
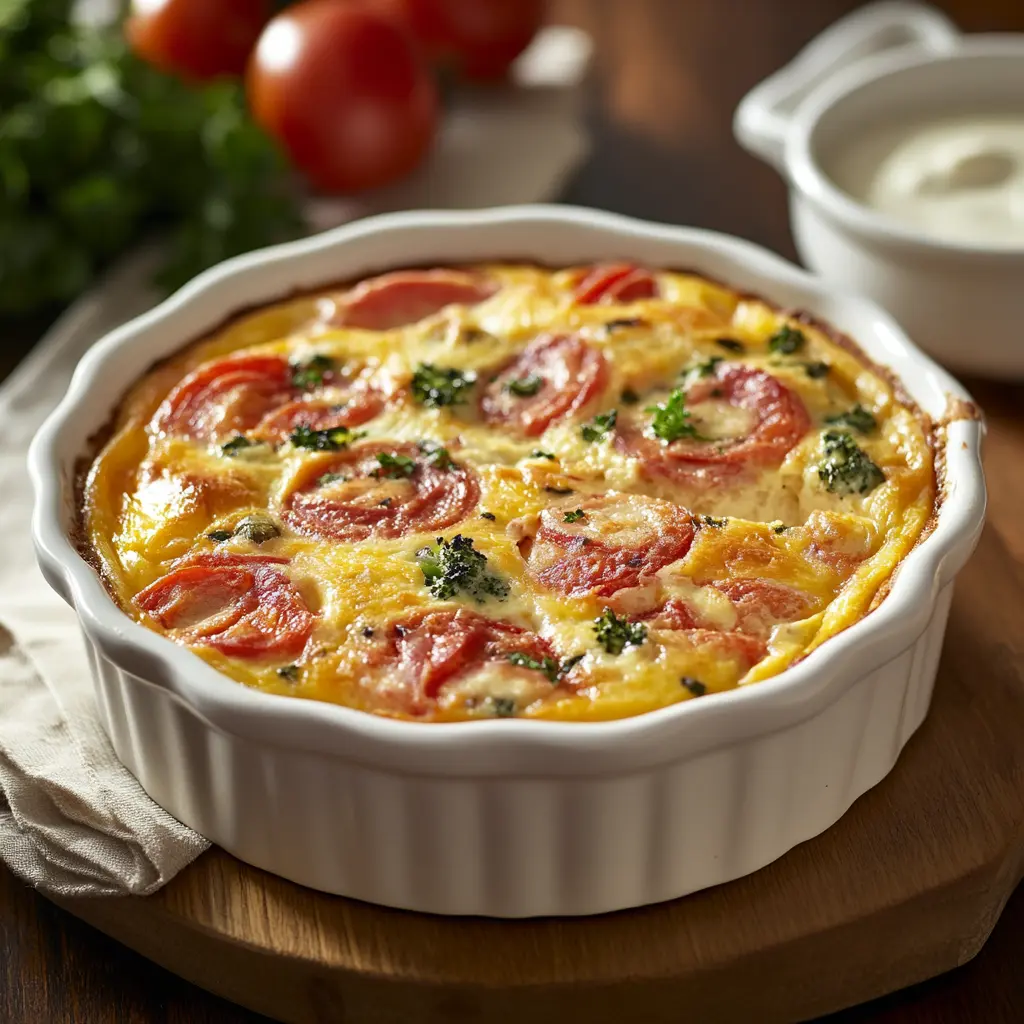
Making Bisquick Quiche: A Simple and Delicious Guide
If you’re looking for a quick and delicious way to serve up a satisfying meal, a Bisquick quiche is the answer. Whether you’re hosting a brunch or just need a hearty breakfast, this crustless quiche is both easy to prepare and incredibly versatile. The best part? It’s made with Bisquick, so there’s no need to fuss with making a crust from scratch. This guide will walk you through everything you need to know—from the ingredients and equipment to different variations and baking tips. Get ready to enjoy a savory, homemade quiche in no time!
Introduction to Bisquick Quiche
What Is Bisquick Quiche?
When it comes to quick and easy meals, a Bisquick quiche stands out. It’s a simple, yet satisfying dish that combines the richness of eggs and the fluffiness of Bisquick to create a deliciously crustless quiche. Unlike the traditional quiche that often requires a separate crust, Bisquick quiche incorporates the crust right into the batter, making it an effortlessly adaptable meal option. This means less work for you, but just as much flavor.
Simplicity and Versatility
One of the best features of a Bisquick quiche is how easily it can be customized. From vegetarian to meat lovers—you can swap in your favorite fillings like spinach, bacon, cheese, or even mushrooms. It’s perfect for busy mornings, family brunches, or a cozy dinner. And if you’re looking for a make-ahead option, Bisquick quiche has you covered. Simply bake it in advance and store it in the fridge, ready to serve at any time.
Purpose of This Guide
In this article, we’ll provide a step-by-step guide to creating the perfect Bisquick quiche. Whether you’re a seasoned chef or a beginner, we’ll cover everything from selecting the right ingredients to tips for perfecting your quiche. By the end, you’ll be a Bisquick quiche pro, ready to wow your guests and yourself. Let’s dive in!
Understanding Bisquick Quiche
What Is Bisquick Quiche?
A Bisquick quiche is a modern twist on the classic French dish, blending the richness of eggs with the convenience of Bisquick baking mix. Instead of spending time preparing a flaky pie crust, the Bisquick mix does the heavy lifting. It forms a soft, almost custardy base that holds together the fillings of your choice, from creamy cheeses to savory meats and vegetables. The beauty of a Bisquick quiche is in its simplicity and its versatility. With just a few ingredients, you can create a meal that feels elegant but is remarkably easy to prepare.
The batter itself is a simple combination of Bisquick, eggs, milk, and seasonings. However, the fun part comes when you add your fillings—like bacon, ham, spinach, or cheese—into the mix. The batter is poured into a pie dish, and as it bakes, the quiche forms a soft, golden crust on top while the ingredients meld together perfectly.
History and Popularity
While Bisquick quiche didn’t appear in French kitchens, it owes its popularity to a classic American shortcut for traditional dishes. Created during the 1950s when Bisquick became a staple in American households, the recipe gained traction for its convenience and versatility. The quiche soon found a place in the brunch scene, becoming a go-to dish for parties, gatherings, and lazy weekends.
Over time, its popularity grew, and it adapted to different tastes and dietary needs. Today, you’ll find variations of Bisquick quiche everywhere—from simple breakfast versions to gourmet creations filled with seasonal vegetables, sautéed mushrooms, or even spicy chorizo. Its enduring appeal lies in the fact that anyone, regardless of skill level, can whip up a scrumptious quiche in a fraction of the time it would take to make the traditional version.
Ingredients and Equipment
Essential Ingredients
To make a perfect Bisquick quiche, you’ll need a handful of basic ingredients. While the recipe is customizable with your favorite fillings, these essential ingredients are a must:
- Bisquick Mix: This is the star ingredient. Bisquick acts as both the crust and the base for the quiche, making it quick and easy. The baking mix gives the quiche a soft, almost custard-like texture without the hassle of creating a separate crust.
- Eggs: Eggs help bind the quiche together, providing structure and richness to the dish. They give the quiche its signature texture.
- Milk: Milk adds moisture to the quiche, making it creamy and tender. You can substitute with cream or a dairy-free option if preferred.
- Fillings: This is where you can get creative. You can choose from a variety of ingredients like cheese, bacon, spinach, onions, bell peppers, or even mushrooms. The sky’s the limit when it comes to fillings, so pick what you love!
- Seasonings: Don’t forget to season the quiche! A pinch of salt, black pepper, and your favorite herbs (like thyme or oregano) will elevate the flavors. If you want a bit of a kick, consider adding a dash of hot sauce or red pepper flakes.
Necessary Equipment
You don’t need any special gadgets to make Bisquick quiche, but having the right tools can make the process smoother:
- Mixing Bowls: A medium-sized bowl will do for combining your wet ingredients (eggs, milk), and a larger bowl is helpful when mixing everything together.
- Whisk: A whisk is essential for blending the eggs and milk. It helps ensure everything is thoroughly mixed and free from lumps.
- Pie Dish: You’ll need a 9-inch pie dish to pour the quiche mixture into. The shallow sides help the quiche bake evenly. You can also use a quiche dish or a casserole dish if you don’t have a pie dish on hand.
- Oven: Of course, you’ll need an oven to bake your quiche. Be sure to preheat it to the correct temperature before starting to assemble the dish.
Once you have your ingredients and equipment ready, you’ll be on your way to making a delicious Bisquick quiche. With just a few simple steps, you’ll have a dish that is both filling and full of flavor!
Preparing the Bisquick Quiche
Mixing the Batter
Making Bisquick quiche is as easy as mixing a few ingredients together. Start by cracking the eggs into a medium-sized mixing bowl. You’ll need about four large eggs to give your quiche that rich, custardy texture. Whisk the eggs until they’re well beaten and smooth, incorporating a bit of air into them to give your quiche a light consistency.
Next, add the milk to the eggs. You can use whole milk for a creamy quiche, or feel free to substitute with a dairy-freealternative like almond milk or coconut milk if you have dietary preferences. Continue whisking until the mixture is well combined. This will form the base of your quiche, which is simple yet flavorful.
Now it’s time to add the Bisquick mix. Measure out the required amount of Bisquick, usually around 1 cup, and add it to the egg and milk mixture. Whisk again until the batter is smooth and free of lumps. The Bisquick will thicken the batter, and as it bakes, it will form a soft, golden “crust.” This is the magic of the Bisquick quiche—it takes away the need for a traditional crust, while still giving you that comforting, baked texture.
Adding Fillings
The next step is where you can really get creative. Bisquick quiche is incredibly versatile when it comes to fillings. You can add almost anything you like, so don’t be afraid to experiment!
Start by choosing your base flavor. A classic choice is to include cheese—cheddar, Swiss, feta, or mozzarella all work beautifully. If you’re a fan of bacon, sauté some crispy bacon bits and toss them into the mixture. Ham, sausage, or even turkey also make great savory options.
For a healthier, lighter version, load up on vegetables. Spinach, mushrooms, onions, peppers, and zucchini are all delicious fillings that will add flavor and nutrition. You can either sauté them to soften them up before adding them to the quiche or add them raw if you prefer a bit more texture.
Herbs and spices are key to enhancing the flavor of your fillings. Try adding garlic powder, onion powder, thyme, oregano, or a pinch of nutmeg for extra depth.
Once you’ve chosen and prepared your fillings, simply fold them into the batter. Be sure to distribute them evenly so every bite of quiche has a good mix of eggs, cheese, and fillings. Don’t be afraid to pack the dish with ingredients—Bisquick is forgiving and will rise around your toppings, creating a fluffy, full quiche.
Pouring Into the Pie Dish
Once your filling is ready, it’s time to pour the mixture into your pie dish. Make sure your pie dish is lightly greased or sprayed with cooking spray to prevent the quiche from sticking. Pour the batter into the dish, using a spatula to gently smooth it out. You want to make sure the ingredients are evenly spread across the bottom so that every slice is just as delicious as the last.
If you’re adding cheese on top for a golden, bubbly finish, you can sprinkle it over the quiche before baking. This will create a beautiful, melted cheese topping that adds even more flavor to the dish.
With everything ready, you’re just one step away from baking the quiche to perfection!
Baking the Quiche
Preheating the Oven
Before you even start assembling your Bisquick quiche, it’s essential to preheat your oven. This ensures that the quiche bakes evenly from the moment it goes in. Set your oven to 375°F (190°C), which is the optimal temperature for achieving a golden, cooked-through quiche.
Preheating is important because it helps the quiche rise properly, ensuring that the Bisquick mix does its magic and forms a light, fluffy texture. While your oven is heating up, take this time to make sure you have everything else ready to go—like the quiche ingredients in the pie dish, your oven mitts, and your timer!
Baking Time and Techniques
Once the oven has reached the desired temperature, carefully place the pie dish with the quiche mixture inside. The baking time for Bisquick quiche typically ranges from 35 to 45 minutes, depending on your oven and the specific ingredients used.
To check if your quiche is done, insert a knife or toothpick into the center. If it comes out clean, the quiche is ready. Another sign to look for is the golden brown top, with the edges slightly pulling away from the sides of the dish. You should also notice a slight puffing of the quiche as it bakes, which is a sign that it’s cooked properly.
Baking times may vary slightly, especially if you’re using a deeper or smaller dish. If your quiche starts to get too brown on top before it’s fully baked, you can loosely cover it with aluminum foil to prevent burning while the center continues to cook.
For a more uniform bake, you can also rotate the quiche halfway through the baking time, ensuring that it bakes evenly on all sides. This is particularly useful if your oven has hot spots that tend to cook certain areas faster than others.
Cooling and Setting
Once your quiche is done baking, it’s crucial to allow it to cool for a bit before serving. Letting the quiche rest for 10-15 minutes will help it set and firm up, making it easier to slice. If you try to cut into it too soon, it might fall apart, as the filling needs a moment to stabilize.
As the quiche cools, you’ll notice it may deflate slightly. This is totally normal! It’s the quiche’s way of settling after being exposed to the heat. Don’t worry, it’ll still be fluffy and delicious!
While your quiche cools, you can start preparing any side dishes or accompaniments you plan to serve with it. A light salad or some fresh fruit would pair perfectly with the savory quiche.
Once cooled, you can slice your Bisquick quiche into wedges. The texture should be soft yet firm enough to hold its shape, with the fillings beautifully integrated throughout.
Serving Suggestions
Accompaniments
A Bisquick quiche is a versatile dish that pairs wonderfully with a variety of sides. Whether you’re serving it for breakfast, brunch, or dinner, you’ll want to balance the savory richness of the quiche with something light and refreshing.
A classic choice is a mixed greens salad. A simple combination of arugula, spinach, and baby kale, dressed with a lemon vinaigrette, offers a crisp contrast to the creamy texture of the quiche. Add a sprinkle of nuts like walnuts or almonds for a bit of crunch!
For a more hearty side, consider serving your quiche with roasted potatoes or a crispy hash brown casserole. These side dishes add a satisfying, starchy element to the meal and complement the savory flavors of the quiche perfectly.
If you’re enjoying your Bisquick quiche for breakfast, you might opt for a side of fresh fruit like berries, sliced oranges, or a fruit salad. The sweetness of the fruit pairs well with the savory filling and adds a pop of color to your plate.
Another great pairing for a Bisquick quiche is a light soup, like a creamy tomato basil or a refreshing cucumber soup. The soup can balance the meal, making it even more comforting, especially during the colder months.
Presentation Tips
Presentation plays a big role in making your Bisquick quiche look as appealing as it tastes. Start by slicing your quiche into neat wedges to show off the beautiful fillings inside. Arrange the slices on a plate or serving dish with a colorful garnish to add a touch of elegance.
You can garnish your quiche with fresh herbs, such as parsley, chives, or basil, which not only enhance the flavor but also add a pop of green. For a more decadent look, sprinkle a bit of grated cheese on top, like Parmesan, just before serving. This extra touch can make your quiche look extra indulgent.
If you’re serving it for brunch or a special occasion, consider using a decorative platter or serving dish that adds a festive touch. A beautiful table setting, complete with elegant plates and cutlery, can elevate the whole experience.
For a more casual presentation, simply pair your quiche slices with a side salad or a basket of crusty bread. This casual but satisfying setup allows your Bisquick quiche to take center stage, and the side dishes complement the quiche without overwhelming the plate.
Variations and Customizations
Flavor Combinations
One of the best things about Bisquick quiche is its versatility. You can easily customize the recipe with a variety of fillings to suit your tastes, dietary preferences, or the ingredients you have on hand.
For a classic touch, bacon and cheese are always a winning combination. You can use sharp cheddar, Swiss, or even mozzarella to create a rich, savory quiche. Add crispy bacon or ham for extra flavor—this combination never fails to please!
If you’re craving something more veggie-forward, spinach and mushrooms make a great pairing. The earthy mushrooms and fresh spinach balance each other beautifully, creating a light yet satisfying quiche. You could also throw in some diced tomatoes, bell peppers, or zucchini for a colorful veggie medley that’s as tasty as it is eye-catching.
For those who love a bit of spice, consider adding chopped jalapeños, chili flakes, or a handful of hot peppers. These ingredients bring a zesty kick to your quiche, perfect for those who like a little heat in their meals.
Dietary Modifications
You can easily adjust your Bisquick quiche to accommodate various dietary needs. For a vegetarian quiche, simply skip the meat and focus on hearty vegetables like broccoli, spinach, and tomatoes. You can even add a handful of tofu for extra protein and texture.
Looking for a gluten-free option? Use a gluten-free Bisquick mix to make the quiche base. Ensure that all other ingredients, including cheese and fillings, are gluten-free to maintain this modification.
If you’re aiming for a lighter version, consider using low-fat milk and reduced-fat cheese to reduce the overall calorie count without sacrificing flavor. For those on a low-carb diet, you can skip the Bisquick altogether and opt for a crustless quiche with a mixture of eggs, cream, and fillings.
With these simple swaps and creative combinations, you can personalize your Bisquick quiche to suit any taste or dietary requirement.
Frequently Asked Questions (FAQs)
Can I make Bisquick quiche ahead of time?
Absolutely! Bisquick quiche is great for make-ahead meals. You can prepare the quiche up to 24 hours in advance, cover it, and store it in the refrigerator. When you’re ready to bake, simply preheat your oven and bake according to the instructions. You might need to add a few extra minutes to the baking time if the quiche is cold from the fridge.
How do I store leftover quiche?
Leftover Bisquick quiche can be stored in an airtight container in the fridge for up to 3 days. To reheat, simply microwave individual slices or warm the whole quiche in the oven at 350°F (175°C) until heated through.
Can I freeze Bisquick quiche?
Yes, Bisquick quiche freezes well. To freeze, allow the quiche to cool completely, then wrap it tightly in plastic wrap or aluminum foil. Place it in a freezer-safe container or bag, and freeze for up to 2 months. To reheat, thaw it overnight in the fridge, then bake at 350°F (175°C) until hot.
What are some vegetarian filling options?
Vegetarian fillings like spinach, mushrooms, onions, bell peppers, and zucchini are excellent choices. You can also add cheese like feta or goat cheese for added flavor.
How can I prevent my quiche from being soggy?
To avoid a soggy quiche, ensure that your fillings are well-drained. If you’re using vegetables, sauté them first to remove excess moisture before adding them to the quiche mixture.