The Ultimate Cheese, Tomato, and Pesto Toastie Guide
Craving a crispy, melty, flavor-packed sandwich? Look no further than the cheese, tomato, and pesto toastie—a heavenly combo that’s equal parts comfort food and gourmet delight. Whether you’re a toastie newbie or a grilled cheese connoisseur, this guide will walk you through everything you need to craft the perfect version.
From selecting the best ingredients to mastering cooking techniques, we’ll cover all the secrets to achieving that golden crunch and gooey melt. Plus, we’ve got clever twists, serving ideas, and answers to burning FAQs. So, grab your spatula—it’s toastie time!
Introduction
Why This Toastie Combo is a Classic
Ah, the humble toastie—simple, yet utterly irresistible. While classic grilled cheese is a timeless favorite, adding tomato and pesto takes it to a whole new level. But why does this trio work so well?
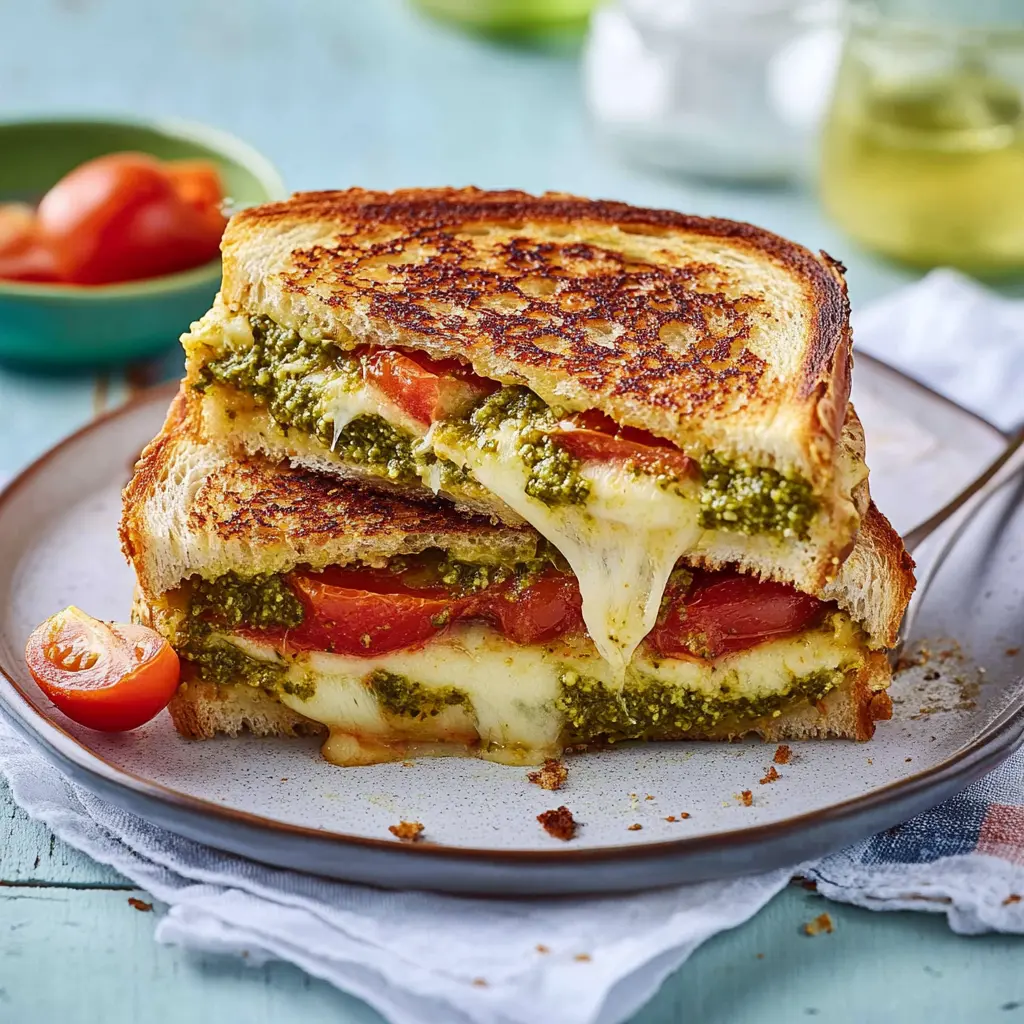
First off, let’s talk texture. The creamy, melty cheese contrasts beautifully with the juicy bite of tomato, while pesto brings a herby, garlicky punch. Together, they create a harmony of flavors that’s bright, rich, and satisfying.
Interestingly, this combo isn’t just a modern café trend. In Italy, panini with pesto and mozzarella have been a staple for ages. Meanwhile, the British toastie culture embraced it as a quick, hearty meal. And let’s not forget the American twist—adding a smear of mayo for extra crispiness.
What Makes a Perfect Toastie?
A flawless toastie isn’t just about slapping ingredients between bread. Oh no! It’s a delicate balance of:
- Bread – Sturdy enough to hold up, yet soft inside.
- Cheese – Meltability is key (we’ll dive into the best picks later).
- Tomatoes – Fresh or sun-dried? Depends on your vibe.
- Pesto – Homemade or store-bought? Both work, but quality matters.
- Technique – Butter vs. oil, low vs. high heat—small tweaks make big differences.
Bottom line? A great toastie is crispy outside, molten inside, and packed with layers of flavor. Ready to make yours legendary? Let’s get into the nitty-gritty.
Ingredients Breakdown
Choosing the Best Ingredients for Your Toastie
Let’s be real—the magic of a great toastie starts with top-notch ingredients. You could throw any old cheese and tomatoes between bread, but if you want a next-level sandwich, every component matters. Here’s how to pick the crème de la crème for your cheese, tomato, and pesto toastie.
The Best Cheese for a Pesto Toastie
Ah, cheese—the star of the show. But not all cheeses melt the same, and picking the wrong one could leave you with a rubbery mess instead of that dreamy, stretchy pull.
- Mozzarella – The classic choice for its mild flavor and superb meltability. Perfect if you want that Instagram-worthy cheese pull.
- Cheddar – Adds a sharp, tangy kick and still melts well, especially when mixed with mozzarella.
- Gruyère – A gourmet upgrade with a nutty depth that pairs beautifully with pesto.
- Vegan cheeses – Look for cashew-based or coconut oil-based varieties that actually melt (check the label!).
Pro tip: Mix cheeses! Combining mozzarella (for melt) and sharp cheddar (for flavor) gives you the best of both worlds.
Selecting the Perfect Tomatoes
Tomatoes bring freshness and acidity to balance the richness of cheese and pesto—but not all tomatoes are created equal.
- Fresh tomatoes – Juicy and bright, but can make your toastie soggy if not prepped right. Slice them thin and pat them dry with a paper towel.
- Sun-dried tomatoes – Intensely sweet and tangy, with zero sogginess risk. Great for a more concentrated flavor.
- Cherry tomatoes – Sweet and firm, perfect if you want little bursts of freshness in every bite.
Fun fact: If you’re using fresh tomatoes, lightly salt them first to draw out excess moisture. Game-changer!
Pesto Varieties & Homemade Options
Pesto is where things get exciting. Whether you go store-bought or homemade, the right pesto can elevate your toastie from good to “Oh my god, what is this sorcery?”
- Classic basil pesto – Herby, garlicky, and slightly nutty—the gold standard.
- Spinach pesto – A milder, slightly sweeter alternative if basil is too strong.
- Sun-dried tomato pesto – Bold, rich, and slightly smoky—pairs amazingly with mozzarella.
- Vegan pesto – Many store-bought versions skip the cheese (or use nutritional yeast).
Got 5 minutes? Make your own pesto! Blend fresh basil, garlic, pine nuts, Parmesan, olive oil, and a pinch of salt. Boom—restaurant-quality pesto at home.
Bread Selection for the Crispiest Toastie
*Bread is the foundation—pick wrong, and your toastie could be a soggy disaster or, worse, fall apart mid-bite.
- Sourdough – The ultimate choice—sturdy, slightly tangy, and gets incredibly crispy.
- Ciabatta – Airy inside, crunchy outside—great for a rustic feel.
- Whole grain – Nutty and hearty, but make sure it’s fresh (stale whole grain = cardboard city).
- Gluten-free – Look for dense, sturdy GF bread (avoid the super-fluffy kinds—they crumble).
Golden rule: Slightly stale bread actually works better than fresh—it toasts up crispier without getting mushy.
Step-by-Step Recipe
How to Make the Perfect Cheese, Tomato, and Pesto Toastie
Alright, let’s get down to business! Now that you’ve got your premium ingredients, it’s time to transform them into melty, crispy perfection. Whether you’re a stovetop traditionalist or a gadget lover (hello, air fryer fans!), we’ve got you covered with foolproof methods for toastie success.
Classic Stovetop Method
This is where the magic began – just a pan, some butter, and a whole lot of patience. Here’s how to nail it:
- Prep your sandwich
- Spread pesto on both slices of bread (trust us, double pesto = double deliciousness)
- Layer cheese, then tomatoes, then more cheese (this creates a protective melt barrier against sogginess)
- Butter it right
- Softened butter is your friend – spread it thinly on the outer sides of the bread
- Pro alternative: Use mayonnaise instead for an extra-crispy golden crust
- Low and slow wins the race
- Medium-low heat is key – too hot and you’ll burn the bread before the cheese melts
- Cover with a lid for the first 2 minutes to help the cheese melt evenly
- The perfect flip
- Wait until golden brown (about 3-4 minutes per side)
- Use a wide spatula and flip with confidence (no half-hearted attempts!)
Chef’s secret: Press down gently with the spatula after flipping to ensure even contact with the pan.
Using a Sandwich Press or Panini Maker
*For those who love those professional grill marks and even cooking:
- Preheat is crucial
- Let your press heat up fully – about 5 minutes on medium setting
- No preheat? You’ll get soggy bread instead of that satisfying crunch
- Assembly matters
- Layer ingredients evenly to prevent sliding
- Lightly butter the outside of the bread (the press will do the rest)
- Timing is everything
- 3-5 minutes total, depending on your machine
- No peeking for at least 2 minutes to let the magic happen
Bonus tip: For extra crispness, spritz the outside with a little olive oil before pressing.
Air Fryer & Oven-Baked Variations
*Yes, you can get perfect toasties without a pan! Here’s how:
Air Fryer Method:
- Preheat to 375°F (190°C) for 3 minutes
- Assemble sandwich and lightly spray the outside with oil
- Cook for 6-8 minutes, flipping halfway
- Watch closely – air fryers vary wildly in temperature
Oven Method (Great for batches!):
- Preheat to 425°F (220°C)
- Place sandwiches on a wire rack over a baking sheet
- Bake for 10-12 minutes, flipping once
- Broil for the last 30 seconds for extra crispness
Game-changer: For oven baking, pre-toast your bread slightly to prevent sogginess.
Pro Tips for the Best Melt & Crunch
- Cheese distribution
- Grate your cheese instead of slicing – it melts faster and more evenly
- Put some cheese directly against the bread – it acts as a “glue” to prevent sliding
- Moisture control
- Pat tomatoes dry with paper towels
- If using fresh tomatoes, salt them first and let sit for 10 minutes to draw out excess liquid
- The perfect crisp
- Let your cooked toastie rest for 1-2 minutes before cutting – this prevents cheese lava eruptions
- For extra crunch, add a thin layer of Parmesan to the outside of the bread before cooking
Final wisdom: Always cut diagonally – it just tastes better (science says so!).
Variations & Upgrades
Delicious Twists on the Classic Pesto Toastie
Who says you have to play by the rules? While the classic cheese, tomato, and pesto toastie is already a winner, sometimes you want to shake things up. Here are some mouthwatering variations that’ll take your toastie game from great to “when are you opening your café?”
Adding Protein (Chicken, Bacon, Ham)
Let’s beef things up—literally! These meaty additions turn your toastie into a full meal deal:
- Grilled Chicken
- Leftover rotisserie chicken? Shred it and mix with pesto before assembling
- Pro move: Marinate chicken in pesto before cooking for double the flavor
- Crispy Bacon
- Cook until just shy of crispy (it’ll finish in the toastie)
- Next level: Brush bacon with maple syrup for sweet-salty perfection
- Italian Ham
- Thin slices of prosciutto or capicola add fancy deli vibes
- Cheat code: Layer ham between cheese slices to prevent it from drying out
Meat lover’s bonus: Try pepperoni slices for a pizza toastie vibe!
Vegetarian & Vegan Modifications
Plant-powered doesn’t mean flavor-free! These swaps keep things 100% delicious:
For Vegetarians:
- Roasted veggies: Zucchini, eggplant, or bell peppers add smoky depth
- Caramelized onions: Cook low and slow for sweet umami bombs
- Artichoke hearts: The secret weapon for gourmet flavor
Vegan Magic:
- Cheese alternatives: Look for cultured nut cheeses that actually melt
- Pesto hack: Swap Parmesan for nutritional yeast in homemade versions
- Tomato twist: Use oven-dried tomatoes for intense flavor without dairy
Surprise star: Mashed white beans add creaminess and protein in vegan versions!
Gourmet Upgrades (Truffle Oil, Balsamic Glaze)
Date night? Impressing guests? These elevated touches make your toastie restaurant-worthy:
- Truffle Territory
- Drizzle truffle oil on the inside before grilling
- Or mix truffle zest into your pesto
- Balsamic Brilliance
- Reduction drizzle post-cooking adds sweet acidity
- Or use balsamic-soaked tomatoes as your fruit layer
- Cheese Board Inspo
- Add fig jam for sweet contrast
- Sprinkle with toasted walnuts for crunch
- Finish with flaky sea salt and fresh basil
Game-changer combo: Pesto + fresh mozz + sun-dried tomatoes + balsamic glaze = pure bliss
Serving Suggestions & Pairings
What to Serve with Your Toastie
Let’s be honest – even the most perfect toastie deserves some fabulous company! Whether you’re going for a light lunch or hearty dinner vibe, these pairings will make your cheese, tomato, and pesto toastie shine even brighter. Here’s how to build the ultimate toastie experience.
Best Side Dishes (Salads, Soups, Chips)
- Crispy Greens
- Simple arugula salad with lemon vinaigrette cuts through the richness
- Caprese salad doubles down on the tomato-cheese theme beautifully
- Kale Caesar brings satisfying crunch
- Soul-Warming Soups
- Tomato basil soup – the classic grilled cheese partner
- Roasted red pepper soup complements the pesto perfectly
- Minestrone for when you want something heartier
- Crunchy Companions
- Homemade potato chips dusted with Parmesan
- Sweet potato fries with garlic aioli
- Zucchini chips for a lighter option
Pro tip: For next-level presentation, cut toasties into triangles and serve with sides in small bowls – instant café vibes!
Drink Pairings
- Cold Refreshments
- Sparkling lemonade with mint – the effervescence cleanses the palate
- Iced hibiscus tea offers tart contrast to rich cheese
- Cucumber-melon agua fresca for ultimate refreshment
- Warm Comforts
- Roasted barley tea has nutty notes that complement pesto
- Spiced chai latte makes it feel extra cozy
- Herbal mint tea aids digestion after a rich meal
Fun idea: Create a DIY beverage station with different drink options when serving guests!

FAQs
Frequently Asked Questions
We’ve all been there – standing over a sizzling pan, wondering if we’re doing this toastie thing right. Here are answers to the most common questions about making the perfect cheese, tomato, and pesto toastie.
Can I Make a Pesto Toastie Ahead of Time?
Short answer: Yes, but with smart prep!
- Uncooked: Assemble sandwiches (minus pesto) and wrap tightly in parchment paper. Refrigerate up to 12 hours – add pesto just before cooking.
- Cooked: Reheat in a dry pan over medium-low for crisp revival (microwaving makes it soggy).
- Freezing: Not recommended – the tomatoes become watery when thawed.
Pro tip: Prep ingredients separately and assemble when ready to cook for best results.
How Do I Prevent My Toastie from Being Soggy?
The eternal struggle! Try these game-changing tricks:
- Tomato prep: Salt slices and let sit on paper towels for 10 minutes
- Cheese barrier: Place cheese directly against both bread slices
- Pesto placement: Spread pesto between cheese layers rather than on bread
- Bread choice: Slightly stale sourdough resists sogginess best
Bonus: Cook at medium-low heat – rushing with high heat = melted outside, cold inside.
What’s the Best Cheese for Melting?
Our meltability ranking:
🥇 Mozzarella (the O.G. melter)
🥈 Fontina (buttery and smooth)
🥉 Young Gouda (mild but reliable)
🏅 American cheese (for ultimate melt – mix with fancier cheeses!)
Surprising fail: Aged cheeses like Parmesan don’t melt well alone (but great for flavor boosts!).
Conclusion
The Last Slice – Final Thoughts on Perfect Toasties
Well, there you have it – everything you need to create toastie magic! From selecting the perfect cheeseto mastering crispy-golden techniques, you’re now armed with all the secrets to make the ultimate cheese, tomato, and pesto toastie.
Remember: Great toasties are about balance – that perfect harmony of gooey cheese, bright tomatoes, and herby pesto sandwiched between crispy, buttery bread. Don’t be afraid to experiment with different cheeses, breads, or add-ins. Some of the best flavor combinations come from happy accidents in the kitchen!
Our final pro tips:
- Always grate your cheese for even melting
- Pat those tomatoes dry like your toastie depends on it (because it does!)
- Low and slow cooking wins the race
- Most importantly – let it rest 2 minutes before cutting to avoid cheese lava burns
Now it’s your turn! Grab your ingredients and start creating. Whether it’s a quick lunch or comforting dinner, your perfect toastie awaits. And who knows? You might just invent the next great toastie combination!
Happy toasting! 🧀🍅🔥