
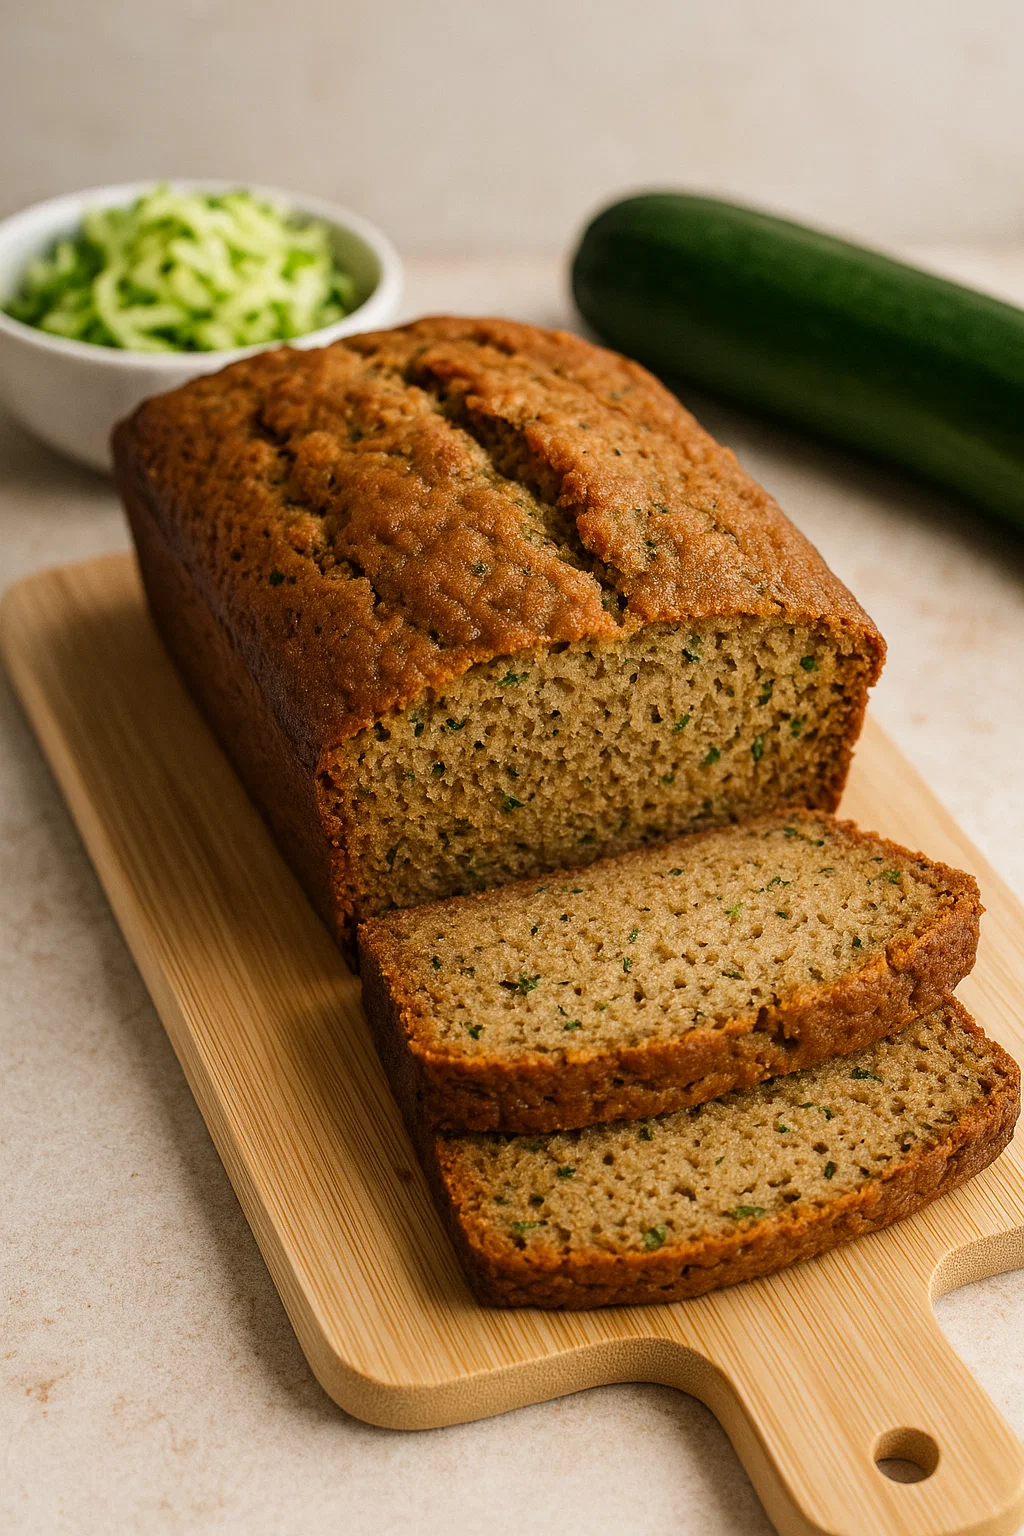
The Ultimate Guide to Zucchini Bread: Recipes, Tips & History
Ah, zucchini bread. Is there any aroma more warmly inviting than a loaf, spiced with cinnamon and nutmeg, wafting from the oven? This humble quick bread is a masterpiece of resourcefulness, a delicious paradox that transforms a bland summer squash into a shockingly moist and flavorful treat. Frankly, it’s a baking rite of passage. Consequently, this guide is designed to be your definitive resource, unraveling everything from its surprising history to the foolproof science behind achieving that perfect, non-soggy crumb. Therefore, whether you’re drowning in a garden bounty or simply craving a slice of comfort, you’re in the right place.
Why Zucchini Bread is America’s Favorite Quick Bread
Well, let’s be honest; its popularity isn’t exactly a mystery. Firstly, it’s incredibly forgiving. Unlike a finicky soufflé or a temperamental yeast dough, zucchini bread welcomes improvisation. Secondly, it solves a problem. Specifically, for generations of gardeners, this recipe has been the delicious answer to the annual August question: “What on earth do I do with all this zucchini?!” Ultimately, it’s more than just a recipe; it’s a symbol of comfort, ingenuity, and sweet, spiced nostalgia. Suddenly, that overflowing vegetable patch doesn’t seem so intimidating, does it?
What Exactly is Zucchini Bread?
At its core, zucchini bread is a type of moist quick bread. “Quick bread” simply means it relies on chemical leaveners like baking soda or baking powder for its rise, rather than a lengthy fermentation process with yeast. Think of it as a cousin to banana bread or pumpkin bread. Grated zucchini is the star, of course, performing a magical trick. While it vanishes almost completely into the batter, it leaves behind an unparalleled tenderness and healthy moisture. Typically, it’s warmly spiced, often studded with nuts or chocolate chips, and boasts a wonderfully dense yet soft crumb. It’s the ultimate easybake.
A Brief and Delicious History
Surprisingly, this all-American classic has immigrant roots. Zucchini itself, a type of summer squash, was originally brought to North America by Italian immigrants in the early 20th century. However, the recipe as we know it truly blossomed after World War II. With the rise of victory gardens and suburban home gardening, zucchini’s notoriously prolific nature became both a blessing and a curse. Naturally, resourceful home cooks needed creative ways to use up the surplus.
Consequently, zucchini bread recipes began circulating through community cookbooks and women’s magazines, becoming a staple of home baking. It was the perfect treat: it felt wholesome enough for a breakfast or snack yet sweet enough for dessert. This clever recipe ensured that not a single squash went to waste, cementing its place in the pantheon of beloved comfort foods. It’s a history baked right into every single slice.
The Definitive Classic Zucchini Bread Recipe
Alright, let’s get down to the good stuff! This classic zucchini bread recipe is your foolproof foundation. It’s the one you’ll memorize, the one you’ll tweak, and the one that will make your kitchen smell absolutely heavenly. Believe me, this isn’t just another recipe; it’s the recipe. So, preheat your oven to 350°F (175°C) and let’s gather our ingredients.
Gathering Your Ingredients: A Detailed Look
Great baking, as it happens, starts with understanding your components. Each ingredient here plays a specific role in creating that perfect, moist loaf we’re after.
The Star: Choosing and Prepping Your Zucchini
First and foremost, let’s talk about the headliner: the zucchini. You’ll need about 2 cups of grated zucchini, which typically comes from 2-3 medium-sized squashes. Why medium? Well, smaller zucchinis can be a bit bitter, while the gigantic ones are often overly watery and seedy. Honestly, the seeds are perfectly edible, but if your zucchini is a real monster, you might want to split it lengthwise and scrape the seedy core out with a spoon.
Now, for the million-dollar question: to peel or not to peel? Actually, the peel adds lovely green flecks of color and extra nutrients, so I never bother. However, if you’re trying to sneak veggies past a picky eater, peeling it is a cunning little trick.
Finally, the most critical step: draining. Zucchini is about 95% water, and if you don’t deal with that, you’ll end up with a soggy mess. After grating, place the shreds in a clean kitchen towel or several layers of paper towels. Then, wring it out over the sink with all your might! You’ll be stunned by how much liquid comes out. This one step is the absolute secret to a perfectly textured loaf.
The Dry Team: Flour, Leaveners, and Spices
Next up, the supporting cast that provides structure and warmth.
-
All-purpose flour: The reliable backbone of our bread. For a healthier twist, you can substitute up to half with whole wheat flour, though the texture will be slightly denser.
-
Leaveners: We’re using both baking soda and baking powder for a guaranteed good rise. They’re not interchangeable, so use both!
-
Salt: Crucial for balancing all that sweetness and enhancing the overall flavor.
-
The Spices: Ground cinnamon is non-negotiable. Seriously, it’s the soul of this bread. Nutmeg is its perfect partner, adding a deep, warm complexity. Feel free to experiment with a tiny pinch of cloves or ginger for an extra kick.
The Wet Team: Oil, Eggs, and Sweeteners
This is where the magic of moisture happens.
-
Neutral oil: Vegetable, canola, or avocado oil works best. Unlike butter, oil keeps the crumb incredibly moist and tender for days. It’s a game-changer for texture.
-
Eggs: They bind everything together and add richness.
-
Sweeteners: Most recipes use a combination of white and brown sugar. The white sugar sweetens, while the brown sugar, with its molasses content, adds moisture and a subtle caramel note. For a deeper flavor, you can use all brown sugar.
-
Vanilla extract: The flavor enhancer that makes everything taste, well, more like itself.
-
The Fun Stuff: This is your chance to get creative. A cup of chopped walnuts or pecans adds a wonderful crunch. Similarly, a cup of chocolate chips is a classic, family-pleasing move. Why not add both?
Step-by-Step Instructions for Perfect Bread
Now, let’s walk through the process. It’s simple, but a few key techniques make all the difference.
Step 1: Prepare the Zucchini and Pan
First, grate your zucchini using the large holes of a box grater. Then, and this is vital, drain it thoroughly! Meanwhile, grease a 9×5 inch loaf pan with butter or oil. For absolute guaranteed release, line it with parchment paper, leaving an overhang on the two long sides. This creates a sling so you can just lift the whole loaf out after baking.
Step 2: Combine Dry and Wet Ingredients Separately
In a large bowl, whisk together all your dry ingredients: the flour, leaveners, salt, and spices. This ensures everything is evenly distributed. In another medium bowl, whisk the eggs, oil, sugars, and vanilla until they are well combined and slightly pale. This is your wet ingredients mixture.
Step 3: The Gentle Fold
Here’s where most mistakes happen. Pour the wet ingredients into the dry ingredients. Then, using a spatula, fold them together until they are just combined. Please, walk away from the mixer! Overmixing develops the gluten in the flour, which leads to a tough, gummy, and dense loaf. A few streaks of flour are totally fine. Finally, gently fold in the drained zucchini and your chosen add-ins like chocolate chipsor nuts.
Step 4: Baking to Perfection
Pour the batter into your prepared pan and smooth the top. Pop it into the preheated oven and bake for 50-60 minutes. Now, ovens lie, so don’t just trust the timer. The true test is when a skewer or toothpick inserted into the very center of the loaf comes out with a few moist crumbs attached, but not wet batter. If the top is browning too quickly, you can tent it loosely with aluminum foil for the last 15 minutes.
Once it’s done, let the bread cool in the pan on a wire rack for at least 20 minutes. This allows it to set. Then, carefully remove it from the pan and let it cool completely on the rack. I know it’s torture to wait, but slicing into a warm loaf will cause it to crumble. The flavor is also better the next day!
Beyond the Classic: Delicious Variations to Try
Once you’ve mastered the classic, the real fun begins! The beauty of this easy zucchini bread recipe is its incredible versatility. It’s a blank canvas waiting for your personal touch. So, without a doubt, don’t be afraid to get creative and make it your own. Here are some crowd-pleasing twists to inspire your next bake.
Chocolate Chip Zucchini Bread
This is, without question, the undisputed champion of variations. It’s the one that makes kids (and let’s be honest, adults too) forget they’re eating vegetables. Simply fold a heaping cup of semi-sweet chocolate chips into the batter right before baking. The melted chocolate pockets against the spiced crumb is a match made in heaven. For an extra decadent twist, sprinkle a few more chips on top of the batter before it goes in the oven.
Zucchini Nut Bread
For a fantastic textural contrast, this is the way to go. Toasting a cup of walnuts or pecans beforehand is a non-negotiable pro tip. It deepens their flavor immensely, adding a rich, crunchy element to every single bite. Simply spread the nuts on a baking sheet and toast at 350°F for 5-8 minutes, until fragrant. Let them cool, chop them roughly, and fold them in.
Lemon-Zucchini Bread
If you’re craving something a little brighter and less heavy, this variation is a revelation. It’s incredibly refreshing! To achieve this, add the zest of two large lemons to the wet ingredients. Then, for an optional but highly recommended glaze, whisk together 1 cup of powdered sugar with 2-3 tablespoons of fresh lemon juice until smooth. Drizzle this over the completely cooled loaf for a tangy, sweet finish.
Apple Zucchini Bread
Why choose between two fantastic harvest fruits? This combination is pure autumn comfort. Simply add one cup of finely chopped or grated apple (a firm variety like Granny Smith works well) along with the zucchini. The apple adds another layer of subtle sweetness and moisture. To complement it, a pinch of extra cinnamon or even a dash of apple pie spice blend works wonders.
Pineapple Zucchini Bread
For a truly moist and tropical twist, this one is a hidden gem. The pineapple practically guarantees an exceptionally tender crumb. Drain a 8-ounce can of crushed pineapple very well, pressing out the excess juice. Then, fold this into the batter along with the zucchini. You can even add a half cup of shredded coconut for a full-on tropical vacation in a loaf pan.
Dietary Modifications: Making Zucchini Bread for Everyone
The best thing about zucchini bread is that everyone should get to enjoy it. Fortunately, this recipe adapts beautifully to various dietary needs. Here’s how to make sure no one misses out.
How to Make Healthier Zucchini Bread
Want to feel a little better about that second slice? You can easily make a few smart swaps.
-
Flour: Substitute half of the all-purpose flour with whole wheat flour. This adds fiber and a nutty flavor.
-
Oil: You can replace up to half of the oil with unsweetened applesauce or mashed ripe banana. This cuts fat while maintaining all that crucial moisture.
-
Sugar: Feel free to reduce the total sugar by up to a quarter. The zucchini and add-ins provide plenty of natural sweetness.
Gluten-Free Zucchini Bread
Making this gluten-free is remarkably simple. The key is to use a reliable 1:1 gluten-free baking flour blend (like those from Bob’s Red Mill or King Arthur). These blends already include xanthan gum, which replicates the structure that gluten provides. Otherwise, follow the recipe exactly as written! The result is a tender, delicious loaf that nobody will guess is gluten-free.
Vegan Zucchini Bread
To make a plant-based version, you just need to address the eggs. A “flax egg” is a perfect, binding substitute. Simply mix 1 tablespoon of ground flaxseed with 3 tablespoons of water for each egg needed. Let it sit for 5-10 minutes until it becomes gelatinous. Then, use it exactly as you would a regular egg. Also, double-check that your sugar is vegan (some refined white sugar is processed with bone char) and use dairy-free chocolate chips if you’re adding them.
Dairy-Free Zucchini Bread
Good news! Since our master recipe uses oil instead of butter, it’s naturally dairy-free. The only potential pitfall is the add-ins. Simply ensure that any chocolate chips you use are explicitly labeled dairy-free. Otherwise, you’re good to go. It’s one less thing to worry about.
Expert Tips and Tricks for the Best Loaf Every Time
You’ve got the recipe, but these pro tips are what will elevate your bake from good to legendary. They’re the little secrets that make a world of difference.
First, and I cannot stress this enough, squeeze that zucchini! This is the single most important step for avoiding a soggy loaf. Wringing out the excess water concentrates the zucchini’s flavor and ensures your bread has structure instead of being a wet mess. Secondly, toast your nuts. Throwing raw walnuts into the batter is a missed opportunity. Toasting them in a dry pan or the oven for a few minutes unlocks their oils and gives them a profoundly deeper, richer flavor. Thirdly, don’t trust the clock alone. Oven temperatures can be notoriously inaccurate. Always use the toothpick test: it should come out with a few moist crumbs attached, not clean and not with wet batter. Finally, practice patience. Let the bread cool in the pan for a while, and then cool completely on a wire rack. This allows the structure to set, making it easier to slice and intensifying the flavors. Slicing into a warm loaf is a recipe for crumbly disappointment.
Zucchini Bread Troubleshooting: Solving Common Problems
Even the best bakers have a flop now and then. But usually, it’s due to one of these common, and easily fixable, issues.
Why is my zucchini bread soggy or mushy?
This is, by far, the most common complaint. The culprit is almost always insufficiently drained zucchini. All that extra water has to go somewhere, and it steams inside the loaf, creating a gummy texture. Next time, really put some muscle into wringing it out in that kitchen towel.
Why is my bread dense and gummy?
This texture is typically a direct result of overmixing the batter. Once you add the flour, you’re developing gluten. Mix until the ingredients are just combined, even if there are a few streaks of flour left. Furthermore, make sure your leaveners (baking soda and powder) aren’t expired, as they won’t provide the necessary lift.
Why did it sink in the middle?
A sunken center usually points to one of three issues: the bread was underbaked and its structure wasn’t set, there was too much leavener causing it to rise too rapidly and then collapse, or the oven door was opened too early in the baking process, causing a sudden temperature drop.
Why is it dry and crumbly?
Conversely, if your bread is dry, it was likely overbaked. Ovens can run hot, so start checking for doneness a good 10 minutes before the timer goes off. Additionally, using too much flour (always spoon and level it into your measuring cup, don’t scoop!) or not enough oil or zucchini can also lead to a dry crumb.
Storing, Freezing, and Serving Your Masterpiece
Alright, you’ve baked the perfect loaf. Now, how do you keep it that way?
The Best Way to Store Zucchini Bread
To keep it moist, once completely cool, wrap the loaf tightly in plastic wrap or store it in an airtight container. It will stay fresh at room temperature for 2-3 days. If you need it to last longer, you can refrigerate it for up to a week.
How to Freeze Zucchini Bread
Yes, you can freeze zucchini bread beautifully! It’s the best way to preserve a large harvest. Wrap the completely cooled loaf (or individual slices) tightly in plastic wrap, and then again in aluminum foil or place it in a freezer bag. It will keep for up to 3 months. To thaw, just leave it on the counter still wrapped; the condensation will keep it from drying out.
Serving Suggestions
This bread is fantastic all on its own. However, for a special treat, a smear of soft butter is classic. For a tangy contrast, a layer of cream cheese is absolutely divine. Or, for a healthier option, a dollop of Greek yogurt works wonderfully.
Frequently Asked Questions (FAQs)
Do you peel zucchini before making zucchini bread?
No, it is not necessary. The peel adds nice green flecks of color and contains additional nutrients. However, if you are trying to “hide” the vegetable from skeptical eaters, peeling it is an effective trick.
Can I use frozen zucchini for zucchini bread?
Absolutely, but it requires extra work. When zucchini freezes and thaws, it releases a tremendous amount of water. After thawing, you must drain it and then squeeze it even more aggressively than fresh zucchini to remove all the excess liquid.
Can I make zucchini bread muffins instead?
Of course! This batter makes fantastic muffins. Simply line a muffin tin with papers or grease the cups, fill each about 2/3 full, and bake at the same temperature for 18-22 minutes, or until a toothpick comes out clean.
How long does zucchini bread last?
When stored properly in an airtight container, it lasts 2-3 days at room temperature, about a week in the refrigerator, and up to 3 months in the freezer.
Can I reduce the sugar in this recipe?
You can typically reduce the sugar by up to one-third without majorly affecting the texture. However, sugar contributes to moisture and browning, so the loaf may be slightly drier and paler.
Conclusion: Your New Go-To Recipe
And there you have it—the complete journey of zucchini bread, from its humble origins to your kitchen counter. This isn’t just a recipe; it’s a formula for comfort, a solution for garden gluts, and a testament to the magic of simple, home baking. You’re now armed with the ultimate classic recipe, a toolkit of delicious variations, and the expert knowledge to troubleshoot any issue. You understand the science behind the squeeze and the art of the gentle fold.
So, the next time you see those green squashes at the market or threatening to take over your garden, don’t see a chore. See an opportunity. See a future loaf, warm from the oven, waiting to be shared. Grab your grater, preheat your oven, and fill your home with that unmistakable, spiced aroma. Your new favorite easy baking project, and a surefire crowd-pleaser, is waiting for you. Happy baking