
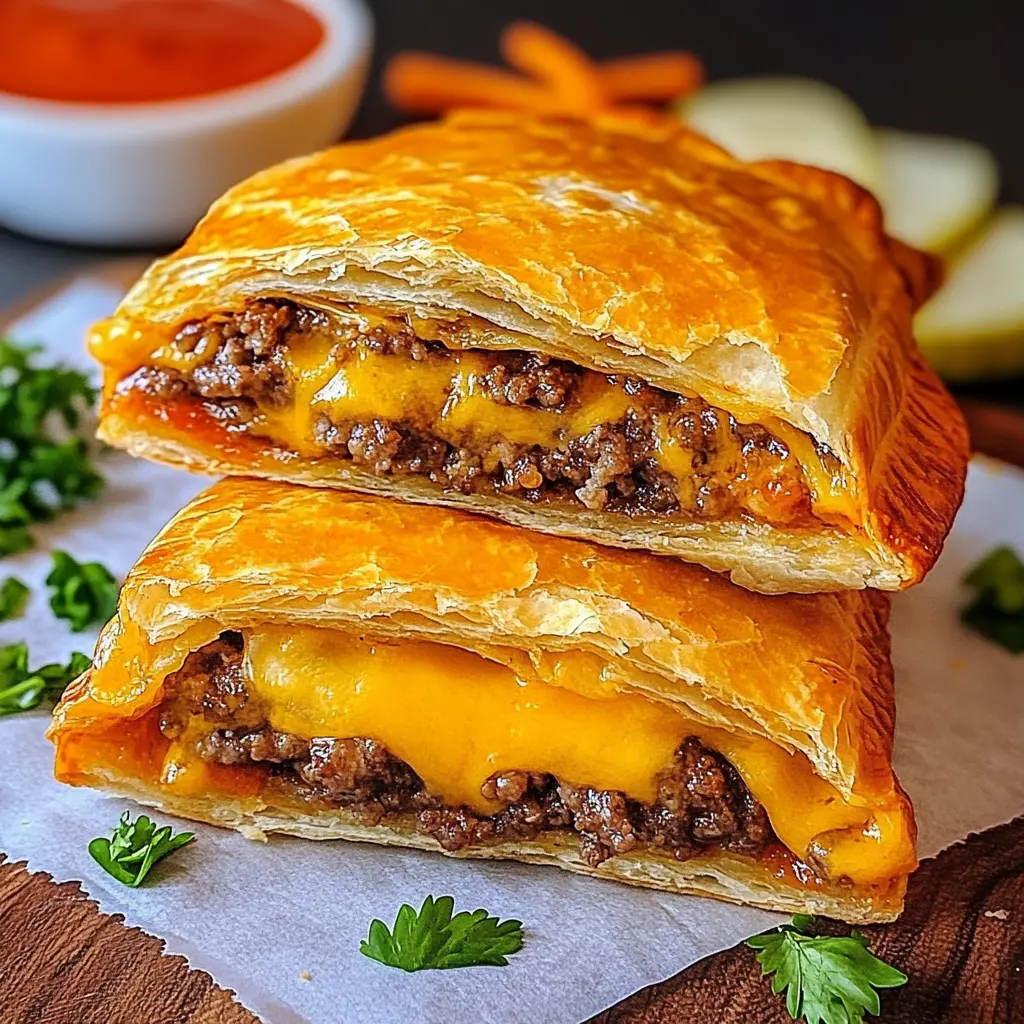
Cheeseburger Pockets: The Ultimate Comfort Food Recipe
Cheeseburger pockets represent the perfect fusion of classic American comfort food and convenient handheld dining. These delightful pastries combine all the beloved flavors of a traditional cheeseburger wrapped in golden, flaky dough. Furthermore, they offer a mess-free way to enjoy your favorite burger flavors without the hassle of assembling multiple components.
Whether you’re planning a family dinner, preparing snacks for a party, or looking for a creative way to use ground beef, cheeseburger pockets deliver satisfaction in every bite. Additionally, they’re incredibly versatile and can be customized to suit various dietary preferences and taste requirements.
What Are Cheeseburger Pockets?
Cheeseburger pockets are essentially handheld pastries filled with seasoned ground beef, melted cheese, and classic burger accompaniments. Similarly to traditional hot pockets, these treats feature a crispy exterior that encases a warm, flavorful filling.
The concept originated from the desire to make cheeseburger flavors more portable and convenient. Moreover, they eliminate the common problem of burger toppings falling out during eating. These pockets maintain all the essential elements of a great cheeseburger while providing a neater dining experience.
Key Components
The success of cheeseburger pockets relies on three fundamental elements:
-
Flaky pastry crust that provides structure and texture
-
Seasoned ground beef filling that captures authentic burger flavor
-
Melted cheese that binds ingredients together
Consequently, each component must be prepared with care to achieve the perfect balance of flavors and textures.
Essential Ingredients
Creating exceptional cheeseburger pockets requires quality ingredients that work harmoniously together. Therefore, selecting the right components ensures optimal flavor and texture in your finished product.
For the Pastry Dough
-
2 cups all-purpose flour
-
1/2 teaspoon salt
-
1/3 cup cold butter, cubed
-
6-8 tablespoons ice water
-
1 egg (for egg wash)
Alternatively, you can use store-bought pie crust or puff pastry for convenience. However, homemade dough often provides superior flavor and texture control.
For the Filling
-
1 pound ground beef (80/20 blend recommended)
-
1 medium onion, finely diced
-
2 cloves garlic, minced
-
1 tablespoon ketchup
-
1 tablespoon yellow mustard
-
1 teaspoon Worcestershire sauce
-
1/2 teaspoon salt
-
1/4 teaspoon black pepper
-
1/4 teaspoon smoked paprika
-
1 1/2 cups shredded cheddar cheese
-
1/2 cup diced pickles (optional)
Additional Seasonings
-
1/2 teaspoon garlic powder
-
1/2 teaspoon onion powder
-
1/4 teaspoon dried oregano
These seasonings enhance the burger-like flavor profile. Furthermore, they help create depth and complexity in the filling.
Step-by-Step Recipe Instructions
Follow these detailed instructions to create perfect cheeseburger pockets every time. Additionally, proper technique ensures consistent results and optimal flavor development.
Preparing the Dough
First, combine flour and salt in a large mixing bowl. Next, cut in cold butter using a pastry cutter or two knives until mixture resembles coarse crumbs. Gradually add ice water, one tablespoon at a time, until dough comes together.
Form the dough into a ball and wrap in plastic wrap. Subsequently, refrigerate for at least 30 minutes to allow gluten to relax and butter to firm up.
Making the Filling
Heat a large skillet over medium-high heat. Add ground beef and cook, breaking it up with a spoon, until browned and cooked through (approximately 6-8 minutes). Drain excess fat if necessary.
Add diced onion to the beef and cook for 3-4 minutes until softened. Then, add minced garlic and cook for another minute until fragrant.
Stir in ketchup, mustard, Worcestershire sauce, and all seasonings. Cook for 2-3 minutes to allow flavors to meld. Remove from heat and let cool slightly before adding cheese and pickles.
Assembly Process
Preheat your oven to 425°F (220°C). Meanwhile, roll out chilled dough on a floured surface to 1/8-inch thickness.
Cut dough into 6-inch squares or circles, depending on your preference. Place approximately 1/3 cup of filling in the center of each piece, leaving a 1-inch border around edges.
Fold dough over filling to create a pocket shape. Press edges firmly together and seal with fork tines to prevent leaking during baking.
Baking Instructions
Place assembled cheeseburger pockets on a parchment-lined baking sheet. Brush tops with beaten egg for a golden finish. Cut small slits in the top of each pocket to allow steam to escape.
Bake for 20-25 minutes until golden brown and crispy. Allow to cool for 5 minutes before serving, as filling will be extremely hot.
Variations and Customizations
Cheeseburger pockets offer endless possibilities for customization. Therefore, you can adapt the recipe to accommodate different tastes and dietary requirements.
Cheese Variations
-
Swiss cheese for a milder flavor profile
-
Pepper jack for added spice and heat
-
American cheese for classic burger authenticity
-
Mozzarella for extra stretch and creaminess
Consequently, different cheeses create unique flavor experiences while maintaining the core concept.
Meat Alternatives
-
Ground turkey for a leaner option
-
Ground chicken for lighter flavor
-
Plant-based meat for vegetarian preferences
-
Ground lamb for gourmet variation
Each alternative requires slight adjustments to seasoning and cooking time. Moreover, some may need additional moisture to prevent drying out.
Additional Fillings
-
Crispy bacon bits for extra richness
-
Sautéed mushrooms for earthy flavor
-
Diced tomatoes for freshness (drain well first)
-
Jalapeño peppers for heat
However, be careful not to overfill pockets, as this can cause them to burst during baking.
Sauce Variations
-
Barbecue sauce instead of ketchup
-
Ranch dressing for tangy flavor
-
Thousand island dressing for classic burger taste
-
Spicy mayo for heat and creaminess
Furthermore, you can serve additional sauces on the side for dipping.
Pro Tips for Perfect Results
Achieving consistently excellent cheeseburger pockets requires attention to detail and proper technique. Additionally, these tips help avoid common pitfalls and ensure success.
Dough Handling Tips
Keep ingredients cold throughout the process. Cold butter creates flaky layers, while warm butter results in tough, dense pastry. Therefore, work quickly and refrigerate dough if it becomes too warm.
Don’t overwork the dough, as this develops gluten and creates toughness. Mix just until ingredients come together, then stop.
Filling Considerations
Allow filling to cool before assembly. Hot filling can melt butter in the dough and create soggy bottoms. Moreover, cooled filling is easier to handle and portion.
Drain excess moisture from vegetables and meat. Wet fillings can make pockets soggy and cause them to leak during baking.
Assembly Secrets
Don’t overfill pockets. Too much filling prevents proper sealing and can cause bursting. Use approximately 1/3 cup of filling per pocket for best results.
Seal edges thoroughly using fork tines or crimping. Additionally, brush sealed edges with egg wash for extra security.
Baking Guidelines
Preheat oven completely before baking. Proper temperature ensures crispy exteriors and prevents soggy bottoms.
Don’t overcrowd baking sheets. Leave space between pockets for air circulation and even browning.
Serving Suggestions
Cheeseburger pockets pair wonderfully with various side dishes and accompaniments. Consequently, thoughtful pairings enhance the overall dining experience.
Classic Sides
-
French fries for traditional burger meal experience
-
Onion rings for added crunch and flavor
-
Coleslaw for cooling contrast
-
Pickle spears for tangy brightness
These sides complement the rich, savory flavors of the pockets while providing textural variety.
Lighter Options
-
Mixed green salad for freshness
-
Roasted vegetables for nutrition
-
Fresh fruit for natural sweetness
-
Vegetable sticks with hummus for crunch
Furthermore, lighter sides help balance the richness of the cheeseburger pockets.
Dipping Sauces
-
Ketchup for classic burger flavor
-
Ranch dressing for creamy richness
-
Honey mustard for sweet and tangy notes
-
Barbecue sauce for smoky depth
Additionally, offer multiple sauce options to accommodate different preferences.
Beverage Pairings
-
Ice-cold soft drinks for traditional pairing
-
Fresh lemonade for citrusy refreshment
-
Iced tea for Southern comfort
-
Fruit smoothies for nutritious option
These beverages complement the savory richness without competing with flavors.
Storage and Reheating
Proper storage extends the life of your cheeseburger pockets while maintaining quality. Therefore, following correct procedures ensures food safety and optimal taste.

Short-Term Storage
Store cooked cheeseburger pockets in the refrigerator for up to 3 days. Wrap individually in plastic wrap or store in airtight containers to prevent drying out.
For best quality, consume within 24 hours of baking. However, properly stored pockets remain safe and tasty for several days.
Freezing Instructions
Freeze unbaked assembled pockets for up to 3 months. Place on baking sheets and freeze until solid, then transfer to freezer bags.
Alternatively, freeze baked pockets for up to 2 months. Wrap individually and store in freezer-safe containers.
Reheating Methods
Oven method: Preheat to 350°F (175°C). Place pockets on baking sheet and heat for 10-15 minutes until warmed through and crispy.
Microwave method: Heat individual pockets for 1-2 minutes, checking frequently to prevent overheating. Note that microwaving may result in softer crust.
Air fryer method: Heat at 350°F (175°C) for 5-7 minutes for crispy results similar to fresh-baked texture.
Nutritional Information
Understanding the nutritional profile of cheeseburger pockets helps with meal planning and dietary considerations. Moreover, this information assists those tracking intake for health goals.
Per Serving (1 pocket)
-
Calories: 420-480 (varies by size)
-
Protein: 22-26 grams
-
Carbohydrates: 35-40 grams
-
Fat: 24-28 grams
-
Sodium: 680-750 milligrams
These values are estimates and can vary based on specific ingredients and portion sizes used.
Nutritional Benefits
Ground beef provides high-quality protein and essential B vitamins. Additionally, cheese contributes calcium and additional protein for bone health.
The pastry crust supplies carbohydrates for energy. However, it also adds saturated fat and sodium to the overall nutritional profile.
Making Healthier Versions
-
Use lean ground turkey or chicken
-
Incorporate whole wheat flour in the dough
-
Add finely chopped vegetables to the filling
-
Reduce cheese quantity slightly
Consequently, these modifications can lower calorie content while maintaining flavor.
Frequently Asked Questions
Can I make cheeseburger pockets ahead of time?
Yes, you can assemble cheeseburger pockets up to 24 hours before baking. Store covered in the refrigerator and add 5-10 minutes to baking time if cooking from cold.
What’s the best way to prevent soggy bottoms?
Ensure your filling is completely cooled before assembly. Additionally, avoid overfilling and make sure your oven is fully preheated before baking.
Can I use store-bought dough?
Absolutely! Refrigerated pie crust, puff pastry, or even pizza dough work well. However, adjust baking times and temperatures according to package directions.
How do I know when cheeseburger pockets are done?
They should be golden brown on top and bottom, with internal temperature reaching 165°F (74°C). Furthermore, the crust should sound hollow when tapped.
Can I make mini versions for parties?
Yes! Cut smaller dough pieces and use less filling (about 1-2 tablespoons per mini pocket). Reduce baking time to 12-15 minutes and watch carefully.
What if my pockets burst during baking?
This usually indicates overfilling or inadequate sealing. Make sure edges are pressed firmly together and consider using less filling next time.
Cheeseburger pockets represent the perfect combination of convenience, flavor, and comfort food satisfaction. These handheld treats capture all the beloved elements of a classic cheeseburger in a portable, mess-free format. Moreover, they offer endless customization possibilities to suit various tastes and dietary preferences.
Whether you’re feeding hungry families, preparing party snacks, or simply craving comfort food with a twist, cheeseburger pockets deliver exceptional results. The recipe’s flexibility allows for creative variations while maintaining the core appeal that makes these treats so satisfying.
Ready to create your own batch of delicious cheeseburger pockets? Gather your ingredients, follow these detailed instructions, and prepare to enjoy one of the most satisfying handheld meals you’ll ever make!

Cheeseburger Pockets
Description
Cheeseburger Pockets
Ingredients
For the Filling:
-
1 pound ground beef
-
1 small onion, finely chopped
-
1 tablespoon olive oil
-
2 tablespoons ketchup
-
1 tablespoon yellow mustard
-
1 tablespoon Worcestershire sauce
-
1 teaspoon garlic powder
-
1/2 teaspoon salt
-
1/4 teaspoon black pepper
For Assembly:
-
1 can (12 oz) refrigerated crescent rolls or buttermilk biscuits
-
1 cup shredded cheddar cheese
-
5 slices American cheese (if using biscuits)
-
1 egg, beaten (for egg wash, optional)
-
1 teaspoon sesame seeds (optional)
Instructions
-
Preheat oven: Preheat oven to 375°F (190°C). Line a baking sheet with parchment paper or lightly grease it.
-
Cook the filling: Heat olive oil in a large skillet over medium heat. Add chopped onion and cook until translucent, about 3-4 minutes. Add ground beef and cook until well browned, breaking it apart with a spatula. Drain excess grease.
-
Season mixture: Stir in ketchup, mustard, Worcestershire sauce, garlic powder, salt, and pepper. Simmer for 2-3 minutes to blend flavors. Remove from heat and let cool slightly.
-
Prepare dough: If using crescent rolls, unroll dough and separate into 8 triangles or press into 4 rectangles. If using biscuits, place 2 overlapping biscuits on a floured surface and roll into 5-inch ovals.
-
Assemble pockets: For crescent rolls, spoon beef mixture onto wide end of each triangle and sprinkle with cheddar cheese. For biscuits, place 1/4 cup meat mixture on one side and fold a cheese slice over it.
-
Seal pockets: Fold dough over filling and press edges with a fork to seal completely. Place seam-side down on prepared baking sheet.
-
Finish and bake: Brush tops with beaten egg and sprinkle with sesame seeds if desired. Prick tops with a fork to prevent puffing. Bake for 12-15 minutes until golden brown.
Makes: 4-8 pockets depending on dough choice
Total time: 30-40 minutes