
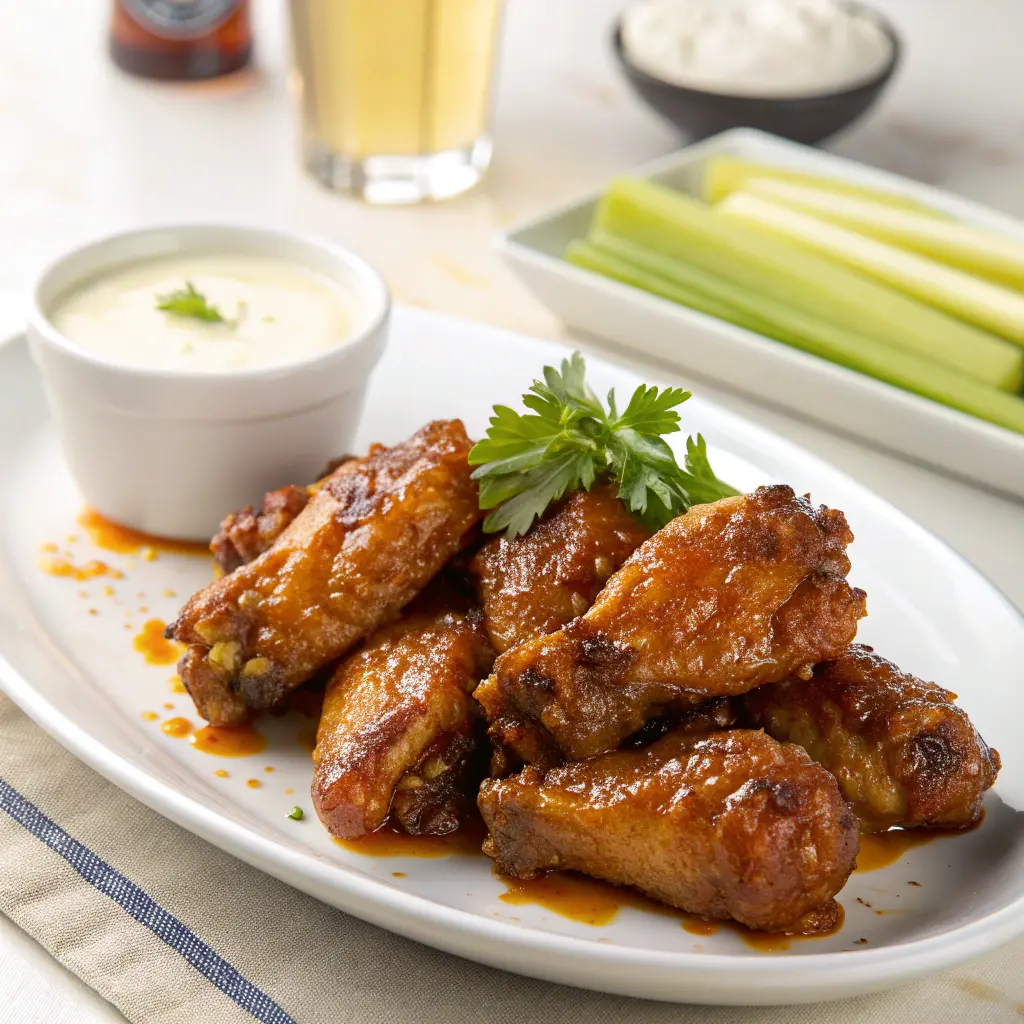
Honey Garlic Butter Chicken Wings: The Ultimate Sweet and Savory Recipe
Craving restaurant-quality chicken wings at home? These Honey Garlic Butter Chicken Wingsdeliver the perfect balance of sweet honey, savory garlic, and rich butter in every bite. Whether you’re hosting game day, planning a family dinner, or simply treating yourself, this recipe guarantees crispy, flavorful wings that everyone will love. Best of all, this recipe keeps things simple while maximizing taste, making it perfect for all ages and dietary preferences.
What Makes Honey Garlic Butter Chicken Wings Special
Honey garlic butter chicken wings stand out because they combine three powerhouse flavors that complement each other perfectly. The natural sweetness of honey balances the pungent richness of fresh garlic, while butter adds a luxurious, velvety coating that helps everything stick to the wings.
Unlike other wing recipes that rely on heavy sauces or complex ingredient lists, this version keeps things straightforward. The simplicity allows each component to shine through. Additionally, the glaze caramelizes beautifully during cooking, creating a gorgeous golden-brown finish that looks as impressive as it tastes.
Why This Recipe Works
This recipe succeeds because it focuses on technique as much as ingredients. The key lies in achieving crispy skin before adding the glaze. This approach ensures your wings stay crunchy rather than soggy. Furthermore, the glaze penetrates the meat while forming a sticky, finger-licking coating on the outside.
The absence of alcohol keeps the flavors clean and family-friendly. Many traditional wing recipes use it for depth, but this version proves you don’t need it. Instead, the natural sugars in honey provide complexity while garlic and butter deliver richness.
Essential Ingredients for Perfect Wings
Main Components
Chicken Wings (3 pounds): Choose whole wings or pre-cut drumettes and flats. Fresh wings work best, though frozen ones are acceptable if thoroughly thawed and patted dry.
Honey (½ cup): Use pure, high-quality honey for the best flavor. Raw honey offers more complexity than processed varieties.
Butter (6 tablespoons): Unsalted butter gives you control over salt levels. It should be at room temperature for easier mixing.
Fresh Garlic (6-8 cloves): Freshly minced garlic provides the most potent flavor. Avoid pre-minced garlic in jars, as it lacks the same punch.
Soy Sauce (3 tablespoons): Adds umami depth and saltiness. Use regular or low-sodium based on preference. For gluten-free options, substitute tamari or coconut aminos.
Apple Cider Vinegar (1 tablespoon): Balances sweetness with subtle tanginess. White vinegar works as an alternative.
Ginger (1 teaspoon, fresh grated): Provides warmth and complexity. Ground ginger can substitute in a pinch.
Seasoning Blend
-
Garlic powder (1 teaspoon)
-
Onion powder (1 teaspoon)
-
Smoked paprika (½ teaspoon)
-
Black pepper (½ teaspoon)
-
Salt (1 teaspoon)
-
Cornstarch (2 tablespoons)
The cornstarch coating creates an incredibly crispy exterior. It absorbs moisture and helps the glaze adhere better.
Optional Garnishes
-
Sesame seeds (white or black)
-
Fresh chopped parsley or cilantro
-
Sliced green onions
-
Red pepper flakes for heat
Kitchen Tools You’ll Need
Having the right equipment makes preparation easier and results more consistent. Here’s what you’ll need:
-
Large mixing bowl: For tossing wings with seasoning
-
Baking sheet with wire rack: Elevates wings for even air circulation
-
Aluminum foil or parchment paper: Simplifies cleanup
-
Small saucepan: For preparing the honey garlic butter sauce
-
Whisk or wooden spoon: For mixing the glaze
-
Tongs: For flipping wings and tossing in sauce
-
Meat thermometer: Ensures wings reach safe internal temperature
-
Large serving platter: For presentation
If using an air fryer, ensure it’s large enough to cook wings in a single layer without overcrowding.
Step-by-Step Cooking Instructions
Preparation Phase
Step 1: Prep the Chicken Wings
Start by rinsing the wings under cold water. Pat them completely dry using paper towels. This step is crucial because moisture prevents crisping. If wings are whole, separate them at the joints into drumettes and flats. Discard the wing tips or save them for stock.
Step 2: Season the Wings
In a large bowl, combine cornstarch, garlic powder, onion powder, smoked paprika, salt, and black pepper. Add the dried wings and toss thoroughly until each piece is evenly coated. The cornstarch creates a light dusting that turns golden and crispy during cooking.
Let the coated wings rest for 10-15 minutes. This allows the coating to adhere properly and begin absorbing surface moisture.
Cooking Phase (Oven Method)
Step 3: Preheat and Arrange
Preheat your oven to 425°F (220°C). Line a baking sheet with aluminum foil for easy cleanup. Place a wire rack on top of the foil. Arrange wings in a single layer on the rack, ensuring they don’t touch. Space between wings allows hot air to circulate freely.
Step 4: Bake Until Crispy
Bake for 45-50 minutes, flipping wings halfway through. The wings are done when the skin turns golden brown and crispy. Internal temperature should reach 165°F (74°C) when measured with a meat thermometer. For extra crispiness, broil for 2-3 minutes at the end, watching carefully to prevent burning.
Making the Honey Garlic Butter Sauce
Step 5: Prepare the Glaze
While wings bake, prepare the sauce. Melt butter in a small saucepan over medium-low heat. Add minced garlic and grated ginger. Sauté for 1-2 minutes until fragrant but not browned. Burnt garlic tastes bitter, so watch carefully.
Add honey, soy sauce, and apple cider vinegar. Whisk continuously until the mixture combines into a smooth glaze. Simmer for 3-4 minutes, stirring occasionally. The sauce will thicken slightly as it reduces. Remove from heat when it coats the back of a spoon.
Step 6: Glaze the Wings
Transfer hot, crispy wings to a large clean bowl. Pour half the honey garlic butter sauce over the wings. Toss thoroughly using tongs until every wing is evenly coated. Add more sauce gradually if needed. Reserve some sauce for serving.
Alternative: Air Fryer Method
Preheat air fryer to 380°F (193°C). Arrange seasoned wings in a single layer in the basket. Don’t overcrowd. Cook for 22-25 minutes, shaking the basket every 8 minutes for even cooking. Increase temperature to 400°F (204°C) for the final 3 minutes to maximize crispiness. Toss with sauce as directed above.
Alternative: Stovetop to Oven Method
For an extra crispy finish, start wings on the stovetop. Heat a large cast-iron skillet over medium-high heat with 2 tablespoons of oil. Sear wings in batches for 3-4 minutes per side until golden. Transfer to a baking sheet and finish in a 400°F oven for 20-25 minutes. Glaze as usual.
Cooking Methods Compared
| Method | Time | Crispiness | Hands-On Effort | Best For |
|---|---|---|---|---|
| Oven | 50 min | High | Low | Large batches |
| Air Fryer | 25 min | Very High | Medium | Quick cooking |
| Stovetop-Oven | 40 min | Very High | High | Maximum crispiness |
| Slow Cooker | 3 hours | Low | Very Low | Tender, fall-off-bone |
Each method produces delicious honey garlic butter chicken wings, but they differ in texture and convenience. The oven method works best for feeding crowds. Meanwhile, air frying delivers speed without sacrificing quality. Choose based on your priorities and available equipment.
Pro Tips for Extra Crispy Wings
Moisture Management
The biggest enemy of crispy wings is moisture. After washing wings, use multiple layers of paper towels to absorb every drop. Some cooks refrigerate uncovered wings for 1-2 hours before cooking. This air-drying technique removes surface moisture effectively.
Temperature Matters
Always cook wings at high heat. Low temperatures steam rather than crisp. For oven cooking, 425°F represents the sweet spot. Going higher risks burning before the meat cooks through.
Don’t Overcrowd
Space between wings during cooking is essential. Overcrowding traps steam and prevents proper air circulation. Cook in batches if necessary rather than stacking wings.
Baking Powder Trick
Add 1 tablespoon of aluminum-free baking powder to the cornstarch mixture. Baking powder raises pH levels, which helps proteins break down faster. This creates crispier skin. Ensure it’s aluminum-free to avoid metallic taste.
Flip Strategically
Flip wings only once during cooking. Constant flipping releases moisture and interrupts the crisping process. Wait until the halfway point, then flip confidently.
Sauce Timing
Always add sauce after wings finish cooking. Glazing too early causes the sugars in honey to burn. The residual heat from freshly cooked wings is perfect for melting the sauce into every crevice.
Flavor Variations to Try
Spicy Honey Garlic Wings
Add 1-2 tablespoons of sriracha or your favorite hot sauce to the honey garlic butter glaze. Red pepper flakes or cayenne pepper work too. Start with less and adjust to your heat tolerance.
Asian-Inspired Wings
Increase ginger to 2 teaspoons and add 1 teaspoon of sesame oil to the glaze. Top finished wings with toasted sesame seeds and sliced green onions. This variation pairs beautifully with steamed rice.
Lemon Honey Garlic Wings
Add 2 tablespoons of fresh lemon juice to the glaze. The citrus brightens the flavor profile while complementing the honey’s sweetness. Garnish with lemon zest for extra punch.
Herb-Infused Wings
Stir in 1 teaspoon of dried rosemary or thyme into the glaze. Fresh herbs work even better. This variation adds an earthy dimension that balances the sweetness.
Sweet and Tangy Wings
Double the apple cider vinegar and add 1 tablespoon of Dijon mustard. This creates a more complex sweet-and-sour profile reminiscent of Asian takeout.
Smoky Honey Garlic Wings
Increase smoked paprika to 2 teaspoons in the dry rub. Add ½ teaspoon of liquid smoke to the glaze. This creates depth without requiring an actual smoker.
Serving Suggestions and Pairings
Ideal Side Dishes
Honey garlic butter chicken wings pair excellently with various sides:
-
Coleslaw: Creamy or vinegar-based coleslaw provides refreshing contrast
-
French Fries: Classic pairing that satisfies every craving
-
Corn on the Cob: Grilled or boiled corn complements the glaze
-
Roasted Vegetables: Broccoli, carrots, or Brussels sprouts add nutrition
-
Rice: Jasmine or basmati rice soaks up extra sauce
-
Salad: Fresh greens with light vinaigrette balance richness
Check out our guide on [insert link to side dishes article] for more pairing ideas.
Dipping Sauces
While these wings taste incredible on their own, dipping sauces add variety:
-
Ranch dressing
-
Blue cheese dressing
-
Sweet chili sauce
-
Garlic aioli
-
Honey mustard
-
Barbecue sauce
Beverage Pairings
These wings work well with various beverages:
-
Iced Tea: Sweetened or unsweetened complements the flavors
-
Lemonade: Citrus cuts through richness
-
Sparkling Water: Clean palate cleanser
-
Fruit Juice: Apple or orange juice enhances sweetness
-
Milk: Classic comfort pairing
-
Smoothies: Fruit-based smoothies provide refreshing contrast
Presentation Tips
Arrange wings on a large platter lined with lettuce or cabbage leaves. Drizzle extra glaze over the top and sprinkle with sesame seeds and chopped parsley. Place dipping sauces in small bowls around the platter. Provide plenty of napkins and wet wipes for easy cleanup.
Storage and Reheating Guidelines
Refrigeration
Store leftover honey garlic butter chicken wings in an airtight container in the refrigerator. They’ll stay fresh for 3-4 days. Separate any unused sauce into a different container to prevent the wings from getting soggy.
Freezing
Freeze wings for up to 3 months. Cool completely before freezing. Place wings in a single layer on a baking sheet and freeze for 1 hour. Then transfer to freezer bags, removing as much air as possible. This prevents wings from sticking together.
Reheating Methods
Oven Method: Preheat oven to 375°F (190°C). Arrange wings on a baking sheet with a wire rack. Heat for 10-15 minutes until warmed through. This method best preserves crispiness.
Air Fryer Method: Reheat at 350°F for 5-8 minutes. Shake basket halfway through. This quick method maintains texture well.
Microwave Method: Place wings on a microwave-safe plate. Heat on 50% power in 30-second intervals. While fastest, this method sacrifices some crispiness.
Stovetop Method: Heat a skillet over medium heat with a small amount of oil. Pan-fry wings for 3-4 minutes per side. This restores the crispy exterior beautifully.
Nutritional Information
Per serving (approximately 4-5 wings):
-
Calories: 420-480
-
Protein: 28g
-
Carbohydrates: 24g
-
Fat: 26g
-
Saturated Fat: 10g
-
Cholesterol: 115mg
-
Sodium: 780mg
-
Sugar: 18g
These values are estimates and vary based on wing size and exact ingredients used. The honey contributes most of the sugar content. For a lighter version, use less butter and honey while maintaining the garlic flavor.
Making It Healthier
Reduce Sugar: Use less honey or substitute with a sugar-free alternative like monk fruit sweetener.
Lower Fat: Use less butter or substitute part of it with olive oil or chicken broth.
Reduce Sodium: Use low-sodium soy sauce and reduce added salt in the seasoning blend.
Portion Control: Stick to recommended serving sizes and pair with healthy sides like salads or steamed vegetables.
Common Mistakes to Avoid
Mistake 1: Skipping the Drying Step
Wet wings never crisp properly. Always pat wings completely dry before seasoning. Consider the air-drying technique mentioned earlier for even better results.
Mistake 2: Overcrowding the Pan
Giving wings space ensures proper air circulation. Crowded wings steam rather than roast. Use multiple baking sheets if necessary.
Mistake 3: Adding Sauce Too Early
Glazing before cooking causes burning and prevents crisping. Always sauce wings after they finish cooking. The residual heat warms the sauce perfectly.
Mistake 4: Using Old Oil or Butter
Rancid fats ruin flavor. Check expiration dates and smell ingredients before using. Fresh butter makes a noticeable difference in taste.
Mistake 5: Not Monitoring Temperature
Undercooked chicken poses health risks. Always use a meat thermometer to verify wings reach 165°F internally. This ensures safety without overcooking.
Mistake 6: Forgetting to Flip
Wings need flipping halfway through cooking for even browning. Set a timer to remind yourself at the halfway point.
Mistake 7: Using Garlic Powder Instead of Fresh
While garlic powder works in the dry rub, fresh garlic must be used in the sauce. Pre-minced garlic in jars lacks the vibrant flavor fresh cloves provide.
Mistake 8: Burning the Garlic
Garlic burns quickly and becomes bitter. Cook it gently over medium-low heat just until fragrant. Watch it constantly during the sautéing phase.
Frequently Asked Questions
Can I use frozen chicken wings?
Yes, but thaw them completely first. Pat them thoroughly dry with paper towels. Frozen wings contain extra moisture that prevents crisping. Never cook wings directly from frozen.
How do I make honey garlic butter chicken wings even crispier?
Use the baking powder trick, ensure wings are completely dry, cook at high heat, and avoid overcrowding. The stovetop-to-oven method produces maximum crispiness.
Can I make the sauce ahead of time?
Absolutely. Prepare the honey garlic butter sauce up to 3 days in advance. Store it in an airtight container in the refrigerator. Reheat gently before tossing with wings.
What’s the best honey for this recipe?
Pure, raw honey offers the most complex flavor. However, any high-quality honey works. Avoid honey labeled as “honey-flavored” or “honey blend,” as these contain additives.
Can I use boneless chicken instead?
Yes, boneless chicken breast or thighs work well. Cut them into bite-sized pieces and reduce cooking time by 10-15 minutes. They won’t be as crispy as wings but still taste delicious.
How can I tell when wings are done?
Wings should reach an internal temperature of 165°F. The skin should be golden brown and crispy. Juices run clear when pierced with a fork.
Can I double the recipe?
Yes, simply double all ingredients. You’ll need multiple baking sheets or cook in batches. Prepare extra sauce as needed.
What if I don’t have apple cider vinegar?
White vinegar, rice vinegar, or even lemon juice work as substitutes. Use slightly less as they may be more acidic than apple cider vinegar.
Are these wings gluten-free?
The recipe can be gluten-free if you use tamari instead of regular soy sauce and verify all other ingredients are certified gluten-free.
Can I grill these wings?
Yes, grill over medium-high heat for 20-25 minutes, turning frequently. Brush with sauce during the last 5 minutes of cooking. Monitor closely to prevent burning.
Conclusion
Honey garlic butter chicken wings deliver restaurant-quality flavor with straightforward home cooking techniques. The combination of sweet honey, aromatic garlic, and rich butter creates an irresistible glaze that transforms simple chicken wings into a crowd-pleasing masterpiece. By following these detailed instructions and tips, you’ll achieve perfectly crispy wings with a sticky, flavorful coating every time.
The beauty of this recipe lies in its versatility. Whether you bake, air fry, or use a combination of cooking methods, the results consistently impress. The alcohol-free approach keeps the recipe family-friendly while maintaining complex, satisfying flavors. From game day gatherings to weeknight dinners, these wings adapt to any occasion.
Remember the key principles: dry wings thoroughly, cook at high heat with proper spacing, and add sauce only after cooking. These fundamentals guarantee success regardless of which variation or cooking method you choose.
Print
Honey Garlic Butter Chicken Wings
Description
Honey Garlic Butter Chicken Wings
Ingredients:
-
2 lbs chicken wings (split into flats and drumettes)
-
1 teaspoon salt
-
1/2 teaspoon black pepper
-
1 teaspoon paprika (optional for color)
-
2 tablespoons cornstarch (for extra crispiness)
-
2 tablespoons olive oil
For the Honey Garlic Butter Sauce:
-
1/4 cup unsalted butter
-
1/3 cup honey
-
4 cloves garlic, minced
-
2 tablespoons soy sauce
-
1 tablespoon brown sugar (optional for extra caramelization)
-
1 teaspoon apple cider vinegar or lemon juice (for balance)
Garnish:
Chopped parsley or green onions, sesame seeds (optional)
Instructions:
-
Prep the wings:
Pat chicken wings dry with paper towels. Toss in salt, pepper, paprika, and cornstarch until evenly coated. -
Cook the wings:
-
Oven method: Bake at 400°F (200°C) for 40–45 minutes, flipping halfway, until golden and crispy.
-
Air fryer method: Cook at 380°F (193°C) for 20–25 minutes, shaking halfway through.
-
Fried method: Deep-fry in oil at 350°F (175°C) for 8–10 minutes, until crispy and golden.
-
-
Make the sauce:
In a skillet, melt butter over medium heat. Add minced garlic and sauté for 30 seconds until fragrant.
Stir in honey, soy sauce, and brown sugar. Simmer 1–2 minutes until it slightly thickens. -
Coat the wings:
Add cooked wings to the skillet and toss in the sauce until fully coated and glossy. -
Serve:
Garnish with parsley, sesame seeds, or green onions. Serve hot and sticky!