
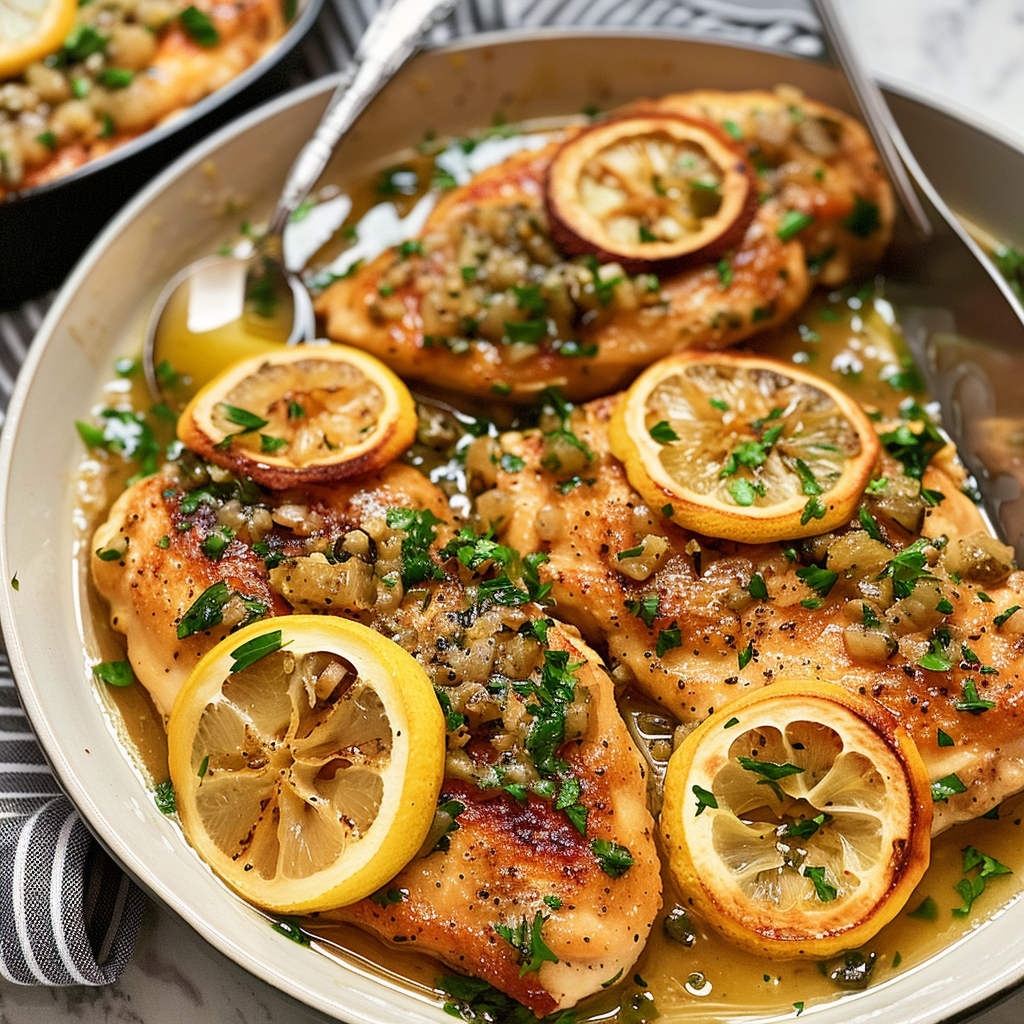
Craving a restaurant-quality meal that’s shockingly simple to pull off in your own kitchen? Look no further than Chicken Piccata, the iconic Italian-American dish that’s a total game-changer for weeknight dinners and special occasions alike. This definitive guide is your golden ticket to mastering this classic. We’re not just talking about any recipe; we’re diving deep into the history, the secrets of the perfect sear, and the art of crafting that lip-smacking, buttery lemon caper sauce. Get ready to transform a few humble ingredients into a dazzling, flavor-packed masterpiece that will have everyone begging for seconds. Let’s get cooking!
The Ultimate Guide to Chicken Piccata: A Classic Italian-American Masterpiece
Ever found yourself staring at a restaurant menu, utterly captivated by the words “Chicken Piccata“? Consequently, you imagine tender, golden poultry swimming in a vibrant, tangy sauce—well, guess what? You can absolutely recreate that magic at home, and frankly, it’s easier than you think. This dish is the ultimate culinary sleight of hand: it looks and tastes incredibly sophisticated, yet the process is straightforward and wonderfully fast. In fact, from start to glorious finish, you’re often looking at just about 30 minutes. Ultimately, this guide will walk you through every single step, unveiling the pro tips and little twists that make all the difference between a good attempt and a truly spectacular result.
So, what’s the big deal about this particular dish? For starters, it’s a brilliant study in balance. Imagine this: the rich, luxurious feel of butter seamlessly mingling with the bright, sunny punch of fresh lemon. Then, just when you think it can’t get better, in pop the briny, salty capers, creating a flavor explosion that is nothing short of addictive. It’s a symphony in a skillet, each ingredient playing its part perfectly. Whether you’re a seasoned home cook or just starting your journey, mastering Chicken Piccata is a right of passage that delivers immense satisfaction and, most importantly, a delicious dinner.
Now, why will you absolutely fall head over heels for this recipe? Well, beyond the incredible taste, its versatility is a huge win. Firstly, it’s a proven crowd-pleaser that impresses dinner guests without requiring you to slave away for hours. Secondly, it’s a weeknight warrior, capable of getting a gourmet meal on the table faster than you can decide on takeout. Furthermore, the ingredients are simple, fresh, and often already in your pantry or easy to find. Honestly, once you learn the basic technique of pan-searing and making a simple pan sauce, a whole new world of cooking opens up. This isn’t just a recipe; it’s a fundamental skill that will serve you for years to come.
What is Chicken Piccata? & A Brief History
What is Chicken Piccata?
Let’s cut to the chase: what exactly are we making? At its heart, Chicken Piccata is an elegant yet uncomplicated dish featuring tender, pan-fried chicken cutlets smothered in a vibrant, buttery sauce. The sauce itself is the real star, a dazzling combination of fresh lemon juice, briny capers, and rich butter. Traditionally, the chicken is lightly dredged in flour before hitting the hot pan, which creates a delicate, golden crust that helps thicken the sauce later. Importantly, don’t confuse it with its cousin, Chicken Francese, which involves a dip in egg batter. Piccata is all about that light, crisp coating that lets the chicken itself shine through.
A Brief History of Piccata: From Veal to Chicken
Believe it or not, the story of this dish begins with a different protein altogether. Originally, “Piccata” is an Italian preparation, specifically from Milan, traditionally made with veal (Vitello alla Piccata). The term “piccata” itself comes from the Italian word “piccato,” meaning “larded” or “pounded,” referring to the crucial step of thinning the meat. As Italian immigrants brought their culinary traditions to America, they adapted. Veal was often more expensive and less readily available than chicken, so the substitution was a natural, delicious evolution. Moreover, the addition of capers, while now considered essential, is actually a more prominent feature in the Italian-American version than in some traditional Italian recipes. This evolution is a beautiful example of how immigration shapes food, creating new classics in the process. For a deeper dive into this culinary journey, you can explore the rich history of Italian-American cuisine.
Gathering Your Ingredients & Essential Kitchen Tools
Gathering Your Ingredients: A Checklist for Success
Alright, let’s talk ingredients! The beauty of this dish lies in its simplicity, so using high-quality, fresh components is non-negotiable for the best flavor. Here’s your shopping list and why each item matters:
The Chicken
-
Boneless, Skinless Chicken Breasts: The main event! We’ll be butterflying and pounding them into cutlets for quick, even cooking.
The Breading Station
-
All-Purpose Flour: This creates that light, golden crust and, crucially, helps thicken the sauce later into a luxurious glaze.
-
Kosher Salt & Black Pepper: For essential seasoning at every stage.
-
Garlic Powder (optional): A little sprinkle in the flour adds a subtle, aromatic depth.
The Piccata Sauce Trinity
-
Fresh Lemon Juice: Please, I beg you, do not use the bottled stuff! Freshly squeezed lemon juice provides a bright, clean acidity that is the soul of the dish.
-
Chicken Broth: Use a low-sodium variety so you can control the salt level yourself. This forms the base of the sauce.
-
A Splash of Stock: A bit of additional chicken stock or even vegetable stock can be used to deglaze the pan, building layers of flavor.
The Flavor Powerhouses
-
Capers: These little brined buds provide that signature salty, briny punch. Rinse them lightly to avoid an overly salty sauce.
-
Fresh Garlic: Minced finely, it adds a pungent, aromatic foundation.
-
Shallot: Finely minced, it offers a sweeter, more delicate flavor than onion, but a small onion will work in a pinch.
-
Fresh Parsley: Used as a garnish, its fresh, grassy note cuts through the richness perfectly.
-
Unsalted Butter: This gives the sauce its velvety body and rich flavor. Using unsalted allows you to be the boss of seasoning.
-
Olive Oil: Used for pan-frying, its high smoke point is ideal for getting a good sear.
Essential Kitchen Tools
You won’t need any fancy gadgets for this one! Here’s the shortlist of kitchen essentials:
-
A Large Skillet: Preferably stainless steel or cast iron. Why? Because these materials allow you to develop a beautiful fond—those delicious browned bits stuck to the pan after searing the chicken. That fond is pure flavor gold for your sauce. (A non-stick pan will work, but it won’t develop the same depth of flavor).
-
Meat Mallet or Rolling Pin: Absolutely essential for pounding the chicken to an even thickness. This is the secret to preventing dry, overcooked edges and a raw center.
-
Shallow Dishes: Two or three for setting up your dredging station.
-
Tongs: Your best friend for flipping the chicken cutlets safely.
-
Whisk: Critical for emulsifying the butter into the sauce at the end, creating a smooth, cohesive, and glossy finish.
The Step-by-Step Recipe
How to Make Chicken Piccata: A Step-by-Step Guide
Ready for the main event? Follow these steps carefully, and you’ll be a piccata pro in no time. It’s less about complex technique and more about confidence and timing.
Step 1: Preparing the Chicken Cutlets
First things first, let’s prep the chicken. Place a single breast on a cutting board and cover it with a sheet of plastic wrap. Seriously, don’t skip the plastic wrap—it contains the mess beautifully. Using the flat side of your meat mallet or a heavy rolling pin, gently but firmly pound the chicken from the center outward until it’s about a ½-inch thick. Conversely, you can butterfly the breast first by slicing it horizontally almost all the way through and then opening it like a book before pounding. The goal is uniform thickness; this is the single most important step for ensuring your chicken cooks evenly and stays juicy. Finally, season both sides generously with salt and pepper.
Step 2: The Simple Breading Process
Next, set up your dredging station. Place your all-purpose flour (mixed with a pinch of garlic powder if you’re using it) in a shallow dish. Now, take each seasoned cutlet and press it firmly into the flour, ensuring both sides are fully coated. Then, lift it up and gently shake off any excess. You’re aiming for a light, even dusting—not a thick, pasty batter. This thin layer is what will brown beautifully and help thicken your sauce later on.
Step 3: Pan-Searing to Golden Perfection
Now, for the sizzle! Heat a tablespoon each of olive oil and butter in your large skillet over medium-high heat. Once the butter is foaming and the oil shimmers, it’s showtime. Carefully add the chicken cutlets to the pan. Crucially, do not overcrowd the pan; cook in batches if necessary. Overcrowding will steam the chicken instead of searing it, and we want a gorgeous golden-brown crust. Cook for about 3-4 minutes per side, until the outside is beautifully golden and the inside is cooked through. After that, transfer the cooked chicken to a clean plate and tent loosely with foil. Don’t worry if there are browned bits stuck to the pan—that’s your flavor foundation!
Step 4: Building the Signature Lemon Caper Sauce
With the chicken resting, reduce the heat to medium. Add another tablespoon of butter to the pan, followed by the minced shallot and garlic. Sauté for just about 30 seconds until fragrant—be careful not to burn it! Now, pour in your chicken broth. This is where the magic happens! As you pour, use your whisk to vigorously scrape up all those browned bits (fond) from the bottom of the pan. This process, known as deglazing, is the secret to a deeply flavorful sauce. Let the broth simmer and reduce for a few minutes. Then, stir in the fresh lemon juice and the rinsed capers. Let this mixture bubble away for another minute or two to let the flavors meld.
Step 5: The Final Butter Swirl (Monter au Beurre)
This is the pro move that makes the sauce restaurant-quality. Reduce the heat to low. Add the remaining 2 tablespoons of cold, unsalted butter to the pan. Whisk constantly and vigorously until the butter has completely melted and emulsified into the sauce. This French technique, called monter au beurre, creates a sauce that is velvety, slightly thickened, and luxuriously glossy—not oily or broken. Finally, return the chicken cutlets to the pan, along with any accumulated juices, and spoon the sauce over them to warm through. Garnish with a generous sprinkle of fresh chopped parsley.
Pro Tips, Variations & Serving Suggestions
Pro Tips for the Best Chicken Piccata Ever
Want to take your dish from great to mind-blowing? Here are the insider secrets:
-
Pound Evenly: I’ll say it again: even thickness is the #1 rule for perfectly cooked chicken. No exceptions!
-
Embrace the Fond: Those browned bits in the pan are not a mistake; they are packed with savory flavor. Scrape them all up when you deglaze!
-
Fresh Citrus is Key: Bottled lemon juice has a dull, often metallic taste. Freshly squeezed is non-negotiable for the brightest, cleanest flavor.
-
Butter Off the Heat: When finishing the sauce, adding the final cold butter off the direct heat (or on very low) and whisking like crazy prevents it from separating into an oily mess.
-
Don’t Crowd the Pan: Giving the chicken space ensures a crisp sear, not a steam.
Delicious Variations on a Classic
The basic formula is a fantastic canvas for creativity!
-
Piccata with Pasta: Turn it into a complete meal by serving the chicken and sauce over a bed of cooked angel hair or linguine. The pasta soaks up the incredible sauce perfectly.
-
Pork or Veal Piccata: Feel free to use thin pork cutlets or traditional pounded veal cutlets following the exact same method.
-
Creamy Chicken Piccata: For an even richer sauce, stir in a few tablespoons of heavy cream or half-and-half at the very end, after emulsifying the butter.
What to Serve with Chicken Piccata: The Perfect Pairings
What goes well with this tangy, rich dish? Honestly, almost anything!
-
Pasta & Grains: Angel hair pasta, linguine, creamy risotto, or even simple mashed potatoes are all stellar choices for soaking up the sauce.
-
Vegetables: Keep it light with a side of roasted asparagus, sautéed spinach, garlic green beans, or a simple arugula salad with a lemon vinaigrette.
-
Bread: A loaf of warm, crusty Italian bread is perfect for mopping up every last drop of sauce from your plate—no shame in that!
Storing, Reheating, and FAQs
Storing and Reheating Your Leftovers
Got leftovers? Lucky you! Store the chicken and sauce together in an airtight container in the refrigerator for up to 3 days. When reheating, the stovetop is your best bet. Gently warm it in a skillet over low heat, adding a tiny splash of chicken broth or water to loosen the sauce back up. Unfortunately, I don’t recommend freezing Chicken Piccata, as the dairy-based sauce is very likely to separate and become grainy upon thawing.
Frequently Asked Questions (FAQs)
What can I use instead of wine?
“No problem! You can simply omit it and use an equal amount of additional chicken broth. For a more complex flavor, a teaspoon of white wine vinegar or a squeeze of extra lemon juice added to the broth works wonderfully as a non-alcoholic alternative.”
Can I make Chicken Piccata without capers?
“Absolutely, you can skip them. However, they do provide that signature briny flavor. If you want a substitute, chopped green olives can offer a similar salty bite, though the taste will be slightly different.”
Is Chicken Piccata gluten-free?
“The classic recipe is not, due to the flour used for dredging. Fortunately, it’s an easy fix! Just use your favorite 1:1 gluten-free all-purpose flour blend or even almond flour for a gluten-free version. The method remains exactly the same.”
Why is my sauce greasy or broken?
“This typically happens if the heat is too high when adding the final butter, causing the fat to separate. Always add cold butter off the direct heat and whisk constantly to create a stable emulsion. Using fresh lemon juice instead of bottled also helps prevent curdling.”
Conclusion: Your New Go-To Gourmet Meal
And there you have it! You’ve just unlocked the secrets to creating a flawless, restaurant-worthy Chicken Piccata right in your own kitchen. This dish is so much more than just a recipe; it’s a technique, a confidence builder, and a guaranteed way to bring a little bit of Italian-American magic to your dinner table. It proves that with a few fresh ingredients, a hot pan, and a willingness to whisk enthusiastically, you can create something truly extraordinary any night of the week. So, what are you waiting for? Grab that skillet, a couple of lemons, and get ready to receive your standing ovation. Dinner is served
Print
Chicken Piccata
Description
Chicken Piccata
Ingredients
-
2 large chicken breasts, sliced in half lengthwise to make 4 cutlets
-
½ cup all-purpose flour (for dredging)
-
½ tsp salt
-
½ tsp black pepper
-
3 tbsp olive oil
-
3 tbsp unsalted butter (divided)
-
3 cloves garlic, minced
-
½ cup dry white wine (or chicken broth)
-
½ cup chicken broth
-
¼ cup fresh lemon juice (about 2 lemons)
-
¼ cup capers, drained
-
2 tbsp fresh parsley, chopped
-
Lemon slices, for garnish
Instructions
-
Prep chicken: Season flour with salt and pepper. Lightly dredge chicken cutlets in flour, shaking off excess.
-
Sear chicken: Heat olive oil and 1 tbsp butter in a large skillet over medium-high heat. Cook chicken cutlets 3–4 minutes per side, until golden and just cooked through. Remove and keep warm.
-
Make the sauce: In the same skillet, add garlic and sauté 30 seconds. Pour in white wine and simmer 2 minutes, scraping up browned bits. Add chicken broth, lemon juice, and capers. Simmer 3–4 minutes until slightly reduced.
-
Finish: Stir in remaining 2 tbsp butter to enrich the sauce. Return chicken to skillet, spooning sauce over cutlets. Cook 2 minutes to warm through.
-
Serve: Plate chicken, spoon sauce over top, and garnish with parsley and lemon slices.