
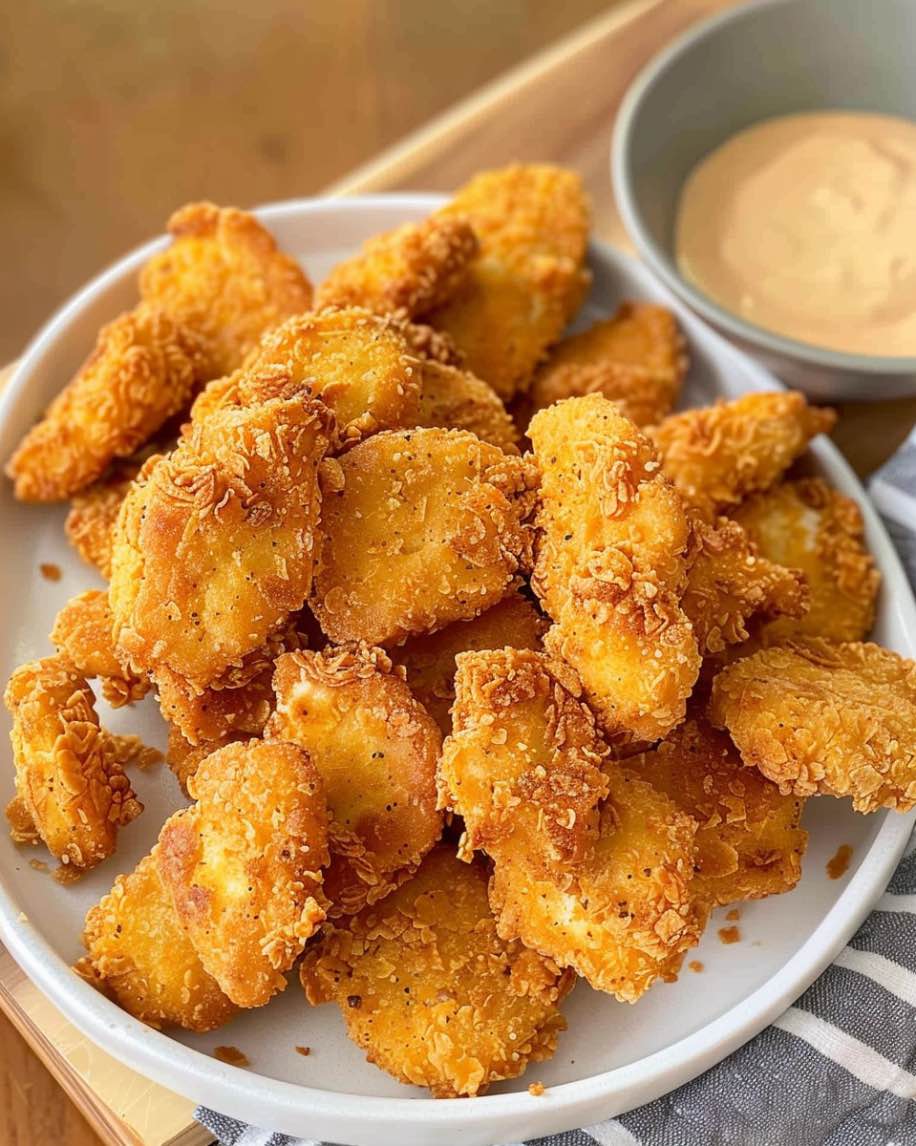
Crispy Homemade Chicken Nuggets: The Ultimate Guide to Perfect Golden Bites
Introduction
Nothing beats the satisfaction of biting into perfectly crispy homemade chicken nuggets that rival any restaurant version. Furthermore, making crispy homemade chicken nuggets at home allows you to control every ingredient while creating a healthier alternative to store-bought options. Additionally, these golden nuggets deliver that perfect crunch on the outside with tender, juicy chicken on the inside that both kids and adults absolutely love.
Moreover, this comprehensive guide will walk you through everything you need to know about creating restaurant-quality chicken nuggets in your own kitchen. Subsequently, you’ll discover the secrets to achieving that coveted crispy exterior while maintaining incredibly moist chicken inside.
Why Make Homemade Chicken Nuggets
Health and Quality Control
Making homemade chicken nuggets provides complete control over ingredients and quality. Consequently, you can choose premium chicken breast, avoid unnecessary preservatives, and eliminate artificial additives commonly found in processed nuggets. Furthermore, you’ll know exactly what goes into each bite.
Cost-Effective Solution
Homemade nuggets cost significantly less than restaurant or frozen alternatives. Additionally, you can make large batches and freeze portions for future meals. Therefore, this approach saves both money and time in the long run.
Customization Options
Creating nuggets at home allows endless customization possibilities. Moreover, you can adjust seasonings, accommodate dietary restrictions, and experiment with different coating techniques. Subsequently, every family member can enjoy their preferred flavor profile.
Superior Taste and Texture
Fresh, homemade nuggets deliver unmatched flavor and texture compared to processed alternatives. Furthermore, the combination of tender chicken and perfectly seasoned coating creates an irresistible eating experience that store-bought versions simply cannot match.
Essential Ingredients for Perfect Nuggets
Primary Ingredients
Chicken Selection:
-
2 pounds boneless, skinless chicken breasts or thighs
-
Choose high-quality, fresh chicken for best results
-
Remove any visible fat or connective tissue
Coating System:
-
1 cup all-purpose flour
-
2 large eggs, beaten
-
2 cups panko breadcrumbs
-
1 cup regular breadcrumbs
Seasoning Blend
Dry Seasonings:
-
2 teaspoons salt
-
1 teaspoon black pepper
-
1 teaspoon garlic powder
-
1 teaspoon onion powder
-
1 teaspoon paprika
-
½ teaspoon dried thyme
-
½ teaspoon dried oregano
Optional Flavor Enhancers:
-
1 teaspoon mustard powder
-
½ teaspoon cayenne pepper
-
1 teaspoon dried parsley
Cooking Medium
For Frying:
-
Vegetable oil, canola oil, or peanut oil
-
Approximately 6-8 cups for deep frying
For Baking:
-
2 tablespoons olive oil or melted butter
-
Cooking spray for even browning
Equipment You’ll Need
Essential Tools
Preparation Equipment:
-
Sharp knife for cutting chicken
-
Cutting board (preferably separate for raw meat)
-
Three shallow dishes for breading station
-
Large mixing bowl
-
Wire cooling rack
Cooking Equipment:
-
Heavy-bottomed pot or deep fryer for frying
-
Candy thermometer or instant-read thermometer
-
Large baking sheet for baking method
-
Parchment paper or silicone baking mat
Safety and Serving Tools:
-
Slotted spoon or spider strainer
-
Paper towels for draining
-
Tongs for handling
Optional but Helpful
-
Meat mallet for even thickness
-
Kitchen scale for portion consistency
-
Food processor for custom breadcrumb texture
Step-by-Step Recipe Instructions
Preparation Phase
Step 1: Prepare the Chicken
First, trim any excess fat from the chicken breasts. Then, cut the chicken into uniform pieces approximately 1½ to 2 inches in size. Moreover, consistent sizing ensures even cooking throughout all nuggets.
Step 2: Set Up Breading Station
Subsequently, arrange three shallow dishes in a row. In the first dish, combine flour with half of the seasoning blend. In the second dish, beat the eggs until smooth. Finally, mix both types of breadcrumbs with remaining seasonings in the third dish.
Step 3: Season the Chicken
Meanwhile, place cut chicken pieces in a bowl and season lightly with salt and pepper. Furthermore, this initial seasoning helps the coating adhere better and enhances overall flavor.
Breading Process
Step 4: First Coating
Dredge each chicken piece in seasoned flour, ensuring complete coverage. Additionally, shake off excess flour to prevent clumpy coating. This step creates the foundation for crispy texture.
Step 5: Egg Wash
Next, dip the floured chicken into beaten eggs, allowing excess to drip off. Moreover, the egg wash acts as glue between the flour and breadcrumb layers.
Step 6: Final Coating
Finally, roll each piece in the breadcrumb mixture, pressing gently to ensure adherence. Furthermore, double-coating creates extra crispiness by repeating the egg and breadcrumb steps.
Cooking Methods
Deep Frying Method
Step 7: Heat the Oil
Heat oil to 350°F (175°C) in a heavy-bottomed pot. Consequently, maintaining proper temperature ensures crispy exterior without overcooking the interior. Use a thermometer for accuracy.
Step 8: Fry the Nuggets
Carefully add nuggets to hot oil without overcrowding. Additionally, fry for 3-4 minutes until golden brown and internal temperature reaches 165°F (74°C). Therefore, cook in batches for best results.
Step 9: Drain and Rest
Remove nuggets with a slotted spoon and place on a wire rack. Subsequently, this allows excess oil to drain while maintaining crispiness.
Baking Method
Alternative Step 7: Preheat Oven
Preheat oven to 425°F (220°C) and line a baking sheet with parchment paper. Furthermore, lightly spray with cooking oil for even browning.
Alternative Step 8: Bake
Arrange breaded nuggets on the prepared baking sheet without touching. Then, lightly spray tops with cooking oil and bake for 15-20 minutes, flipping once halfway through.
Alternative Step 9: Check Doneness
Ensure nuggets reach an internal temperature of 165°F (74°C) before serving. Moreover, they should be golden brown and crispy on all sides.
Pro Tips for Extra Crispy Results
Temperature Control
Maintaining consistent oil temperature is crucial for crispy homemade chicken nuggets. Furthermore, oil that’s too hot burns the coating before cooking the chicken through. Conversely, oil that’s too cool results in greasy, soggy nuggets.
Double Breading Technique
For ultimate crispiness, repeat the egg wash and breadcrumb coating process. Additionally, this creates multiple layers that result in exceptionally crunchy texture. However, allow the first coating to set for 10 minutes before applying the second layer.
Breadcrumb Customization
Mix panko with regular breadcrumbs for optimal texture combination. Moreover, panko provides large, airy crumbs while regular breadcrumbs fill gaps for complete coverage. Furthermore, toasting breadcrumbs beforehand enhances flavor and color.
Resting Period
Allow breaded nuggets to rest for 15-20 minutes before cooking. Subsequently, this helps the coating adhere better and reduces the chance of it falling off during cooking.
Oil Quality and Reuse
Use fresh oil for best flavor and crispiness. Additionally, strain and store oil properly if planning to reuse. However, discard oil after three uses or if it becomes dark or smells off.
Delicious Variations and Flavor Options
International Flavor Profiles
Asian-Inspired Nuggets:
-
Add sesame oil to egg wash
-
Include ginger powder and Chinese five-spice in seasoning
-
Mix sesame seeds into breadcrumbs
Mediterranean Style:
-
Incorporate dried basil, rosemary, and oregano
-
Add parmesan cheese to breadcrumb mixture
-
Include lemon zest for bright flavor
Mexican-Inspired Version:
-
Use chili powder, cumin, and smoked paprika
-
Add cornmeal to breadcrumbs for texture
-
Include lime zest in seasoning blend
Dietary Adaptations
Gluten-Free Options:
-
Replace flour with gluten-free alternative
-
Use certified gluten-free breadcrumbs
-
Ensure all seasonings are gluten-free certified
Low-Carb Alternatives:
-
Substitute almond flour for regular flour
-
Use crushed pork rinds instead of breadcrumbs
-
Add grated parmesan for extra flavor and binding
Healthier Baked Versions:
-
Use whole wheat flour and breadcrumbs
-
Incorporate ground flaxseed for omega-3s
-
Add nutritional yeast for umami flavor
Creative Coating Ideas
Cornflake Coating:
Crush cornflakes for extra crunch and sweetness. Furthermore, this creates an incredibly crispy texture that children especially love.
Pretzel Coating:
Crush salted pretzels for unique flavor and texture. Additionally, this adds a subtle saltiness that complements the chicken perfectly.
Herb-Crusted Version:
Mix fresh herbs like thyme, rosemary, and sage into breadcrumbs. Moreover, this creates a gourmet flavor profile perfect for dinner parties.
Serving Suggestions and Dipping Sauces
Classic Accompaniments
Traditional Sides:
-
French fries or sweet potato fries
-
Coleslaw for refreshing contrast
-
Mac and cheese for comfort food pairing
-
Fresh vegetable sticks for balance
Healthier Options:
-
Baked sweet potato wedges
-
Steamed broccoli and carrots
-
Fresh fruit salad
-
Mixed green salad with light dressing
Homemade Dipping Sauces
Honey Mustard Sauce:
-
¼ cup Dijon mustard
-
¼ cup honey
-
2 tablespoons mayonnaise
-
1 tablespoon apple cider vinegar
Ranch Dressing:
-
½ cup mayonnaise
-
¼ cup sour cream
-
1 tablespoon dried dill
-
1 teaspoon garlic powder
-
1 teaspoon onion powder
BBQ Sauce:
-
½ cup ketchup
-
2 tablespoons brown sugar
-
1 tablespoon apple cider vinegar
-
1 teaspoon smoked paprika
-
½ teaspoon garlic powder
Buffalo Sauce:
-
¼ cup hot sauce
-
2 tablespoons melted butter
-
1 tablespoon honey
-
½ teaspoon garlic powder
Creative Serving Ideas
Transform your crispy homemade chicken nuggets into complete meals by incorporating them into different dishes. Furthermore, these versatile nuggets work well in wraps, salads, and pasta dishes.
Nugget Wraps:
Wrap warm nuggets with lettuce, tomatoes, and ranch dressing in tortillas. Additionally, this creates a handheld meal perfect for lunch boxes.
Chicken Nugget Salad:
Top mixed greens with sliced nuggets, cherry tomatoes, and cucumber. Moreover, this transforms nuggets into a lighter, healthier meal option.
Nugget Pizza Topping:
Use chopped nuggets as pizza topping with BBQ sauce base. Subsequently, this creates a unique fusion dish that combines two favorite foods.
Storage and Reheating Guidelines
Proper Storage Techniques
Refrigerator Storage:
Store cooked nuggets in airtight containers for up to 3-4 days. Furthermore, separate layers with parchment paper to prevent sticking. Additionally, cool completely before refrigerating to prevent condensation.
Freezer Storage:
Freeze nuggets for up to 3 months in freezer-safe containers or bags. Moreover, flash-freeze on baking sheets before transferring to containers to prevent clumping. Label with dates for easy rotation.
Reheating Methods
Oven Reheating (Best Method):
Preheat oven to 375°F (190°C) and place nuggets on a wire rack over a baking sheet. Then, heat for 8-10 minutes until crispy and warmed through. This method maintains the best texture.
Air Fryer Method:
Heat air fryer to 350°F (175°C) and cook nuggets for 3-4 minutes. Furthermore, this method quickly restores crispiness without drying out the chicken.
Microwave Method (Quick but Less Ideal):
Microwave on medium power for 30-60 seconds, checking frequently. However, this method may soften the coating but works for quick reheating.
Make-Ahead Tips
Prepare nuggets through the breading stage and freeze on baking sheets. Subsequently, transfer to freezer bags once solid. Therefore, you can cook frozen nuggets directly, adding 2-3 minutes to cooking time.
For meal prep, cook large batches and portion into individual containers. Additionally, pair with different sides throughout the week for varied meals.
Nutritional Information
Basic Nutritional Profile
Per serving (approximately 4-5 nuggets):
-
Calories: 280-320
-
Protein: 25-28 grams
-
Carbohydrates: 15-20 grams
-
Fat: 12-16 grams
-
Sodium: 400-500 milligrams
Health Benefits
High-Quality Protein:
Chicken provides complete protein containing all essential amino acids. Furthermore, protein supports muscle development and maintenance while promoting satiety.
Controlled Ingredients:
Homemade nuggets eliminate preservatives, artificial colors, and excess sodium found in processed versions. Additionally, you can control oil quality and cooking methods.
Customizable Nutrition:
Adjust ingredients to meet specific dietary needs. Moreover, use whole grain coatings, lean chicken breast, and baking methods to improve nutritional profile.
Making Nuggets Healthier
Reduce Fat Content:
-
Choose baking over frying
-
Use cooking spray instead of oil
-
Select lean chicken breast over thighs
Increase Fiber:
-
Add ground flaxseed to coating
-
Use whole wheat breadcrumbs
-
Incorporate finely chopped vegetables
Boost Nutrients:
-
Add nutritional yeast for B vitamins
-
Include herbs and spices for antioxidants
-
Serve with vegetable sides for balanced nutrition
Troubleshooting Common Issues
Coating Problems
Coating Falls Off During Cooking:
This usually results from inadequate resting time or improper breading technique. Therefore, ensure each piece is thoroughly coated and allow 15-20 minutes rest before cooking. Additionally, press coating firmly onto chicken.
Uneven Browning:
Inconsistent oil temperature or overcrowding causes uneven browning. Furthermore, maintain steady temperature and cook in smaller batches. Also, turn nuggets carefully to ensure all sides cook evenly.
Soggy Coating:
Low oil temperature or insufficient draining creates soggy coating. Subsequently, verify oil temperature with thermometer and drain on wire racks rather than paper towels.
Texture Issues
Dry Chicken Interior:
Overcooking results in dry, tough chicken. Moreover, use a meat thermometer to ensure internal temperature reaches exactly 165°F (74°C). Additionally, avoid cutting into nuggets immediately after cooking.
Tough or Chewy Texture:
Using incorrect chicken cuts or overcooking causes toughness. Furthermore, choose tender cuts like chicken breast and don’t exceed recommended cooking times.
Temperature Control
Oil Temperature Fluctuation:
Heavy pot with thick bottom maintains more consistent temperature. Additionally, adjust heat as needed and allow temperature to stabilize between batches.
Undercooked Centers:
Cut chicken pieces uniformly to ensure even cooking. Moreover, larger pieces require longer cooking times or lower temperatures to cook through without burning coating.
Prevention Strategies
Always pat chicken dry before breading to improve coating adhesion. Furthermore, season each layer for optimal flavor distribution. Additionally, maintain organized workspace to streamline the breading process.
Check out our comprehensive guide on [chicken preparation techniques] for additional tips on selecting and preparing chicken for various recipes.
Frequently Asked Questions
Can I make crispy homemade chicken nuggets ahead of time?
Yes, you can prepare nuggets through the breading stage and freeze them. Furthermore, this allows you to cook fresh nuggets anytime. Additionally, fully cooked nuggets store well in the refrigerator for 3-4 days.
What’s the best oil temperature for frying nuggets?
Maintain oil temperature at 350°F (175°C) for optimal results. Moreover, this temperature creates crispy coating while cooking chicken thoroughly. Additionally, use a thermometer for accuracy.
How do I know when nuggets are fully cooked?
Use a meat thermometer to ensure internal temperature reaches 165°F (74°C). Furthermore, properly cooked nuggets have golden-brown coating and clear juices. Additionally, cutting into one nugget can verify doneness.
Can I use chicken thighs instead of breast meat?
Absolutely! Chicken thighs provide more flavor and remain juicier than breast meat. However, remove skin and excess fat before cutting. Moreover, thighs may require slightly longer cooking time.
Why are my homemade nuggets not as crispy as store-bought?
Commercial nuggets often use specialized coatings and preservatives for extra crispiness. Furthermore, double-breading and proper oil temperature improve home results. Additionally, using panko breadcrumbs enhances texture.
What’s the best way to reheat leftover nuggets?
Oven reheating at 375°F (190°C) for 8-10 minutes provides best results. Moreover, placing nuggets on a wire rack prevents soggy bottoms. Additionally, air fryers work excellently for reheating.
Can I make gluten-free crispy homemade chicken nuggets?
Yes, substitute regular flour and breadcrumbs with gluten-free alternatives. Furthermore, ensure all seasonings are certified gluten-free. Additionally, almond flour creates excellent gluten-free coating.
How long should I let breaded nuggets rest before cooking?
Allow breaded nuggets to rest for 15-20 minutes before cooking. Subsequently, this helps coating adhere better during cooking process. Moreover, chilled nuggets hold coating more effectively.
Is it safe to reuse frying oil?
You can reuse oil 2-3 times if properly strained and stored. However, discard oil that smells rancid, appears dark, or foams excessively. Furthermore, filter oil through fine mesh strainer after each use.
What sides pair best with chicken nuggets?
Classic sides include french fries, coleslaw, and mac and cheese. Additionally, healthier options include roasted vegetables, sweet potato fries, and fresh salads. Moreover, various dipping sauces complement nuggets perfectly.
Conclusion
Creating perfectly crispy homemade chicken nuggets transforms ordinary chicken into an extraordinary family favorite that rivals any restaurant version. Moreover, this comprehensive guide provides everything needed to master the art of nugget making, from ingredient selection to cooking techniques and storage solutions.
The key to exceptional crispy homemade chicken nuggets lies in attention to detail throughout every step of the process. Furthermore, proper breading technique, temperature control, and quality ingredients ensure consistently delicious results that exceed expectations.
Whether you prefer the traditional deep-fried method or the healthier baked alternative, these techniques guarantee golden, crispy nuggets with tender, juicy interiors. Additionally, the endless variation possibilities mean you’ll never run out of new flavors to explore.
Ready to create the most delicious homemade chicken nuggets your family has ever tasted? Start gathering your ingredients today and experience the satisfaction of serving restaurant-quality nuggets from your own kitchen. Furthermore, don’t forget to experiment with different seasonings and dipping sauces to make this recipe uniquely yours.
Transform dinner time into something special with these incredible crispy homemade chicken nuggets that bring families together around the table. Subsequently, once you master this technique, you’ll wonder why you ever relied on store-bought alternatives. Make tonight the night you discover just how amazing homemade really can be!
Crispy Homemade Chicken Nuggets
Description
Crispy Homemade Chicken Nuggets
Ingredients
-
1.5 pounds boneless, skinless chicken breasts, cut into 1-inch cubes
-
1½ cups panko breadcrumbs
-
1½ teaspoons kosher salt
-
1 teaspoon black pepper
-
1 teaspoon onion powder
-
1 teaspoon paprika
-
½ teaspoon garlic powder
-
¼ teaspoon cayenne pepper (optional)
-
2 large eggs
-
2 tablespoons almond milk or milk of choice
-
Nonstick olive oil cooking spray or oil for frying
Instructions
-
Preheat oven to 400°F. Spread panko breadcrumbs evenly on a baking sheet and spray with nonstick cooking spray. Bake for 2 minutes, stir or shake, then bake for another 2-4 minutes until golden brown. Remove and set aside but keep the oven on.
-
Mix spices into the toasted panko breadcrumbs: salt, pepper, onion powder, paprika, garlic powder, and optional cayenne.
-
Prepare egg wash: In a separate bowl, whisk eggs and milk together.
-
Coat chicken: Dip each chicken cube into the egg wash, then coat well in the seasoned panko breadcrumbs. Use tongs for coating and transfer coated nuggets to a wire rack on a baking sheet, spacing about 1 inch apart.
-
Spray and bake: Spray tops of the nuggets generously with cooking spray. Bake for 15-20 minutes, flipping halfway through, until cooked through and internal temperature reaches 165°F. Nuggets should be crispy and golden.
-
Serve: Enjoy hot with favorite dipping sauces like BBQ, honey mustard, or ketchup.
These crispy chicken nuggets take about 30 minutes from start to finish and serve 4.
Alternatively, for frying:
-
Heat oil for deep frying to 350°F. Fry breaded nuggets for 6-7 minutes until golden and crispy. Drain on paper towels and serve hot.