
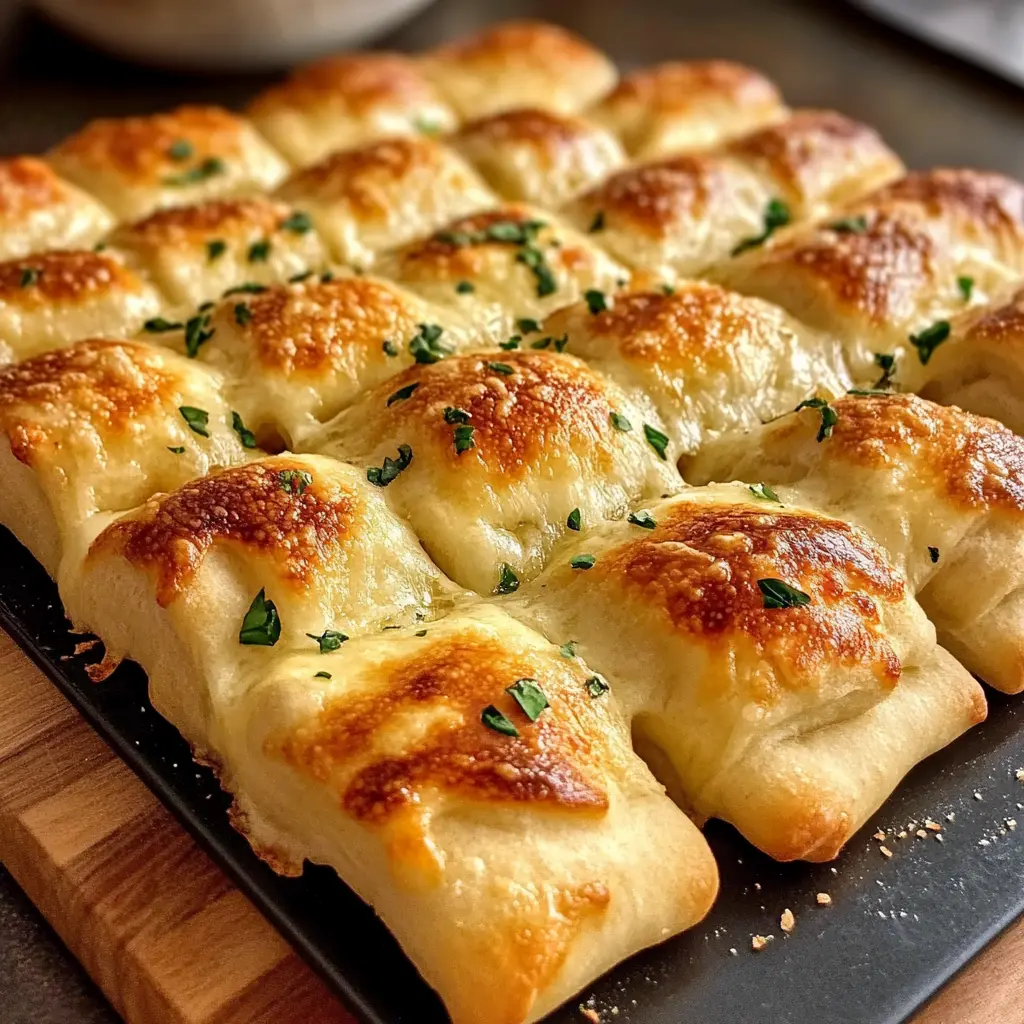
Homemade Cheesy Garlic Breadsticks
Introduction
Imagine pulling golden-brown, bubbling homemade cheesy garlic breadsticks from your oven, the aroma of garlic and melted cheese filling your kitchen. These irresistible treats combine the perfect blend of soft, pillowy dough with a crispy exterior, generous amounts of mozzarella, and aromatic garlic butter. Whether you’re serving them alongside pasta, soup, or enjoying them as a standalone snack, homemade cheesy garlic breadsticks deliver restaurant-quality flavor right from your own kitchen. This comprehensive guide will walk you through everything you need to know to create these delicious breadsticks at home, from dough preparation to the final golden-brown perfection.
Why Make Homemade Cheesy Garlic Breadsticks
Making cheesy garlic breadsticks from scratch offers numerous advantages over store-bought alternatives. First, you control every ingredient, ensuring freshness and quality. Additionally, homemade versions cost significantly less than restaurant orders. Furthermore, the satisfaction of creating these delicious treats yourself cannot be understated.
The customization possibilities are endless. You can adjust cheese quantities, garlic intensity, and seasoning levels. Moreover, making them fresh means you experience the ultimate texture—crispy outside, soft inside. Consequently, your family and guests will be amazed by your baking skills.
Finally, these breadsticks make excellent party food. They’re easy to prepare in advance. Plus, everyone loves them. Therefore, mastering this recipe adds a valuable skill to your cooking repertoire.
Essential Ingredients
For the Dough
Creating perfect breadsticks starts with quality ingredients. Here’s what you’ll need:
-
All-Purpose Flour (3½ cups): The foundation of your dough
-
Warm Water (1¼ cups): Activates the yeast (110°F)
-
Active Dry Yeast (2¼ teaspoons): Provides rise and texture
-
Granulated Sugar (2 tablespoons): Feeds the yeast
-
Salt (1 teaspoon): Enhances flavor
-
Olive Oil (2 tablespoons): Adds richness
For the Garlic Butter Topping
The signature flavor comes from this mixture:
-
Unsalted Butter (½ cup, melted): Creates richness
-
Fresh Garlic (4-6 cloves, minced): Provides aromatic punch
-
Italian Seasoning (1 teaspoon): Adds herbal notes
-
Fresh Parsley (2 tablespoons, chopped): Brightens flavor
-
Salt (½ teaspoon): Balances taste
For the Cheese Layer
Generous cheese makes these breadsticks irresistible:
-
Mozzarella Cheese (2 cups, shredded): Main cheese component
-
Parmesan Cheese (½ cup, grated): Adds sharpness and golden color
-
Optional: Cheddar Cheese (½ cup): For extra flavor depth
For high-quality baking techniques, check resources at King Arthur Baking.
Kitchen Tools and Equipment
Proper equipment ensures success. Therefore, gather these tools before starting:
-
Large Mixing Bowl: For combining ingredients
-
Stand Mixer or Wooden Spoon: Kneading dough efficiently
-
Measuring Cups and Spoons: Accurate measurements matter
-
Rolling Pin: Creates even thickness
-
Baking Sheet (13×9 inches): Standard size works perfectly
-
Parchment Paper: Prevents sticking
-
Pastry Brush: Applies butter evenly
-
Pizza Cutter or Sharp Knife: Creates clean cuts
-
Kitchen Thermometer: Checks water temperature
Having everything ready streamlines the process. Consequently, you’ll work more efficiently.
Step-by-Step Recipe Instructions
Preparing the Dough
First, activate your yeast properly. Combine warm water, sugar, and yeast in a bowl. Let it sit for 5-10 minutes until foamy. This indicates active yeast.
Next, mix the dough components. Add flour, salt, and olive oil to the yeast mixture. Stir until combined. The dough will look shaggy initially.
Then, knead the dough thoroughly. Use a stand mixer with a dough hook for 6-8 minutes. Alternatively, knead by hand for 10 minutes. The dough should become smooth and elastic.
First Rise
Place dough in a greased bowl. Cover with a clean kitchen towel. Let it rise in a warm spot for 60-90 minutes. The dough should double in size. This step develops flavor and texture.
Meanwhile, prepare your garlic butter mixture. Combine melted butter, minced garlic, Italian seasoning, parsley, and salt. Set aside for flavors to meld.
Shaping the Breadsticks
Once risen, punch down the dough gently. This releases excess air. Transfer to a lightly floured surface.
Roll the dough into a rectangle measuring approximately 13×9 inches. Keep thickness even throughout. This ensures uniform cooking.
Transfer to a parchment-lined baking sheet. Brush generously with half the garlic butter mixture. The butter adds flavor and helps cheese adhere.
Adding Cheese and Final Rise
Sprinkle mozzarella and parmesan cheese evenly across the surface. Don’t skip corners. Cheese should cover the entire area.
Cover loosely with plastic wrap. Let rest for 20-30 minutes. This brief rise makes breadsticks tender.
Meanwhile, preheat your oven to 425°F. Proper temperature ensures golden-brown results.
Baking to Perfection
Remove plastic wrap carefully. Bake for 12-15 minutes. Watch for golden-brown cheese and edges.
Remove from oven when cheese bubbles and browns slightly. Immediately brush with remaining garlic butter. This adds extra flavor and shine.
Let cool for 2-3 minutes before cutting. Use a pizza cutter for clean lines. Cut into 12-16 breadsticks depending on preferred size.
Tips for Perfect Breadsticks Every Time
Dough Consistency Matters
Your dough should feel slightly tacky but not sticky. If too sticky, add flour one tablespoon at a time. Conversely, if too dry, add water gradually. Proper consistency creates the best texture.
Temperature Control
Yeast thrives at specific temperatures. Water should be 110°F—warm to touch but not hot. Furthermore, rising occurs best in 75-80°F environments. Therefore, place dough near a warm oven or in a sunny spot.
Fresh Garlic Superiority
Fresh garlic significantly outperforms garlic powder. It provides robust, authentic flavor. Additionally, mincing garlic finely distributes flavor evenly. However, avoid burning garlic in butter—it becomes bitter.
Cheese Selection
Use freshly shredded cheese rather than pre-shredded varieties. Pre-shredded cheese contains anti-caking agents that affect melting. Consequently, freshly shredded mozzarella melts beautifully and creates superior texture.
Don’t Overbake
Watch breadsticks carefully during the final minutes. Overbaking creates dry, tough results. Instead, remove when cheese just begins browning. Residual heat continues cooking briefly.
Variations and Flavor Combinations
Herb and Cheese Variations
Experiment with different cheese combinations. Try adding:
-
Asiago and Romano: Creates sharper, nuttier flavor
-
Provolone and Mozzarella: Offers mild, creamy taste
-
Smoked Gouda: Adds sophisticated smokiness
Additionally, enhance herbs beyond Italian seasoning. Consider fresh rosemary, thyme, or basil. These create distinctive flavor profiles.
Spicy Garlic Breadsticks
Add red pepper flakes to garlic butter for heat. Start with ½ teaspoon and adjust upward. Furthermore, cayenne pepper provides different heat intensity. Therefore, customize spiciness to your preference.
Stuffed Breadstick Variation
Roll out dough thinner. Add cheese and toppings on half. Fold dough over and seal edges. Cut into individual breadsticks. This creates delicious stuffed versions.
Sweet Garlic Breadsticks
Replace garlic butter with cinnamon-sugar mixture. Use cream cheese instead of mozzarella. These make excellent dessert breadsticks. However, adjust sweetness to taste.
Check out our guide on [insert link: Italian appetizers] for more ideas.
Serving Suggestions
Perfect Pairings
Cheesy garlic breadsticks complement numerous dishes beautifully:
-
Pasta Dishes: Marinara-based sauces pair excellently
-
Soups: Tomato soup creates classic combination
-
Salads: Caesar or Italian salads work wonderfully
-
Main Courses: Chicken parmesan or lasagna match perfectly
Dipping Sauces
Enhance your breadsticks with various dips:
-
Marinara Sauce: Classic Italian choice
-
Alfredo Sauce: Creamy, indulgent option
-
Garlic Aioli: Rich, garlicky complement
-
Ranch Dressing: Cooling contrast
-
Pesto: Fresh, herbaceous flavor
Party Presentation
Arrange breadsticks upright in a tall glass. This creates visual appeal. Alternatively, fan them on a platter around dipping sauce. Additionally, garnish with fresh parsley for color.
Storage and Reheating Guidelines
Short-Term Storage
Store cooled breadsticks in an airtight container. They remain fresh at room temperature for 1-2 days. However, refrigeration extends freshness to 4-5 days.
Before storing, ensure breadsticks cool completely. Otherwise, condensation creates sogginess. Consequently, room temperature storage works best short-term.
Freezing Instructions
Freeze breadsticks for longer storage. Wrap individually in plastic wrap. Then, place in freezer bags. They keep well for 2-3 months.
Alternatively, freeze unbaked dough. Shape breadsticks, add toppings, then freeze. Bake directly from frozen, adding 5-7 minutes to cooking time.
Reheating Methods
Several methods restore freshness effectively:
Oven Method: Preheat to 350°F. Wrap breadsticks in foil. Heat for 10-12 minutes. This maintains texture best.
Toaster Oven: Heat at 350°F for 5-7 minutes. Watch carefully to prevent burning. Works excellently for small quantities.
Microwave: Heat for 15-20 seconds only. However, this softens crust significantly. Therefore, use only when necessary.
Air Fryer: Heat at 350°F for 3-4 minutes. This restores crispiness wonderfully.
Nutritional Information
Understanding nutritional content helps meal planning. Per breadstick (recipe makes 14):
-
Calories: Approximately 180-200
-
Protein: 7-8 grams
-
Carbohydrates: 20-22 grams
-
Fat: 8-10 grams
-
Fiber: 1 gram
-
Sodium: 280-320 milligrams
-
Calcium: 15% daily value
These values vary based on cheese quantities and portion sizes. Therefore, adjust ingredients to meet dietary needs.
Making Healthier Versions
Reduce calories without sacrificing flavor:
-
Use part-skim mozzarella instead of whole milk
-
Reduce butter quantity slightly
-
Add whole wheat flour for increased fiber
-
Use less cheese on top
-
Incorporate vegetables into dough
However, remember that moderation allows enjoyment. Therefore, occasional indulgence fits balanced eating.
Troubleshooting Common Issues
Dough Won’t Rise
Several factors prevent proper rising. First, check yeast freshness—expired yeast fails. Additionally, water temperature matters critically. Too hot kills yeast, too cold slows it.
Moreover, drafty environments inhibit rising. Therefore, find warm, draft-free spots. Finally, give dough adequate time. Rushing produces dense breadsticks.
Breadsticks Turn Out Tough
Overkneading or overbaking causes toughness. Knead only until smooth and elastic. Furthermore, bake just until golden. Consequently, monitor closely near completion.
Additionally, too much flour creates dry, tough texture. Measure accurately. Therefore, use proper measuring techniques.
Cheese Burns Before Breadsticks Cook
Lower oven temperature to 400°F. Additionally, tent breadsticks with foil if browning too quickly. Furthermore, position oven rack in center position. This ensures even heat distribution.
Uneven Browning
Rotate baking sheet halfway through cooking. Ovens have hot spots naturally. Therefore, rotation ensures uniform results. Additionally, use light-colored baking sheets. Dark pans increase browning speed.
Soggy Breadsticks
Several issues cause sogginess. First, ensure dough isn’t too wet initially. Additionally, don’t add excessive butter or toppings. Finally, bake thoroughly before removing.
Moreover, cool breadsticks on wire racks. This prevents steam accumulation underneath. Consequently, bottoms stay crispy.
Frequently Asked Questions
Can I make homemade cheesy garlic breadsticks ahead of time?
Yes, absolutely. Prepare dough through the first rise. Refrigerate overnight in a covered bowl. The next day, bring to room temperature for 30 minutes. Then, continue with shaping and baking. Alternatively, shape completely and refrigerate unbaked. Bake directly from refrigerator, adding 3-5 minutes.
What’s the best cheese for garlic breadsticks?
Mozzarella works best as the primary cheese. It melts beautifully and provides classic flavor. However, combining mozzarella with parmesan creates superior taste. Additionally, experimenting with provolone, asiago, or fontina adds variety.
Can I use instant yeast instead of active dry yeast?
Yes, instant yeast works perfectly. Use the same quantity. However, you can skip the activation step. Mix instant yeast directly with dry ingredients. Then, add liquids and proceed normally.
How do I prevent garlic from burning?
Use lower oven temperatures or add garlic after baking. Alternatively, mix garlic into butter but brush on after baking. Furthermore, minced garlic burns faster than garlic powder. Therefore, monitor carefully.
Why are my breadsticks dense?
Dense texture indicates several possible issues. First, insufficient rising time produces heavy breadsticks. Additionally, too much flour creates density. Moreover, dead yeast prevents proper rise. Finally, overkneading develops excessive gluten.
Can I make these breadsticks gluten-free?
Yes, using gluten-free flour blends. However, results differ from traditional versions. Add xanthan gum if your blend lacks it. Additionally, gluten-free dough requires different handling. Therefore, follow gluten-free bread recipes closely.
How long do breadsticks stay fresh?
Room temperature storage keeps breadsticks fresh for 1-2 days. Refrigeration extends freshness to 4-5 days. However, freezing preserves quality for 2-3 months. Proper storage in airtight containers prevents staleness.
Can I add vegetables to breadstick dough?
Absolutely. Finely chopped sun-dried tomatoes, spinach, or roasted peppers work wonderfully. However, ensure vegetables are well-drained. Excess moisture affects dough consistency. Therefore, pat dry before incorporating.
Conclusion
Mastering homemade cheesy garlic breadsticks opens countless culinary possibilities. These versatile treats enhance any meal while providing satisfying snacks. Moreover, the recipe’s simplicity makes it accessible for all skill levels. From perfect dough consistency to golden-brown cheese, each step contributes to outstanding results.
Remember the key elements: quality ingredients, proper rising time, and careful baking. Additionally, don’t hesitate experimenting with cheese combinations and seasonings. Furthermore, practice improves technique over time. Therefore, keep making these delicious breadsticks regularly.
The satisfaction of pulling fresh, aromatic breadsticks from your oven is unmatched. Your family and friends will request them repeatedly. Consequently, this recipe becomes a household favorite quickly.
Homemade Cheesy Garlic Breadsticks
Description
Homemade Cheesy Garlic Breadsticks
Ingredients
• 1 lb pizza dough (store-bought or homemade)
• 3 tbsp butter, melted
• 3 cloves garlic, minced
• 1 tsp dried Italian seasoning
• 1 1/2 cups shredded mozzarella cheese
• 1/4 cup grated Parmesan
• Optional: chopped parsley for garnish
Instructions
-
Preheat oven to 425°F (220°C).
-
Roll pizza dough into a rectangle (or oval) on a parchment-lined baking sheet.
-
Mix melted butter, garlic, and Italian seasoning. Brush evenly over the dough.
-
Sprinkle mozzarella and Parmesan evenly on top.
-
Bake 12–15 minutes, or until golden and cheese is bubbly.
-
Optional: sprinkle parsley over the hot breadsticks before serving.
-
Slice into sticks and serve warm with marinara or ranch for dipping.