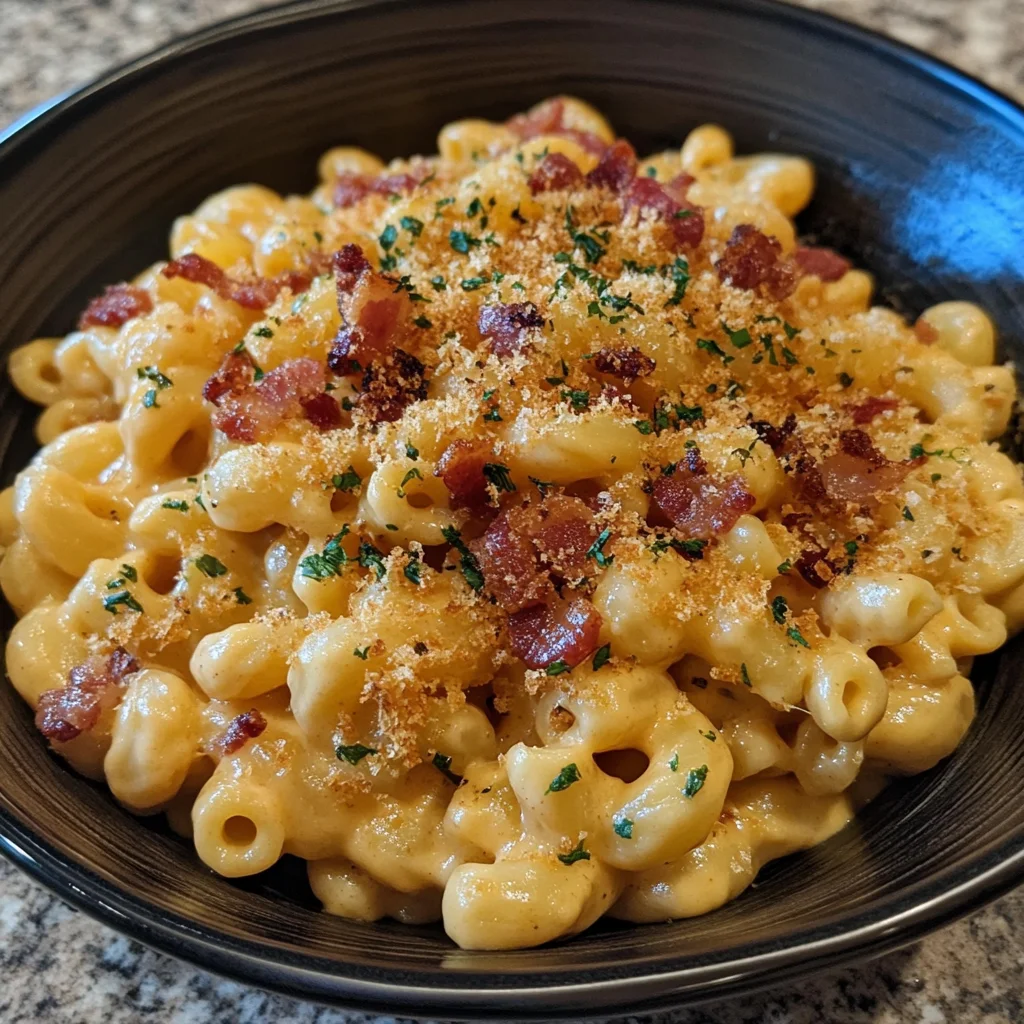
Loaded Cheddar Bacon Ranch Mac & Cheese: The Ultimate Comfort Food Guide
Introduction
Loaded Cheddar Bacon Ranch Mac & Cheese transforms ordinary macaroni into an extraordinary comfort food masterpiece. This dish combines three beloved flavors into one irresistible casserole that satisfies even the pickiest eaters. The creamy cheddar cheese sauce coats every pasta curve perfectly. Moreover, crispy bacon adds a smoky crunch. Finally, ranch seasoning brings herby, tangy notes that elevate the entire experience. Whether you’re feeding a hungry family or preparing for a potluck gathering, this Loaded Cheddar Bacon Ranch Mac & Cheese delivers restaurant-quality results right from your home kitchen.
What Makes This Dish So Special
The Perfect Flavor Trio
The combination of cheddar, bacon, and ranch creates an unforgettable taste experience. Sharp cheddar cheese provides a bold, tangy foundation that melts into a velvety sauce. Meanwhile, bacon contributes smoky richness and satisfying texture contrast. Furthermore, ranch seasoning incorporates garlic, onion, dill, and parsley into every bite. These three elements work together harmoniously, creating depth and complexity rarely found in traditional macaroni dishes.
Comfort Food at Its Finest
This Loaded Cheddar Bacon Ranch Mac & Cheese embodies everything people love about comfort food. The dish features creamy, cheesy pasta that warms you from the inside out. Additionally, the crispy bacon topping provides textural interest that keeps every forkful exciting. Ranch seasoning adds a familiar, crowd-pleasing flavor that appeals to both adults and children. As a result, this recipe has become a favorite for family dinners, gatherings, and special occasions.
Versatility for Any Occasion
This recipe adapts beautifully to various dining situations and preferences. You can serve it as a main course for weeknight dinners. Alternatively, it makes an impressive side dish for barbecues and holiday meals. The casserole format allows for easy transportation to potlucks and parties. Moreover, you can customize ingredients based on dietary needs or personal preferences.
Essential Ingredients
Pasta Selection
Elbow macaroni remains the classic choice for this Loaded Cheddar Bacon Ranch Mac & Cheese recipe. These small, curved noodles capture cheese sauce in their hollow centers. Generally, you’ll need 16 ounces of dried pasta for a standard 9×13-inch casserole. However, other pasta shapes like cavatappi or shells work equally well. The key is selecting pasta with enough surface area to hold the rich sauce.
Cheese Components
Sharp cheddar cheese forms the backbone of the sauce in this recipe. You’ll need approximately 2 to 2.5 cups of freshly shredded cheddar for optimal results. Freshly shredded cheese melts more smoothly than pre-shredded varieties. Additionally, many recipes incorporate Parmesan cheese for added depth. Some variations include cream cheese or Fontina for extra creaminess. These cheese combinations create a complex, restaurant-quality sauce that coats pasta beautifully.
Bacon Requirements
Bacon is essential to achieving authentic Loaded Cheddar Bacon Ranch Mac & Cheese flavor. Most recipes call for 6 to 10 slices of regular-cut bacon. Cook the bacon until crispy, then crumble it into bite-sized pieces. Interestingly, you can use some bacon fat for added flavor when making the cheese sauce. This technique infuses the entire dish with smoky richness.
Ranch Seasoning Mix
Ranch seasoning provides the distinctive flavor profile that defines this dish. One standard 1-ounce packet of dried ranch dressing mix works perfectly. Alternatively, you can create homemade ranch seasoning using buttermilk powder, garlic powder, onion powder, dried dill, dried parsley, dried chives, salt, pepper, and mustard powder. Homemade versions allow you to control sodium levels and adjust flavors to your preference. Both options deliver the tangy, herby taste that makes this Loaded Cheddar Bacon Ranch Mac & Cheese unforgettable.
Dairy Ingredients
The creamy sauce requires specific dairy components for perfect consistency. Most recipes use 2 cups of half-and-half as the base liquid. Some variations incorporate heavy cream for extra richness. Additionally, you’ll need butter for creating the roux, typically 3 tablespoons. Chicken broth adds savory depth to the sauce in some recipes. These dairy ingredients work together to create a luxurious, velvety texture.
Flour and Seasonings
All-purpose flour serves as the thickening agent in the cheese sauce. You’ll need approximately 3 tablespoons to create a proper roux. Basic seasonings include salt and black pepper to taste. Garlic enhances the savory profile significantly. Some recipes incorporate dry mustard powder for additional depth. These seasonings complement the ranch flavor without overwhelming the dish.
Optional Toppings
Breadcrumbs create an irresistible golden crust on baked Loaded Cheddar Bacon Ranch Mac & Cheese. Panko breadcrumbs deliver superior crunch compared to regular varieties. Mix approximately 1/3 cup of breadcrumbs with 2 tablespoons of melted butter. For added color and freshness, sprinkle chopped fresh parsley over the finished dish. These toppings transform the casserole from simple to spectacular.
Kitchen Tools and Equipment
Essential Cookware
Preparing Loaded Cheddar Bacon Ranch Mac & Cheese requires specific kitchen equipment for best results. First, you’ll need a large stockpot for cooking pasta, preferably with a capacity of at least 6 quarts. Additionally, a separate large saucepan or skillet is necessary for making the cheese sauce. For baked versions, a 9×13-inch baking dish works perfectly. Enamel-coated bakeware distributes heat evenly and prevents sticking.
Preparation Tools
Several smaller tools make the cooking process smoother and more efficient. A whisk is essential for creating lump-free cheese sauce. Furthermore, you’ll need a colander for draining cooked pasta. A slotted spoon helps remove bacon from the skillet while leaving flavorful fat behind. Additionally, measuring cups and spoons ensure accurate ingredient proportions. Finally, a cheese grater allows you to shred fresh cheese for optimal melting.
Storage Containers
Proper storage containers extend the life of leftover Loaded Cheddar Bacon Ranch Mac & Cheese. Choose shallow, airtight containers that seal completely. These containers prevent moisture loss and protect against contamination. Label each container with the date to track freshness. For freezing portions, select freezer-safe containers that can withstand low temperatures.
Step-by-Step Cooking Instructions
Preparing the Bacon
Start by cooking bacon until it reaches perfect crispness. Place diced bacon in a large, cold skillet. Turn the heat to medium-low and cook slowly, stirring occasionally. This method renders fat evenly and prevents burning. Once crispy, transfer bacon to a paper towel-lined plate using a slotted spoon. Drain all but 1 tablespoon of bacon fat if using it for the cheese sauce. Otherwise, discard the fat and wipe the skillet clean.
Cooking the Pasta
Proper pasta preparation ensures your Loaded Cheddar Bacon Ranch Mac & Cheese has perfect texture. Bring a large pot of salted water to a rolling boil. Add 16 ounces of elbow macaroni to the boiling water. However, here’s a crucial tip: cook the pasta 1 minute shy of al dente according to package directions. Undercooking prevents mushy pasta during baking. Drain the pasta thoroughly and drizzle with a small amount of olive oil to prevent sticking.
Creating the Cheese Sauce
The cheese sauce is the heart of Loaded Cheddar Bacon Ranch Mac & Cheese. Begin by melting 3 tablespoons of butter in a large saucepan over medium heat. Add minced garlic and cook for about 30 seconds until fragrant. Next, whisk in 3 tablespoons of flour, stirring constantly for 3 minutes until the mixture turns golden brown. This step, called making a roux, eliminates the raw flour taste. Gradually pour in 2 cups of half-and-half while whisking vigorously to prevent lumps. If using chicken broth, add 1 cup along with the half-and-half. Continue whisking and bring the mixture to a simmer. Cook for 3 to 5 minutes, stirring often, until the sauce thickens noticeably.
Adding Cheese and Seasonings
Once your sauce has thickened, reduce the heat to low before adding cheese. This prevents the cheese from separating or becoming grainy. Stir in all of the Parmesan cheese first, followed by half of the shredded cheddar. Mix gently until the cheese melts completely into the sauce. Next, whisk in the ranch seasoning mix, distributing it evenly throughout the sauce. Add salt and black pepper to taste, adjusting seasonings as needed. The sauce should be smooth, creamy, and well-seasoned at this point.
Combining Ingredients
Now it’s time to bring all components together for your Loaded Cheddar Bacon Ranch Mac & Cheese. Pour the cheese sauce over the drained pasta and stir to coat every piece evenly. Add half of the crumbled bacon and mix thoroughly. Taste and adjust seasonings one final time before baking. Transfer the mixture to a greased 9×13-inch baking dish, spreading it evenly.
Baking and Finishing
Preheat your oven to 350°F (175°C) while you prepare the topping. Toss breadcrumbs with melted butter until evenly coated. Sprinkle the buttered breadcrumbs over the pasta mixture. Top with the remaining shredded cheddar cheese and crumbled bacon. Bake uncovered for 25 to 35 minutes until the topping turns golden brown and the edges bubble. Allow the dish to cool for at least 5 minutes before serving. This resting period lets the sauce thicken slightly and makes serving easier. Finally, garnish with chopped fresh parsley for a pop of color.
Tips for Perfect Results
Undercook Your Pasta
The most important tip for excellent Loaded Cheddar Bacon Ranch Mac & Cheese is pasta timing. Cook your macaroni 3 to 4 minutes less than the package directions suggest. The pasta continues cooking in the oven, absorbing sauce and developing perfect texture. Overcooked pasta becomes mushy and unappetizing in baked dishes. This technique ensures every bite has ideal firmness.
Shred Cheese Fresh
Pre-shredded cheese contains anti-caking agents that prevent smooth melting. Therefore, always shred cheese fresh from a block for your Loaded Cheddar Bacon Ranch Mac & Cheese. Freshly shredded cheese creates silkier, creamier sauce. Additionally, it delivers more intense cheese flavor. This small extra effort significantly improves final results.
Make the Roux Properly
Creating a proper roux ensures your cheese sauce has the right consistency. Cook the butter and flour mixture for at least 3 minutes over medium heat. This cooking time eliminates the raw flour taste that can ruin your Loaded Cheddar Bacon Ranch Mac & Cheese. The roux should turn a light golden color and smell slightly nutty. Whisking constantly prevents burning and promotes even cooking.
Control the Heat
Temperature control is critical when making cheese sauce for this dish. Add cheese only after reducing heat to low or removing the pan from heat entirely. High heat causes cheese proteins to separate, resulting in grainy, broken sauce. If cheese doesn’t melt completely, return the pan to low heat briefly while stirring. Patience produces smooth, luxurious Loaded Cheddar Bacon Ranch Mac & Cheese.
Toast Breadcrumbs First
For the crispiest topping, toast breadcrumbs before adding them to your casserole. Melt butter in a skillet over medium heat and add panko breadcrumbs. Stir frequently until breadcrumbs turn light golden brown. This pre-toasting guarantees a crunchy, golden crust on your Loaded Cheddar Bacon Ranch Mac & Cheese. Untoasted breadcrumbs can become soggy during baking.
Avoid Overcrowding
Use a baking dish with adequate surface area for even cooking. A 9×13-inch dish works perfectly for standard recipes. Overcrowding in a smaller dish prevents proper heat circulation. Additionally, a larger surface area creates more crispy edges that everyone loves. Proper sizing ensures your Loaded Cheddar Bacon Ranch Mac & Cheese cooks evenly throughout.
Variations and Customizations
Protein Additions
Transform your Loaded Cheddar Bacon Ranch Mac & Cheese into a complete meal by adding protein. Cooked, diced chicken is the most popular addition, requiring 2 to 3 cups. Season the chicken with ranch seasoning before stirring it into the pasta. Alternatively, leftover rotisserie chicken saves preparation time. Another option is adding cooked ground beef or turkey for a heartier dish. These proteins turn your Loaded Cheddar Bacon Ranch Mac & Cheese into a satisfying one-dish dinner.
Vegetable Mix-Ins
Vegetables add nutrition and color to Loaded Cheddar Bacon Ranch Mac & Cheese without compromising flavor. Steamed broccoli florets complement the cheese sauce beautifully. Frozen peas provide sweetness and bright green color. Diced tomatoes add freshness and acidity that cuts through richness. Sautéed mushrooms contribute earthy depth. Simply fold vegetables into the pasta before baking for a more balanced meal.
Cheese Combinations
Experimenting with different cheeses creates unique versions of Loaded Cheddar Bacon Ranch Mac & Cheese. Sharp white cheddar offers tangier flavor than yellow cheddar. Mozzarella adds extra stretchiness and mild flavor. Fontina cheese brings nutty, buttery notes. Gruyere provides sophisticated, complex taste. Mix and match cheeses while keeping the total amount around 2 to 3 cups.
Spice Level Adjustments
Customize the heat level in your Loaded Cheddar Bacon Ranch Mac & Cheese to suit different preferences. Add cayenne pepper to the cheese sauce for subtle warmth. Red pepper flakes sprinkled on top provide visible heat. Diced jalapeños mixed into the pasta offer more intense spiciness. For milder versions, simply omit any spicy additions and rely on the ranch seasoning alone.
Stovetop Version
When time is limited, prepare Loaded Cheddar Bacon Ranch Mac & Cheese entirely on the stovetop. Follow the same steps for cooking bacon, making cheese sauce, and combining with pasta. However, skip the baking step and serve immediately after stirring in all ingredients. Stovetop versions have creamier texture since the pasta doesn’t absorb as much sauce. This method reduces total cooking time by about 30 minutes.
Nutritional Information
Calorie Content
Loaded Cheddar Bacon Ranch Mac & Cheese is an indulgent dish with substantial calories. A typical serving contains approximately 450 to 500 calories. However, exact numbers vary based on specific ingredients and portion sizes. The calorie density comes primarily from cheese, cream, and pasta. Restaurant versions tend to be higher in calories than homemade preparations.
Macronutrient Breakdown
Understanding the macronutrient profile helps you fit Loaded Cheddar Bacon Ranch Mac & Cheese into your diet. A standard serving provides about 20 grams of protein from cheese, bacon, and pasta. Carbohydrates total approximately 30 to 50 grams per serving, mainly from pasta. Fat content ranges from 20 to 30 grams, with saturated fat comprising a significant portion. This macronutrient balance makes the dish quite filling and satisfying.
Vitamins and Minerals
Loaded Cheddar Bacon Ranch Mac & Cheese offers several important micronutrients. Calcium content is particularly impressive, with one serving providing 45-50% of daily needs. Vitamin A contributes about 30% of daily requirements. The dish also supplies meaningful amounts of iron, zinc, and B vitamins. However, sodium levels can be high, often reaching 600-1000 mg per serving.
Making It Healthier
Several modifications can reduce the calorie and fat content of Loaded Cheddar Bacon Ranch Mac & Cheese. Substitute low-fat milk for half-and-half to cut fat significantly. Use reduced-fat cheese while maintaining flavor. Replace half the pasta with cauliflower florets for added nutrition. Turkey bacon contains less fat than regular bacon. These swaps create lighter versions without sacrificing the essential character of the dish.
Storage and Reheating Guidelines
Proper Storage Methods
Store leftover Loaded Cheddar Bacon Ranch Mac & Cheese correctly to maintain quality and safety. Transfer cooled leftovers to shallow, airtight containers within two hours of cooking. Shallow containers promote faster, more even cooling. Refrigerate at 40°F (4°C) or below immediately. Label containers with the date to track freshness. Properly stored, the dish stays fresh for 3 to 4 days in the refrigerator.
Freezing Instructions
Freezing extends the shelf life of Loaded Cheddar Bacon Ranch Mac & Cheese significantly. Use freezer-safe containers or heavy-duty freezer bags for storage. Remove as much air as possible before sealing. Freeze at 0°F (-18°C) or below for up to 2 months. For best results, freeze before adding the breadcrumb topping. Thaw frozen portions in the refrigerator overnight before reheating.
Reheating Techniques
Several methods effectively reheat Loaded Cheddar Bacon Ranch Mac & Cheese while preserving texture. For oven reheating, preheat to 350°F (175°C). Transfer the portion to an oven-safe dish, cover with aluminum foil, and bake until heated through. Add a splash of milk before reheating to restore creaminess. Alternatively, reheat in the microwave using 30-second intervals, stirring between each. For stovetop reheating, warm slowly in a pot while stirring constantly. All reheated portions must reach an internal temperature of 165°F (74°C) for safety.
Recognizing Spoilage
Always check for signs of spoilage before consuming leftover Loaded Cheddar Bacon Ranch Mac & Cheese. Look for any off smells or sour odors. Check for slimy or discolored texture. If you notice any unusual appearance or smell, discard the leftovers immediately. When in doubt, throw it out to avoid foodborne illness.
Serving Suggestions
Side Dish Pairings
Complement your Loaded Cheddar Bacon Ranch Mac & Cheese with lighter side dishes that balance richness. A crisp green salad with vinaigrette provides refreshing contrast. Steamed green beans or asparagus add color and nutrition. Roasted Brussels sprouts offer slightly bitter notes that cut through the creamy sauce. Garlic bread makes the meal more substantial for hungry eaters.
Presentation Ideas
Serve Loaded Cheddar Bacon Ranch Mac & Cheese in ways that enhance visual appeal. Scoop individual portions into ramekins for elegant presentation. Garnish each serving with extra crumbled bacon and fresh herbs. Sprinkle paprika over the top for added color. These simple touches make the dish look restaurant-quality.
Occasions and Events
This versatile dish suits numerous dining occasions perfectly. Serve it as a main course for casual weeknight dinners. Bring it to potlucks and gatherings where it’s always a crowd-pleaser. Include it in holiday meal spreads as a comforting side dish. Loaded Cheddar Bacon Ranch Mac & Cheese also works well for game day parties and casual entertaining.
Common Mistakes to Avoid
Overcooking the Pasta
One frequent error ruins the texture of Loaded Cheddar Bacon Ranch Mac & Cheese entirely. Cooking pasta to full doneness before baking results in mushy, unappetizing noodles. Remember to stop cooking when pasta still has a white ring of uncooked starch in the center. This undercooking compensates for additional cooking time in the oven. Perfectly cooked pasta maintains slight firmness even after baking.
Using Pre-Shredded Cheese
Pre-shredded cheese is convenient but produces inferior Loaded Cheddar Bacon Ranch Mac & Cheese. Anti-caking agents coat pre-shredded cheese, preventing smooth melting. The sauce becomes grainy instead of silky. Additionally, pre-shredded cheese contains less moisture and flavor. Always take a few extra minutes to shred fresh cheese from a block.
Adding Cheese on High Heat
Temperature mistakes lead to broken, separated cheese sauce that ruins your dish. Adding cheese while the sauce is too hot causes proteins to seize and separate. The result is a grainy, oily mess instead of creamy Loaded Cheddar Bacon Ranch Mac & Cheese. Always reduce heat to low or remove the pan from heat before stirring in cheese. Gentle heat preserves the smooth texture everyone loves.
Skipping the Roux
Some cooks attempt to skip the flour-and-butter roux step to save time. However, this shortcut produces thin, runny sauce that doesn’t coat pasta properly. The roux provides essential thickening power for your Loaded Cheddar Bacon Ranch Mac & Cheese. Additionally, properly cooked roux adds nutty flavor depth. Never skip this crucial step despite the extra few minutes required.
Not Letting It Rest
Serving Loaded Cheddar Bacon Ranch Mac & Cheese immediately after removing it from the oven is tempting but problematic. The sauce needs several minutes to thicken and set properly. Cutting into the dish too soon results in runny, soupy texture. Allow at least 5 minutes of resting time before serving. This patience yields neater portions and better consistency.
Frequently Asked Questions
Can I make Loaded Cheddar Bacon Ranch Mac & Cheese ahead of time?
Yes, you can prepare this dish several hours or even a day in advance. Assemble everything up to the point of baking, then cover tightly and refrigerate. When ready to serve, let the dish come to room temperature for 30 minutes. Bake as directed, adding 5 to 10 extra minutes if needed. This make-ahead approach simplifies entertaining and meal planning significantly.
How do I prevent my cheese sauce from breaking?
Several techniques prevent cheese sauce separation in Loaded Cheddar Bacon Ranch Mac & Cheese. Always add cheese off the heat or over very low heat. Use freshly shredded cheese rather than pre-shredded varieties. Add cheese gradually while stirring constantly. Never let the sauce boil after adding cheese. These precautions ensure smooth, creamy results every time.
What’s the best pasta shape for this recipe?
Elbow macaroni is traditional and works excellently for Loaded Cheddar Bacon Ranch Mac & Cheese. However, other shapes like cavatappi, shells, or penne also capture sauce well. Choose pasta with ridges or hollow centers that hold creamy sauce. Avoid delicate shapes like angel hair that don’t stand up to baking. The best pasta shape ultimately depends on personal preference.
Can I use store-bought ranch dressing instead of seasoning mix?
While ranch seasoning mix is recommended, you can substitute ranch dressing with modifications. Use approximately 1/3 cup of ranch dressing and reduce the amount of milk or cream accordingly. However, this substitution changes the texture and consistency slightly. For best results, stick with dry ranch seasoning mix in your Loaded Cheddar Bacon Ranch Mac & Cheese. Alternatively, make homemade ranch seasoning for complete control over ingredients.
How long does leftover mac and cheese last?
Properly stored Loaded Cheddar Bacon Ranch Mac & Cheese stays fresh in the refrigerator for 3 to 4 days. Keep leftovers in airtight containers at 40°F (4°C) or below. For longer storage, freeze portions for up to 2 months. Always reheat to 165°F (74°C) before consuming. Discard any leftovers showing signs of spoilage.
Can I make this dish in a slow cooker?
While traditional oven-baked methods produce the best texture, slow cooker versions are possible. Cook pasta separately to al dente, then prepare cheese sauce in the slow cooker. Combine cooked pasta with sauce, bacon, and ranch seasoning. Keep on low heat for 1 to 2 hours, stirring occasionally. However, slow cooker Loaded Cheddar Bacon Ranch Mac & Cheese won’t have the crispy top that oven baking provides.
Conclusion
Loaded Cheddar Bacon Ranch Mac & Cheese represents the pinnacle of comfort food excellence. This dish combines creamy cheddar sauce, smoky bacon, and zesty ranch seasoning into one unforgettable casserole. Furthermore, the recipe offers endless customization possibilities to suit various preferences and dietary needs. Whether you’re preparing weeknight dinner or entertaining guests, this Loaded Cheddar Bacon Ranch Mac & Cheese delivers consistent, crowd-pleasing results. The techniques and tips outlined in this guide ensure perfect texture and flavor every single time. Most importantly, this dish proves that simple ingredients, when combined thoughtfully, create extraordinary culinary experiences.
Ready to experience the ultimate comfort food? Gather your ingredients and start making this Loaded Cheddar Bacon Ranch Mac & Cheese today. Your family and friends will thank you for introducing them to their new favorite dish !
Print