
The Ultimate Guide to Mastering Old-Fashioned Beef Stew
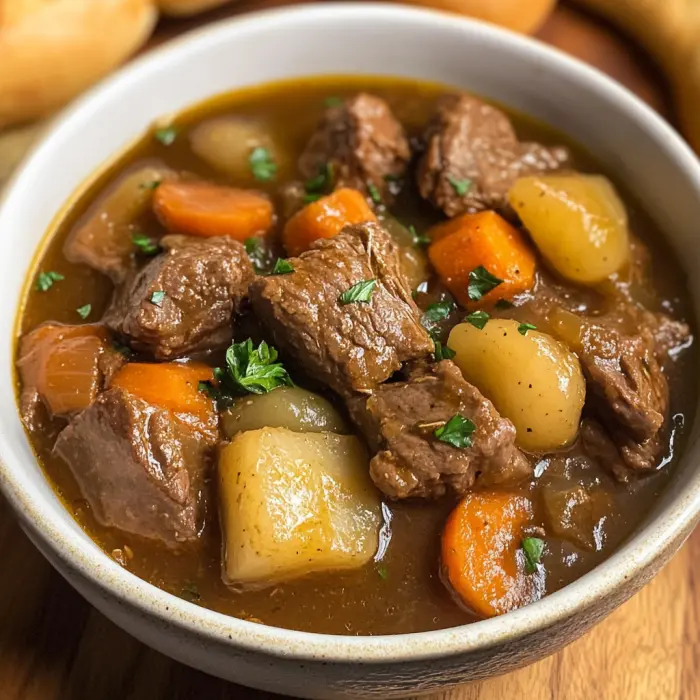
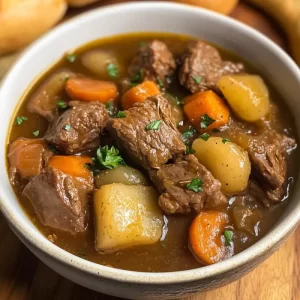
Ah, the unmistakable aroma of old-fashioned beef stew wafting from the kitchen. It’s more than just a meal; it’s a warm hug on a cold day, a spoonful of nostalgia, and the very definition of comfort food. Imagine tender chunks of beef that practically melt in your mouth, swimming in a rich, deeply savory gravy alongside soft, sweet carrots and hearty potatoes. This iconic dish, however, is a tale of two outcomes: either a life-affirming masterpiece or a bland, tough disappointment. Fortunately, crafting the former is within everyone’s reach.
This definitive guide is your personal roadmap to stew success. We’ll dive into the history, the science, and the soul of this classic beef stew. Ultimately, we’ll transform humble ingredients into an extraordinary homemade beef stew that will have everyone asking for seconds. So, grab your favorite pot—let’s get cooking.
Part 1: Introduction & The Foundation of Flavor
Why This Classic Dish Endures: A Brief History of Comfort
Believe it or not, the story of stew is as old as cooking itself. Across centuries and cultures, the basic principle remained brilliantly simple: slow-cook tough cuts of meat and hardy vegetables in a pot with liquid. This method wasn’t about gourmet flair; on the contrary, it was about practicality and survival. It tenderized inexpensive stewing beef cuts and stretched a few ingredients to feed a whole family. For this reason, every culture has its own cherished version, from Hungary’s goulash to France’s pot-au-feu.
Consequently, this humble beginning is precisely why old-fashioned beef stew feels so deeply satisfying. It’s a culinary heirloom, connecting us to generations past through its simple, nourishing goodness. It’s a dish that speaks of home, resilience, and the magic of patience. If you’re curious about the global journey of this beloved dish, you can read about the fascinating history of stew on History.com.
The Holy Trinity: Selecting Your Core Ingredients
Here’s the unvarnished truth: a legendary stew isn’t made with fancy techniques alone. In fact, it all starts with choosing the right players for your team. Skimp here, and you’ll be fighting an uphill battle for flavor.
The Beef: Choosing the Right Cut for a Fall-Apart Tender Stew
This is the most critical decision you’ll make. Do not, I repeat, do not just grab any pre-cut “stew meat” from the store. Those packages are often a mystery mix of lean and tough cuts that will never become truly tender. Instead, you want a well-marbled, tough cut rich with collagen and connective tissue.
Why? Because collagen is the secret superhero of stew. During the long, slow cooking process, it miraculously breaks down into silky, unctuous gelatin. This transformation is what gives you that fall-apart tender beef and luxuriously thick mouthfeel to the broth.
The undisputed champion for this is a boneless chuck roast. Cut from the shoulder, it has perfect marbling and connective tissue. Other excellent options include beef shoulder or round roast. Remember, fat equals flavor and tenderness in the world of hearty beef stew. For a detailed breakdown, the best cuts of beef for stewing from Beef It’s What’s For Dinner is a fantastic resource.
The Broth: Building a Deep, Rich Base
The liquid in your pot is the environment where all the flavors mingle and deepen. While you can certainly use water, a good-quality broth provides a foundational layer of savoriness that water simply can’t match. For a truly next-level experience, use a rich beef stock. However, a robust store-bought beef broth works wonderfully in a pinch.
Furthermore, don’t be afraid to build complexity. A tablespoon of tomato paste adds a subtle sweetness and umami depth, while a splash of Worcestershire sauce introduces a savory tang. These little boosts are the hidden weapons in your best beef stew recipe arsenal.
The Vegetables: Aromatic Foundations and Hearty Add-Ins
Not all vegetables are created equal in the stew pot. They are added at different stages for a reason!
-
The Aromatics (Mirepoix): This classic trio of onion, carrots, and celery is your flavor foundation. You’ll sauté them at the beginning to build a sweet, savory base layer for the entire dish.
-
The Hearty Vegetables: These are the main event alongside the beef. Starchy potatoes (like Russets or Yukon Golds) will break down slightly and help thicken the stew, while waxy potatoes (like Red Bliss) hold their shape better. Chunky carrots are a must—add them later so they stay intact and don’t turn to mush.
-
The Finishers: delicate vegetables like frozen peas or fresh parsley should be stirred in during the last few minutes of cooking. This preserves their bright color and fresh flavor, providing a lovely contrast to the rich stew.
Part 2: The Technique & The Recipe
Essential Tools for Stew Mastery
You don’t need a kitchen full of gadgets, but one piece of equipment truly stands out. A heavy Dutch oven is, without a doubt, the MVP for making traditional beef stew. Its incredible heat retention and distribution are perfect for achieving a perfect sear and maintaining a steady, gentle simmer for hours. Conversely, a sturdy heavy-bottomed stockpot is a perfectly good alternative.
For those who love a hands-off approach, both the slow cooker and the Instant Pot are fantastic modern conveniences. Honestly, they can produce a wonderfully tender beef stew with minimal fuss. Of course, you’ll also need a sharp knife for prepping and a large cutting board.
The Step-by-Step Guide to a Classic Dutch Oven Beef Stew
Alright, let’s roll up our sleeves and dive into the heart of the matter: building your stew layer by glorious layer.
Step 1: Prepping Your Ingredients (Mise en Place)
First things first, let’s get organized. Pat the chuck roast cubes completely dry with paper towels—this is non-negotiable for getting a good sear. Then, chop all your vegetables into large, uniform chunks; you don’t want them to disintegrate. Having everything prepped and ready (a French term called mise en place) makes the cooking process smooth and enjoyable.
Step 2: The Critical Step – Searing the Beef
Here is the single most important step for building deep, complex flavor: the sear. Heat a couple of tablespoons of oil in your Dutch oven over medium-high heat until it’s shimmering. Now, add your beef in a single, uncrowded layer. Crowding the pan is a surefire way to steam the meat instead of browning it.
Work in batches, and be patient! You’re looking for a dark brown, crispy crust on each piece. This magical process, called the Maillard reaction, creates hundreds of new flavor compounds. That fond (the browned bits stuck to the pot) is pure gold. Remove the beef and set it aside.
Step 3: Sautéing the Aromatics and Building Flavor
In that same beautiful, flavorful pot, toss in your onions, carrots, and celery. Sauté them until they begin to soften and sweeten, about 5-7 minutes. Then, add the garlic and tomato paste, cooking for another minute until the paste darkens slightly and smells fragrant. This simple step cooks out the raw taste and unlocks a tremendous amount of umami.
Step 4: Deglazing the Pot
This is the fun part! Pour in about a cup of broth, and using a wooden spoon, scrape the bottom of the pot vigorously to release all those browned, flavorful bits. That fond will dissolve into the liquid, creating the foundation of your stew’s sauce. It’s the ultimate way to capture every bit of flavor you’ve worked so hard to create.
Step 5: The Slow Simmer – Where Magic Happens
Now, return the seared beef and any accumulated juices back to the pot. Add enough remaining broth to just barely cover the meat and vegetables. Throw in a couple of bay leaves and a teaspoon of thyme. Bring it to a lively simmer, then immediately reduce the heat to the lowest possible setting.
Cover the pot and let it cook low and slow for at least 1.5 to 2 hours. Don’t boil it! A gentle simmer is key to tender beef stew. You’re waiting for the beef to become almost fork-tender.
Step 6: Adding the Vegetables and Finishing
Once the beef is nearly there, stir in your potatoes and the remaining carrots. These need less time to cook. Re-cover the pot and continue simmering for another 30-45 minutes, or until both the vegetables and the beef are perfectly tender.
Finally, turn off the heat and stir in a cup of frozen peas. They’ll heat through perfectly in the residual heat without becoming mushy. Now, taste your creation! Season generously with salt and black pepper until the flavors truly sing.
Step 7: How to Thicken Your Stew to Perfect Consistency
Is your stew a little too brothy? No problem! Thickening it is a breeze.
-
The Slurry Method: Whisk two tablespoons of cornstarch with three tablespoons of cold water until smooth. Drizzle this mixture into the simmering stew, stirring constantly. It will thicken up within a minute or two.
-
The Beurre Manié Method: Mash equal parts soft butter and flour into a paste. Whisk small pieces of this paste into the simmering stew until it dissolves and achieves your desired consistency.
Variations, Tips, and Serving
Beyond the Classic: Delicious Variations to Try
Once you’ve mastered the basic formula, the world of stew is your oyster! Feel free to get creative and make it your own.
Hearty Herb and Tomato Stew
For a sunnier, brighter flavor profile, try adding a 14-ounce can of diced tomatoes (with their juices) along with the broth. Then, experiment with different herbs like rosemary or oregano for a Mediterranean twist.
Slow Cooker Old-Fashioned Beef Stew
The slow cooker is a busy cook’s best friend for making easy beef stew. To replicate the deep flavor of searing, quickly brown your beef and sauté your aromatics in a skillet first. Then, transfer everything to the slow cooker, add the remaining ingredients (except the peas), and cook on LOW for 7-8 hours or on HIGH for 4-5 hours. Stir in the peas right before serving.
Instant Pot Beef Stew
Craving stew but short on time? The Instant Pot is your answer! Use the Sauté function to brown the beef and cook the aromatics directly in the pot. Then, add the rest of the ingredients (except the peas), secure the lid, and cook on High Pressure for 35 minutes. Allow for a natural pressure release for 15 minutes before quick releasing any remaining pressure. Stir in the peas and let them warm through.
Pro Tips and Troubleshooting for the Perfect Stew
Even the best cooks run into hiccups. Here’s how to solve common beef stew dilemmas:
-
Why is my beef tough? It simply hasn’t cooked long enough. Collagen takes time to break down. Just keep simmering until it surrenders and becomes tender.
-
Why is my stew bland? You likely under-seasoned. Season in layers: salt the beef before searing, season the vegetables, and always do a final seasoning at the end. A splash of Worcestershire sauce or a tiny bit of vinegar can also brighten all the flavors.
-
My stew is too greasy. Easy fix! Skim the fat from the surface with a spoon, or use a fat separator when adding the broth back in after deglazing.
-
Make-Ahead Magic: Stew almost always tastes better the next day. The flavors have more time to meld and become friends. It’s the ultimate make-ahead meal.
Serving and Storing Your Masterpiece
What to Serve with Beef Stew
A stew this good needs the perfect sidekicks. A thick slice of crusty bread or a fluffy dinner roll is mandatory for sopping up every last drop of gravy. For a lighter contrast, a simple green salad with a tangy vinaigrette works wonders. Some folks even love serving it over a bed of buttered egg noodles or creamy mashed potatoes.
How to Store and Freeze Leftovers
-
Refrigeration: Allow the stew to cool to room temperature before transferring it to airtight containers. It will keep beautifully in the fridge for 3 to 4 days. Reheat gently on the stovetop or in the microwave.
-
Freezing: Stew is a freezing champion! Cool it completely and store it in freezer-safe containers or bags for up to 3 months. When you’re ready, thaw it overnight in the refrigerator before reheating. According to USDA guidelines for safe food storage, this is the best method for preserving quality and safety.
FAQs and Conclusion
Frequently Asked Questions (FAQs) About Old-Fashioned Beef Stew
What is the best cut of beef for old-fashioned beef stew?
The absolute best cut is a boneless chuck roast. It’s well-marbled with fat and connective tissue, which breaks down during the long, slow cooking process, resulting in incredibly tender and flavorful meat.
How can I thicken my beef stew without flour or cornstarch?
You can thicken stew naturally by mashing some of the softened potatoes against the side of the pot and stirring them back in. Alternatively, you can remove a cup or two of the stew (mostly broth and vegetables), puree it in a blender until smooth, and then stir it back into the pot.
Can I make beef stew in a slow cooker?
Absolutely! For the best flavor, sear the beef and sauté the aromatics on the stove first. Then, transfer everything to your slow cooker and cook on LOW for 7-8 hours or on HIGH for 4-5 hours, adding the hardy vegetables like potatoes and carrots about halfway through to prevent them from becoming too soft.
Why is it important to sear the beef before stewing?
Searing creates a flavorful brown crust on the meat through the Maillard reaction. This process creates complex flavor compounds that form the foundation of your stew’s rich taste. Skipping this step will result in a less flavorful, grayer stew.
How long will homemade beef stew last in the refrigerator?
Properly stored in an airtight container, your beef stew will last for 3 to 4 days in the refrigerator. Always ensure it has cooled to room temperature before refrigerating to maintain food safety.
Conclusion: The Comfort of a Perfect Stew
In the end, mastering old-fashioned beef stew isn’t about following a recipe with robotic precision. It’s about understanding the principles: choosing the right beef, building flavors layer by layer, and embracing the slow, gentle simmer that transforms tough ingredients into something sublime. It’s a rewarding process that fills your home with incredible aromas and results in the most satisfying, nourishing meal imaginable. So, don’t be intimidated—embrace the process. Your ultimate bowl of comfort food is waiting.
Print
Old-Fashioned Beef Stew
Description
Old-Fashioned Beef Stew
Ingredients:
-
2 lbs beef chuck, cut into 1 ½-inch cubes
-
3 tbsp all-purpose flour
-
2 tbsp olive oil or vegetable oil
-
1 large onion, chopped
-
3 garlic cloves, minced
-
4 cups beef broth
-
1 cup red wine (optional, can replace with more broth)
-
2 tbsp tomato paste
-
2 tsp Worcestershire sauce
-
1 tsp dried thyme
-
2 bay leaves
-
4 carrots, cut into thick slices
-
3 celery stalks, chopped
-
4 medium potatoes, peeled and cubed
-
1 cup frozen peas (optional, added at the end)
-
Salt and black pepper to taste
-
Fresh parsley, chopped (for garnish)
Instructions:
-
Dredge the Beef – Pat beef dry and toss in flour, coating evenly.
-
Brown the Meat – In a large Dutch oven, heat oil over medium-high heat. Brown beef cubes in batches, then set aside.
-
Sauté Aromatics – In the same pot, sauté onion and garlic until fragrant.
-
Deglaze – Stir in tomato paste, then add red wine (if using), scraping the browned bits from the pot.
-
Build the Base – Return beef to the pot. Add beef broth, Worcestershire sauce, thyme, and bay leaves. Bring to a boil, then reduce to a simmer.
-
Slow Simmer – Cover and cook on low for 1 ½ hours, stirring occasionally.
-
Add Vegetables – Stir in carrots, celery, and potatoes. Simmer another 45–60 minutes, until beef and vegetables are tender.
-
Final Touch – Stir in peas, adjust seasoning with salt and pepper, and remove bay leaves.
-
Serve – Ladle into bowls, garnish with fresh parsley, and serve with crusty bread for dipping.