
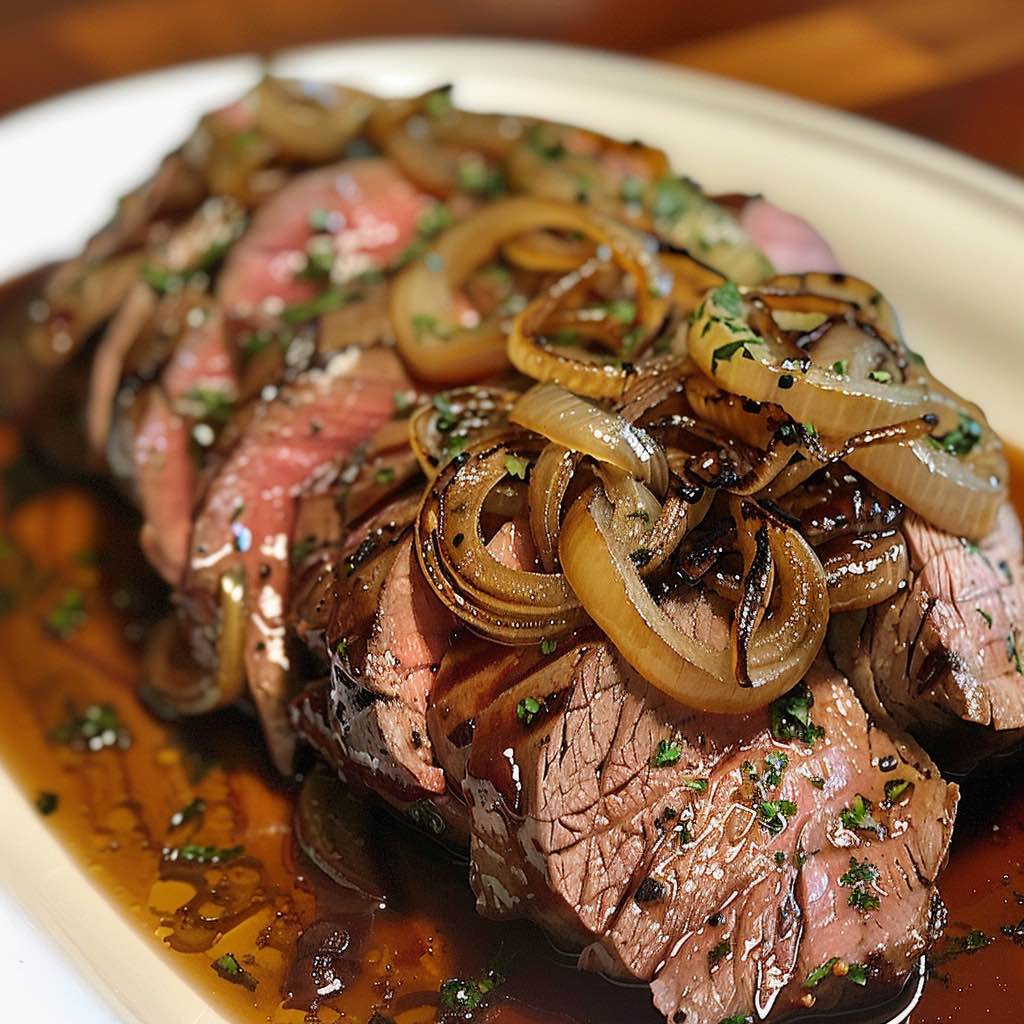
The Ultimate Guide to Roasted Beef Tenderloin with French Onion Au Jus: A Masterclass in Elegance
Picture this: a magnificent, bronzed centerpiece of beef tenderloin, resting majestically on a platter. Its aroma, a heady mix of roasted herbs and savory meat, fills the air. Beside it, a gravy boat steams with a deep, mahogany French onion au jus, speckled with sweet, caramelized onions. This isn’t just a meal; it’s an event, a culinary triumph that whispers of luxury and shouts of skill. Surprisingly, however, creating this gourmet cooking masterpiece at home is far from a Herculean task. In fact, with the right guidance, it’s a surprisingly achievable feat. This definitive guide will demystify the entire process, transforming you from a hesitant home cook into a confident maestro of this special occasion dinner. We’ll walk through selecting the perfect cut, mastering the cooking method, and crafting that show-stopping sauce, ensuring your next holiday roast beef is nothing short of legendary.
Why This Dish is the Ultimate Culinary Showstopper
Let’s be honest, a perfectly cooked roasted beef tenderloin is the undisputed champion of elegant dining. It’s the cut you bring out for milestones—the Christmas dinner that has everyone talking until Easter, the anniversary meal that seals the deal, or the dinner party that solidifies your reputation as a host extraordinaire. Why does it hold such a revered spot? Well, it all boils down to three things: unparalleled tenderness, sophisticated simplicity, and sheer, unadulterated wow factor.
Unlike tougher cuts that need low and slow cooking, the beef tenderloin is naturally the most tender muscle on the animal. Consequently, it offers a buttery, melt-in-your-mouth texture that even the most expensive steak can struggle to match. Furthermore, its lean nature means it presents a clean, pure beef flavor that acts as the perfect canvas for a rich, umami-packed French onion au jus. This combination isn’t just delicious; it’s a match made in culinary heaven. The deep, savory-sweet notes of the sauce complement the subtle roast without overpowering it, creating a harmonious bite every single time.
Ultimately, this guide is designed to banish any intimidation. Whether you’re a seasoned cook or a weekend warrior in the kitchen, we’re breaking this foolproof roast down into manageable, step-by-step instructions. So, take a deep breath; you’re about to learn how to create a restaurant-quality experience right from your own oven.
Understanding Your Star Ingredient: The Beef Tenderloin
Before we even preheat the oven, it’s crucial to understand what we’re working with. After all, you can’t master a dish without knowing your main player.
What Exactly is a Beef Tenderloin?
Imagine a long, slender muscle that runs along the spine of the cow; because it doesn’t do much work, it remains incredibly soft and tender. That, right there, is your beef tenderloin. This prized cut is where those luxurious filet mignon steaks come from—essentially, when you buy a whole tenderloin, you’re getting an entire log that can be sliced into those premium steaks yourself. Its claim to fame is absolutely its texture. However, this luxury comes with a caveat: its low fat content. Unlike a well-marbled ribeye, the tenderloin has little internal fat to baste it from within during cooking. Therefore, this demands a specific cooking approach to prevent it from drying out, making technique your best friend in this endeavor.
Choosing the Perfect Cut: Whole Tenderloin vs. Pre-Trimmed
Now, you’ll face your first big choice at the butcher counter or meat aisle. Do you go for the whole, untrimmed “PSMO” (Peeled, Side Muscle On) or a neat, ready-to-cook pre-trimmed roast?
-
The Whole, Untrimmed Tenderloin: Opting for this path is often more economical and gives you maximum control. You get to trim it exactly to your liking, and you often end up with some extra scraps for a fantastic steak salad or kebabs later. On the other hand, it requires a bit of butchery work—namely, removing the tough silver skin and the side muscle (chain).
-
The Pre-Trimmed Tenderloin: If convenience is your top priority, this is the way to go. Butchers have already done the tedious work of trimming and tying it into a perfect, uniform roast. It’s a fantastic timesaver, though you’ll typically pay a premium for that service. For a first-timer, this can be a brilliant option to eliminate one step of potential stress.
Honestly, there’s no wrong answer here; it simply depends on your budget, confidence level, and how much time you want to spend prepping. Whichever you choose, just make sure it has a bright, cherry-red color and a firm texture. For more on what to look for, you can check out the official USDA Beef Grading Standards (Prime, Choice, Select).
Step-by-Step Guide to Perfect Roasted Beef Tenderloin
Alright, let’s roll up our sleeves and get down to business. This is where the magic happens. By following these steps meticulously, you’re virtually guaranteeing a spectacular result.
Step 1: Selecting and Sourcing Your Beef Tenderloin
First things first, you need to get your hands on a quality piece of meat. Don’t just grab the first package you see! Look for meat that is a vibrant red color, not brown or dull. If possible, spring for Prime or high-quality Choice grade—the better the marbling, the more flavor and juiciness you’ll get in your final roast beef. Honestly, building a relationship with a local butcher is a game-changer here; they can source the best product and often trim it for you at no extra cost.
Step 2: Trimming and Tying the Roast (With Visual Cues)
If you bought a whole tenderloin, don’t panic! Trimming is easier than it looks. You’ll need a sharp, flexible boning knife.
-
Find the Silver Skin: This is a tough, silvery-white membrane on the surface that won’t break down during cooking. Slide your knife under one end of it.
-
Angle and Pull: Hold the piece of silver skin taut with one hand, and with the other, angle your knife blade slightly upward and use a gentle sawing motion to remove it. Alternatively, you can ask your butcher to do this—no shame in that!
-
Tying the Roast: This step is non-negotiable for an even cook. Using kitchen twine, tie a loop around one end and then continue tying loops every inch or so down the length of the roast. This creates a uniform, cylindrical shape so the thinner tail end doesn’t overcook before the center is done.
Step 3: The Key to Flavor: Seasoning and Creating an Herb Crust
Here’s a chef’s secret: season your roast at least 45 minutes before cooking, and ideally up to 24 hours ahead. Why? Because this gives the salt time to penetrate deeply, seasoning the meat from the inside out and improving its ability to retain moisture. Pat the roast completely dry with paper towels—this is critical for a good sear. Then, be generous! Coat it liberally with kosher salt and freshly cracked black pepper. For an incredible herb crust, mix minced fresh rosemary, thyme, and garlic into a paste with a little olive oil and rub it all over the surface. Wow, what a difference this makes!
Step 4: The Cooking Method Debate: Reverse Sear vs. Traditional Roast
This is the big decision. While both methods work, one is decidedly more foolproof for achieving perfect doneness.
The Reverse Sear Method (Highly Recommended)
Frankly, the reverse sear is a modern game-changer for roasting expensive cuts of beef. Instead of blasting it with high heat first, you do the opposite.
-
Slow Roast: Place your seasoned roast on a wire rack set inside a rimmed baking sheet. Put it in a low oven, around 250°F (120°C). This gently brings the internal temperature up slowly and evenly.
-
The Searing Finish: Once the roast is about 15 degrees Fahrenheit below your target temperature, pull it out. Then, heat a tablespoon of oil in a cast-iron skillet or heavy roasting pan until it’s screaming hot. Finally, sear the roast on all sides until a beautiful, deep brown crust forms. This method delivers unparalleled edge-to-edge perfection.
The Traditional High-Heat Method
The classic approach is more straightforward but requires vigilance.
-
Sear First: Heat oil in a pan and sear the roast on all sides until browned.
-
Roast to Temp: Transfer the seared roast to a roasting pan and finish it in a hot oven (around 425°F or 220°C) until it reaches your desired internal temperature. It’s faster, but the window between perfect and overdone is narrower.
Step 5: Mastering Temperatures: Your Thermometer is Your Best Friend
Please, I beg of you, do not guess when your roast is done. Relying on time alone is a recipe for disappointment. Investing in a good meat thermometer is the single most important thing you can do for this recipe. For a medium-rare result, which is ideal for tenderloin, you want to remove the roast from the oven when the thermometer reads 125°F (52°C). Remember, the temperature will continue to rise by another 5-10 degrees as it rests—a phenomenon called “carryover cooking.”
Step 6: The Non-Negotiable Step: Resting Your Roast
Speaking of resting, this might be the hardest part—you have to leave it alone! As soon as it comes out of the oven, transfer your beautiful roast to a clean cutting board and tent it loosely with foil. Let it sit for a full 15-20 minutes. What’s happening during this time? The muscle fibers, which tightened up during cooking, are now relaxing and reabsorbing all those precious juices. If you slice it immediately, all those juices will just run out onto the board, leaving you with dry meat. Trust the process!
Crafting the Quintessential French Onion Au Jus
Now, while that roast is resting, it’s sauce time! This au jus is what takes this dish from great to mind-blowing. It’s deeply savory, slightly sweet, and packed with complex flavor.
Au Jus vs. Gravy: Understanding the Difference
Let’s clear this up right away. Gravy is typically thickened with flour or starch, making it rich and creamy. Au jus, which is French for “with juice,” is thinner, lighter, and more intensely flavored. It’s a reduction of meat drippings, stock, and aromatics—a concentrated essence rather than a blanket. It’s all about that pure, un-thickened flavor.
Building Layers of Flavor: Onions, Herbs, and Stock
The secret to this sauce is building flavor in stages. You can’t rush it!
-
The Foundation (Caramelized Onions): In the same pan you used for searing (to capture all those browned bits!), melt some butter over medium-low heat. Add thinly sliced yellow onions and a pinch of salt. Now, here’s the key: be patient. Stir them occasionally and let them cook low and slow for a good 30-40 minutes until they turn a deep, golden brown. This sweetness is the soul of the sauce.
-
Deglazing (Unlocking the Fond): Once the onions are perfect, add a couple of cloves of minced garlic and some fresh thyme sprigs. Cook for just a minute until fragrant. Then, pour in a splash of broth to deglaze the pan. Scrape all those browned, stuck-on bits (the fond) from the bottom of the pan—that’s pure flavor gold!
-
Simmering and Reducing: Now, add the rest of your high-quality, low-sodium beef stock. Bring it to a simmer and let it cook until it reduces by about a third. This concentrates all the flavors beautifully. Let it simmer gently while your roast rests.
-
Finishing Touches: After simmering, remove the thyme sprigs. For a super-smooth sauce, you can strain it to remove the onions, but I love leaving them in for texture. Finally, stir in a final pat of cold butter off the heat to give the sauce a lovely sheen and a velvety mouthfeel. Season to taste with salt and pepper.
Serving Your Masterpiece and Perfect Pairings
The moment of truth has arrived! Your roast has rested, and your sauce is ready. Now, let’s bring it all together.
Carving and Presentation
First, remove the kitchen twine. Then, using a long, sharp carving knife, slice the tenderloin into ½-inch to 1-inch thick medallions. Always remember to cut against the grain (you’ll see the lines of muscle fibers running in one direction; cut perpendicular to them) for the most tender bite. Arrange the slices beautifully on a warm platter. Immediately afterward, pour some of that incredible au jus into a warm gravy boat for serving.
The Perfect Pairings: What to Serve with Beef Tenderloin
This elegant entrée deserves side dishes that complement without competing.
-
Classic Sides: You can’t go wrong with creamy mashed potatoes or decadent roasted garlic potatoes—they are the perfect vehicle for that glorious sauce. For something a bit different, a parsnip and potato puree is divine.
-
Vegetables: Simple, elegant vegetables are the way to go. Think roasted asparagus, haricots verts (thin green beans) with almonds, or a simple arugula salad with a sharp vinaigrette to cut through the richness.
-
The Perfect Sip: To find the best wines to pair with beef tenderloin, look for options that complement its delicate richness without overpowering it. A smooth, non-alcoholic sparkling cider also makes a wonderful pairing.
Expert Tips, FAQs, and Conclusion
You’ve done it! But before you go, here are some extra pro tips and answers to burning questions.
Expert Tips and Tricks for a Flawless Dinner
-
Make-Ahead Magic: You can trim, tie, and season the roast the day before. Keep it covered on a rack in the fridge—this will actually dry the surface for a better crust. The au jus can be made ahead too; just complete the steps through simmering and store it. Reheat it and add the final butter finish before serving.
-
Leftover Love: Leftover beef tenderloin is a treasure! Slice it thin for incredible sandwiches, chop it for a hearty salad, or dice it for the best steak hash you’ve ever had.
-
Thermometer Trust: I’ll say it again: use that thermometer! It’s your ticket to stress-free success.
Frequently Asked Questions (FAQs)
What is the best temperature to cook beef tenderloin?
For a perfect medium-rare result, remove the roast from the oven when your thermometer reads 125°F (52°C). The temperature will then rise to 135°F (57°C) as it rests, which is the ideal final temperature.
Can I make the French onion au jus ahead of time?
Absolutely! You can caramelize the onions and prepare the sauce base up to 2 days in advance. Store it in the refrigerator. When you’re ready to serve, reheat it on the stove. If you have any drippings from the roasting pan, you can stir those in at the end for an extra boost of flavor.
What’s the difference between au jus and French onion soup?
This is a great question! While they share similar flavors—caramelized onions and beef stock—they are fundamentally different. French onion soup is a hearty, meal-sized dish that is typically topped with bread and cheese. Au jus is a lighter, strained or semi-strained sauce meant solely for accompanying and enhancing the flavor of the meat.
How long does it take to roast a beef tenderloin?
Time is a unreliable guide because it varies drastically with the size of the roast and your cooking method. A 4-5 lb roast using the reverse sear method (at 250°F) can take 60-90 minutes to reach temperature before the quick sear. Always, without exception, rely on the internal temperature reading from a reliable thermometer, not the clock.
Conclusion: Your Journey to a Perfect Holiday Centerpiece
See? I told you you could do it. Preparing a stunning Roasted Beef Tenderloin with French Onion Au Jusisn’t about complex tricks; it’s about understanding a few key principles: patience with the sear and sauce, faith in your thermometer, and the discipline to let the meat rest. This dish is a celebration of technique and quality ingredients. So go forth, confidently. Your well-deserved standing ovation at the dinner table awaits
Print
Roasted Beef Tenderloin with French Onion Au Jus
Description
Ingredients (6–8 servings):
Beef Tenderloin:
-
3–4 lb beef tenderloin, trimmed and tied
-
3 tbsp olive oil
-
4 cloves garlic, minced
-
1 tbsp fresh thyme, chopped
-
1 tbsp fresh rosemary, chopped
-
1 tbsp kosher salt
-
2 tsp freshly cracked black pepper
French Onion Au Jus:
-
3 large yellow onions, thinly sliced
-
3 tbsp butter
-
1 tbsp olive oil
-
2 cloves garlic, minced
-
1 tsp fresh thyme
-
1 tbsp balsamic vinegar (or sherry vinegar)
-
1 cup dry red wine
-
3 cups beef stock (preferably homemade or low-sodium)
-
1 tsp Worcestershire sauce
-
Salt & pepper, to taste
Instructions:
-
Prepare Beef Tenderloin – Rub beef all over with olive oil, garlic, thyme, rosemary, salt, and pepper. Let rest at room temperature for 30–45 minutes.
-
Roast Beef – Preheat oven to 450°F (230°C). Place tenderloin on a rack in a roasting pan. Roast 20–25 minutes for medium-rare (internal temp ~125°F/52°C), or adjust for doneness. Rest 15 minutes before slicing.
-
Make French Onion Au Jus – While beef roasts, melt butter with olive oil in a large skillet over medium heat. Add onions and cook slowly, stirring, until deep golden brown and caramelized (25–30 minutes).
-
Add garlic and thyme, cook 1 minute more. Deglaze with balsamic vinegar, scraping browned bits. Add red wine, simmer until reduced by half. Stir in beef stock and Worcestershire; simmer 10–15 minutes until rich and flavorful. Season with salt & pepper.
-
Serve – Slice tenderloin into thick medallions. Spoon French onion au jus over and serve with sides like roasted potatoes or creamy gratin.