
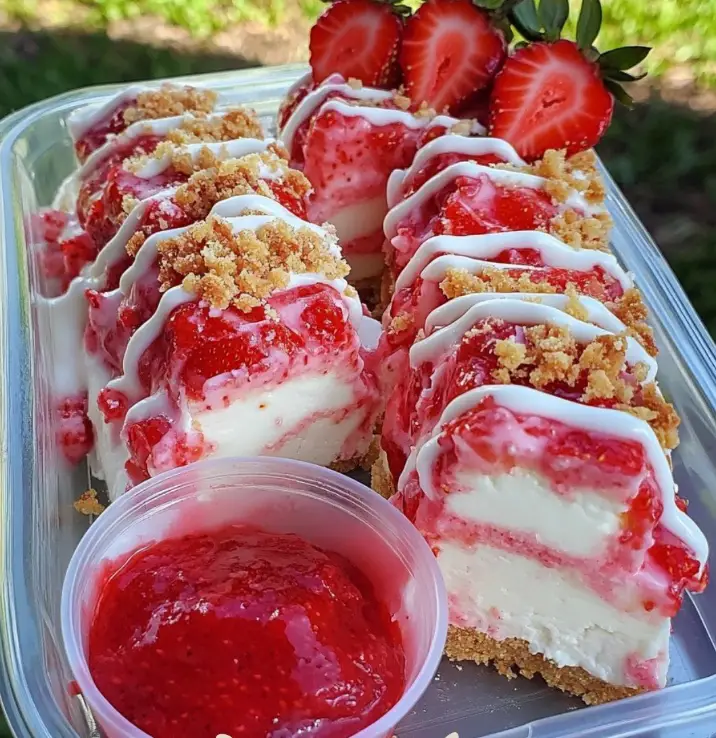
🍓 Strawberry Crunch Cheesecake Chunks: The Viral Dessert Everyone’s Craving
If you’ve ever had strawberry shortcake ice cream bars or classic strawberry crunch cake, then you already know how irresistible that combination of creamy, fruity, and crunchy can be. Now, imagine all that in cheesecake form—bite-sized, handheld, and perfect for any occasion. Introducing your new favorite dessert: Strawberry Crunch Cheesecake Chunks.
This fun twist on traditional cheesecake delivers creamy cheesecake squares layered with a buttery graham cracker crust, topped with a vibrant strawberry sauce, and finished with a sweet strawberry crunch topping made from golden Oreos and freeze-dried strawberries. It’s the ultimate dessert bar that’s as fun to make as it is to eat.
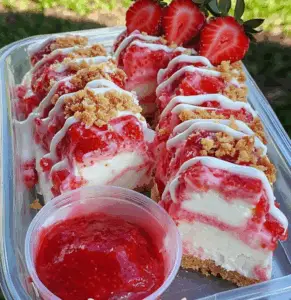
🍰 Why You’ll Love This Strawberry Crunch Cheesecake
There’s something truly special about this dessert. It’s nostalgic yet modern, simple but elegant. Whether you’re making these for a summer BBQ, birthday party, Valentine’s Day, or just a weekend treat, here’s why you’ll fall in love with these strawberry cheesecake chunks:
-
Portion-perfect: Cut into chunks or bars, they’re great for sharing or snacking.
-
Creamy + Crunchy texture: The silky cheesecake filling contrasts beautifully with the crisp crunch topping.
-
Bright, fruity flavor: Thanks to fresh strawberries and lemon juice in the sauce.
-
Make-ahead convenience: Perfect for preparing a day in advance—no last-minute stress!
-
Versatile: You can dress them up or down, drizzle with white chocolate, or keep it classic.
📝 Ingredients You’ll Need
Here’s everything you’ll need to whip up a batch of these amazing strawberry cheesecake bars:
For the Cheesecake Base:
-
2 cups graham cracker crumbs
-
½ cup unsalted butter, melted
-
3 (8 oz) packages cream cheese, softened
-
1 cup granulated sugar
-
3 large eggs
-
1 tsp vanilla extract
For the Strawberry Crunch Topping:
-
1½ cups crushed golden Oreos
-
½ cup freeze-dried strawberries (or use strawberry gelatin powder for flavor and color)
-
3 tbsp melted butter
For the Strawberry Sauce:
-
1½ cups fresh strawberries, diced
-
½ cup granulated sugar
-
1 tbsp lemon juice
For Decoration:
-
Melted white chocolate, for drizzling
-
Extra strawberry crunch, for topping
🔪 Step-by-Step Instructions
Step 1: Make the Graham Cracker Crust
Start by preheating your oven to 325°F (163°C). Grease and line a 9×13-inch baking dish with parchment paper, leaving some overhang for easy removal.
In a medium bowl, combine the graham cracker crumbs and melted butter. Mix until the texture resembles wet sand. Press the mixture firmly into the bottom of the baking dish to form an even layer.
Bake the crust for 10 minutes, then remove it from the oven and let it cool while you prepare the filling.
Step 2: Prepare the Cheesecake Filling
In a large bowl, use an electric mixer to beat the softened cream cheese and granulated sugar until smooth and creamy. Scrape down the sides of the bowl as needed to avoid lumps.
Add in the eggs, one at a time, mixing well after each addition. Stir in the vanilla extract.
Pour the cheesecake batter over the cooled crust and use a spatula to smooth the top.
Bake for 40–45 minutes, or until the edges are set but the center still has a slight jiggle. Let the cheesecake cool at room temperature for about an hour, then transfer it to the fridge and chill for at least 4 hours or overnight.
Step 3: Make the Strawberry Crunch Topping
While the cheesecake chills, prepare the iconic strawberry crunch topping. This is what gives these bars that sweet, fruity, nostalgic flair.
In a food processor or using a zip-top bag and rolling pin, crush the golden Oreos and freeze-dried strawberries into small crumbles. Add the melted butter and mix until the crumbs stick together slightly. Set aside.
💡 Pro Tip: If you can’t find freeze-dried strawberries, use a few tablespoons of strawberry gelatin powder instead. It adds flavor and that vibrant pink color.
Step 4: Make the Strawberry Sauce
In a saucepan over medium heat, combine the fresh diced strawberries, sugar, and lemon juice. Stir occasionally and cook for 5–7 minutes until the mixture thickens slightly and the strawberries break down.
Let the sauce cool to room temperature, then refrigerate until ready to use.
Step 5: Assemble the Cheesecake Chunks
Once the cheesecake is completely chilled, lift it out of the pan using the parchment overhang. Use a sharp knife to cut it into bite-sized chunks or bars.
Drizzle each piece with a spoonful of strawberry sauce, then generously sprinkle the strawberry crunch topping over each square.
Finish with a drizzle of melted white chocolate for a picture-perfect finish.
🍓 Serving Suggestions
-
Serve cold for best flavor and texture.
-
Garnish with a fresh strawberry slice or a dollop of whipped cream.
-
Plate them as a formal dessert, or serve in cupcake liners for grab-and-go convenience at parties or potlucks.
🔄 Storage & Make-Ahead Tips
These cheesecake chunks are ideal for making ahead, which is great when you’re planning for an event or busy schedule.
-
Refrigerator: Store in an airtight container for up to 5 days.
-
Freezer: Wrap individual squares and freeze for up to 2 months. Thaw overnight in the fridge before serving.
-
Crunch topping tip: Add the strawberry crunch topping just before serving to keep it crisp.
💡 Variations and Substitutions
Want to switch things up? Try these ideas:
-
Make it no-bake: Skip the eggs and use whipped cream and gelatin to set the cheesecake. Use a no-bake graham cracker crust and chill instead of baking.
-
Use different fruit: Try raspberry or blueberry sauce instead of strawberries for a new twist.
-
Change the crust: Use vanilla wafers, chocolate cookies, or even pretzels for a sweet-salty crunch.
-
Add a swirl: Swirl strawberry sauce into the cheesecake batter before baking for a marbled effect.
- Print
Strawberry Crunch Cheesecake Chunks
Ingredients
ScaleFor the Cheesecake Base:
2 cups graham cracker crumbs
½ cup unsalted butter, melted
3 (8 oz) packages cream cheese, softened
1 cup granulated sugar
3 large eggs
1 tsp vanilla extract
For the Strawberry Crunch:1 ½ cups crushed golden Oreos
½ cup freeze-dried strawberries (or strawberry gelatin mix for color/flavor)
3 tbsp melted butter
For the Strawberry Sauce:
1 ½ cups fresh strawberries, diced
½ cup granulated sugar
1 tbsp lemon juice
For Decoration:
White chocolate, melted (for drizzling)
Extra strawberry crunch for topping
Instructions
1. Prepare the Cheesecake Base:
Preheat the oven to 325°F (163°C). Grease and line a 9×13-inch baking dish.
Mix graham cracker crumbs and melted butter in a bowl. Press firmly into the bottom of the pan to create the crust. Bake for 10 minutes, then let cool.
In a large bowl, beat cream cheese and sugar until smooth. Add eggs one at a time, then mix in vanilla extract.
Pour the cheesecake batter over the crust and smooth the top. Bake for 40–45 minutes, or until set with a slight jiggle in the center. Let cool completely, then refrigerate for at least 4 hours or overnight.
2. Make the Strawberry Crunch:
Mix crushed golden Oreos, freeze-dried strawberries (or gelatin mix), and melted butter in a bowl. Set aside.
3. Prepare the Strawberry Sauce:
In a saucepan, combine strawberries, sugar, and lemon juice. Cook over medium heat until strawberries soften and the mixture thickens (about 5–7 minutes). Let cool.
4. Assemble the Cheesecake Chunks:
Remove the chilled cheesecake from the pan and slice it into chunks or bars.
Drizzle the strawberry sauce over each chunk.
Sprinkle generously with strawberry crunch.
Drizzle melted white chocolate on top for a beautiful finish.
5. Serve:
Serve cold and enjoy! Perfect as a handheld treat or plated dessert.