
Introducing the Ultimate Dessert Fusion
Introducing the Ultimate Dessert Fusion: Decadent Pecan Pie Cheesecake
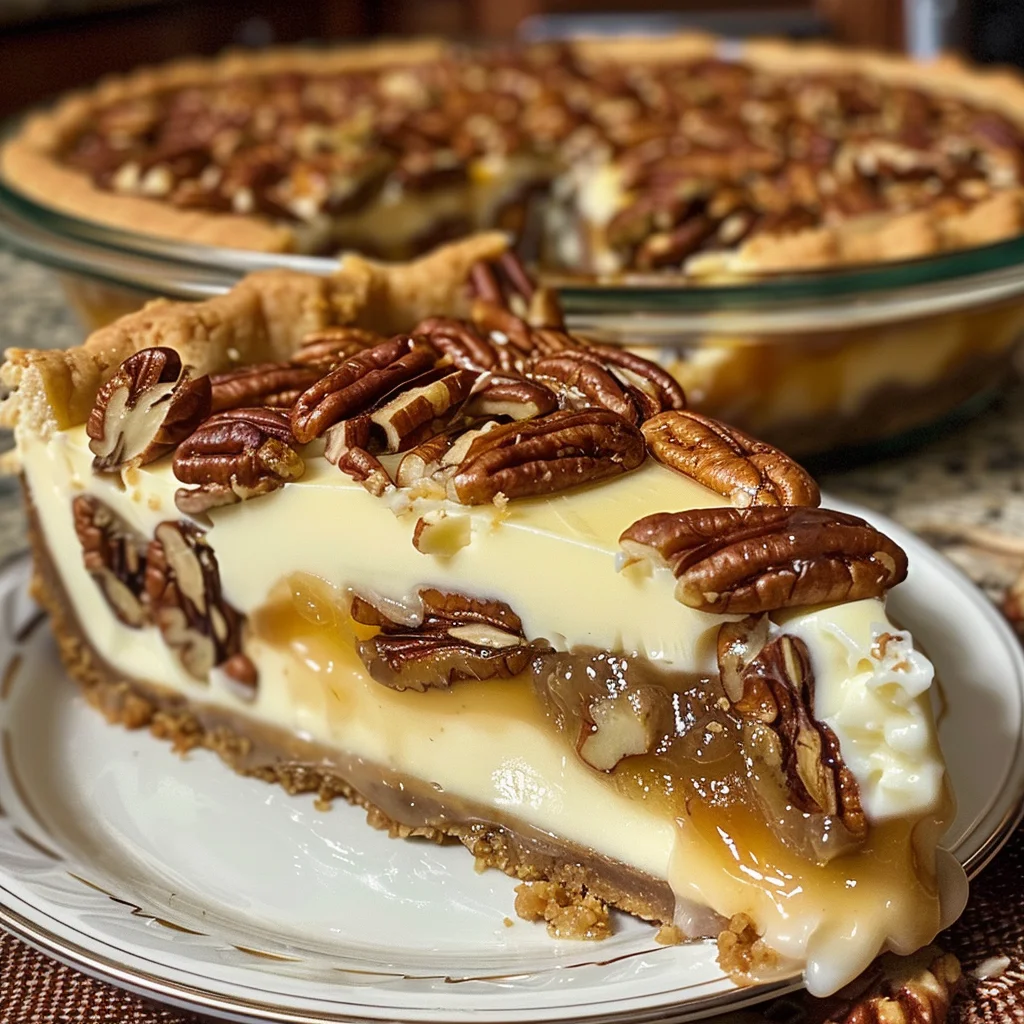
Picture this: a fork glides through a layer of toasted, honeyed pecans nestled in a sticky-sweet glaze, then sinks into a mile-deep, impossibly creamy and dense cheesecake filling, finally meeting a crisp, buttery graham cracker crust. The first bite? Well, it’s nothing short of a revelation—a spectacular symphony of contrasting textures and harmonious flavors that makes choosing between two iconic desserts completely unnecessary.
This Decadent Pecan Pie Cheesecake is more than just a recipe; it’s the undisputed champion of holiday tables, a guaranteed head-turner at any potluck, and frankly, a glorious testament to culinary ambition. Consequently, this guide is crafted to be your trusted companion through the entire process. We’ll walk through every single step, unveil pro-level secrets for a flawless bake, and answer every question you might have before you even ask it. Ultimately, our goal is to transform you into a confident cheesecake connoisseur.
Why This Recipe Works
A Harmony of Textures and Flavors
Fundamentally, the magic of this dessert lies in its brilliant contrast. The cream cheese filling provides a tangy, rich, and cool base that perfectly balances the overwhelming sweetness of a traditional pecan pie. Meanwhile, the spiced pecan layer, with its delightful crunch and deep caramel notes, adds a warm complexity that makes each bite incredibly exciting. Therefore, instead of clashing, these two elements perform a perfect duet on your palate.
Designed for Success
Let’s be honest; a beautiful homemade cheesecake can be intimidating. Cracks, a soggy bottom, or a dense texture are common fears. However, this recipe is meticulously engineered to sidestep those pitfalls. We emphasize critical techniques—like the essential water bath and the paramount importance of room-temperature ingredients—to guarantee a stunning, smooth, and professional-looking result every single time. It’s practically foolproof!
The Ultimate Make-Ahead Dessest
Furthermore, for anyone hosting a big dinner, this dessert is an absolute godsend. Unlike last-minute desserts that add to the day’s chaos, this luxurious cheesecake actually demands an overnight rest in the refrigerator. This extended chilling time allows the flavors to meld magnificently and the texture to firm up perfectly. So, you can proudly cross “dessert” off your to-do list a full day ahead, making your entertaining experience blissfully stress-free.
Gathering Your Arsenal: Ingredients & Equipment
Alright, let’s get down to business! Before any mixing or baking can begin, you need to assemble your toolkit. Think of this as gathering your superhero gear; using the right components is absolutely non-negotiable for a flawless cheesecake. Seriously, skimping here is the quickest path to dessert disappointment. Conversely, following these guidelines will set you up for a spectacular, crowd-pleasing dessert.
The Ingredient Deep Dive: Why Each One Matters
Let’s talk about the stars of the show. Using high-quality ingredients isn’t just a suggestion—it’s the secret handshake to the baking elite. Each component plays a vital role in the final masterpiece.
First and foremost, the cream cheese. This is the undisputed king of the recipe. You must use full-fat, brick-style cream cheese. Those spreadable tubs are a hard no; they contain stabilizers that will ruin your filling’s texture and consistency. For the creamiest, dreamiest outcome, brands like Philadelphia are the gold standard. And here’s the kicker: it must be at room temperature. Cold cream cheese will leave you with a lumpy, sad batter no matter how long you mix it.
Next up, the pecans. Since they’re a headline act, their quality shines through. Opt for fresh, plump pecan halves. Give them a quick toast in a dry skillet beforehand; oh, what a difference it makes! Toasting unlocks their deeply nutty and rich flavor, elevating the entire pecan pie layer from good to absolutely sublime.
Now, don’t overlook the sour cream. This humble ingredient is the unsung hero. It introduces a subtle tang that cuts through the richness, and its fat content contributes to that luxuriously creamy cheesecake texture we’re all chasing. Again, room temperature is crucial!
Then, we have the eggs. They are the backbone that provides structure. However, adding cold eggs to your perfectly creamed cheese mixture is a recipe for disaster—it can cause the fat to seize up. Always, and I mean always, let them sit on the counter until they lose their chill. You’ll incorporate them more evenly without the risk of overmixing.
Finally, the sweeteners. The corn syrup in the topping is traditional for that classic, gooey pecan pieconsistency that doesn’t crystallize. For a more complex flavor profile, however, you can substitute with pure maple syrup. It adds a wonderful, earthy depth that pairs beautifully with the nuts.
Essential Equipment for a Perfect Bake
You don’t need a kitchen full of fancy gadgets, but a few key tools are indispensable for this holay baking project.
-
9-inch Springform Pan: This is non-negotiable. Its removable ring allows you to cleanly release your tall, majestic cheesecake without damaging it.
-
Food Processor: Perfect for blitzing graham crackers into fine, even crumbs for a uniform crust. A blender works in a pinch, too!
-
Stand Mixer or Hand Beaters: You’ll need some electric muscle to properly cream the cheese and sugar until it’s perfectly smooth and lump-free.
-
Roasting Pan: This will act as the vessel for your crucial water bath. It needs to be large enough to hold your springform pan.
-
Parchment Paper & Heavy-Duty Aluminum Foil: The parchment lines the pan bottom for easy release, and the foil is wrapped tightly around the outside to create a waterproof seal against the water bath.
Alright, the prep work is done and your ingredients are poised for action. Now for the main event—transforming these simple components into a legendary dessert. This process is a labor of love, but don’t let that intimidate you. By following these steps methodically, you’re virtually guaranteeing a standing ovation. Remember, patience isn’t just a virtue here; it’s the secret ingredient.
Step 1: Creating the Buttery Graham Cracker Foundation
Every magnificent structure needs a solid base, and your cheesecake is no exception. This crust is anything than an afterthought; it provides essential textural contrast and a buttery flavor that anchors the entire dessert.
First, preheat your oven to 325°F (165°C). Now, take your graham crackers and pulse them in a food processor until you have fine, even crumbs. You’re aiming for about 1 ½ cups of crumbs. Pour these into a bowl and drizzle in the melted butter and a touch of sugar. Go ahead, use your hands to mix it! You want the mixture to hold together when you pinch it—that’s how you know it’s perfect.
Next, transfer the crumb mixture into your prepared 9-inch springform pan. Press them firmly and evenly into the bottom and about halfway up the sides using the bottom of a flat measuring cup or glass. This tool is fantastic for creating a compact, level crust that won’t crumble when sliced. Once it’s firmly in place, pop the pan into the preheated oven for 10 minutes. This quick pre-bake, or “blind baking,” sets the crust and prevents it from becoming soggy later when the wet filling is added. Let it cool on a wire rack while you work on the filling.
Step 2: Whipping Up the Luxurious Cheesecake Filling
Here’s where the magic truly begins. This step is all about technique; it demands attention but rewards you with an ethereally smooth filling.
Place your room-temperature cream cheese into the bowl of your stand mixer fitted with the paddle attachment. Beat it on medium speed for a good minute all by itself. This first step is crucial for breaking it down and ensuring there are zero lumps. Now, gradually add the sugar and continue beating for another 2-3 minutes, frequently scraping down the sides and bottom of the bowl. You’re not just mixing; you’re aerating the mixture until it becomes pale and wonderfully fluffy.
Then, with the mixer on low, blend in the sour cream and vanilla extract until they just disappear into the mixture. Now, for the most critical part: the eggs. Add them one at a time, letting each egg fully incorporate before adding the next. And here is the golden rule: mix on low speed and stop the very second the yolk disappears. Overbeating after adding the eggs incorporates too much air, which leads to puffing and, consequently, tragic cracking as the cheesecake cools. The final filling should be thick, satiny, and impeccably smooth.
Step 3: Preparing the Spiced Pecan Pie Layer
While the filling rests, let’s create that iconic crowning glory. This isn’t just a simple sprinkle of nuts; it’s a mini pecan pie mixture that will partially sink and create a marbled effect.
In a separate bowl, combine your toasted pecan halves, brown sugar, a dash of cinnamon, melted butter, and your choice of syrup. Stir everything together until the pecans are thoroughly coated. The mixture will be thick and fragrant—a promise of the deep, spiced flavor to come. Setting this aside, your kitchen should already smell incredible.
Step 4: The Art of Assembly and the Water Bath
Assembly is a straightforward yet graceful process. First, carefully pour your lush cheesecake filling over the cooled crust, spreading it into an even layer with a spatula. Now, spoon dollops of the pecan mixture across the entire surface of the filling. As you gently spread it, some pecans will sink—this is exactly what you want! It creates a beautiful layered effect and distributes the flavor throughout.
Now, for the pièce de résistance: the water bath. Don’t even think about skipping this! Tightly wrap the outside of your springform pan with two layers of heavy-duty aluminum foil to create a waterproof seal. Place the pan into your large roasting pan. Then, carefully pour hot water into the roasting pan until it reaches about halfway up the sides of the springform. This brilliant technique creates a steamy oven environment, ensuring gentle and even heat distribution. It’s your single best defense against cracks, a rubbery texture, and burnt edges.
Step 5: Baking, Cooling, and The All-Important Chill
Place your meticulously assembled creation into the oven and bake for approximately 65-75 minutes. The true sign of doneness is not a clean toothpick! Instead, you’re looking for the edges to be firmly set while the center still has a slight, gentle jiggle—like Jell-O—when you nudge the pan. The residual heat will continue to cook the center as it cools.
Once the timer goes off, turn off the oven and crack the door open with a wooden spoon. Let the cheesecake cool gradually inside this turned-off oven for one hour. This slow temperature change is another vital step to prevent shocking the delicate dessert and causing surface cracks. After its hour-long rest, remove it from the oven and the water bath, then let it cool completely to room temperature on a wire rack. Finally, cover it loosely with plastic wrap and refrigerate for at least 8 hours, though overnight is truly ideal. This extended chill is non-negotiable for achieving the perfect firm, sliceable texture and allowing all the magnificent flavors to fully meld together.
Chef’s Secrets, Variations, and Serving Your Masterpiece
The hard part is over! Your cheesecake is now patiently chilling, its flavors deepening with every passing hour. While we wait, let’s dive into the professional tricks that separate a good bake from a great one. Furthermore, we’ll explore some delicious twists on the classic recipe and, finally, how to present your creation for maximum dramatic effect.
Chef’s Secrets: Tips for a Flawless Dessert
Every baker has their little vault of secrets, and here’s mine, unlocked for you. These simple yet powerful tips are what will make your dessert utterly unforgettable.
First and foremost, let’s tackle the fear of cracks. A flawless surface is the hallmark of a master baker. The trifecta for crack prevention is simple: room temperature ingredients (which prevent overmixing), the gentle heat of a water bath, and that crucial gradual cooling period in the turned-off oven. If, despite your best efforts, a small crack does appear, don’t despair! Your glorious pecan pie topping will hide a multitude of sins.
Next, mastering the doneness test is key. Forget about toothpicks and timers; they lie. Instead, trust the “jiggle test.” The center of the cheesecake should still have a slight wobble—about the size of a quarter—when you gently shake the pan. It will firm up beautifully as it cools, resulting in that perfect, creamy consistency.
Finally, the art of the clean slice. There’s nothing more frustrating than a messy first piece. For picture-perfect slices, you need the right tool: a thin, sharp knife. Here’s the trick: run the blade under very hot water, wipe it completely dry with a towel, and then make a smooth, confident cut. Repeat this heating and wiping process between every single slice. The clean, hot knife glides through the dense filling and sticky topping without dragging, leaving you with pristine portions.
Delicious Variations to Try
Once you’ve mastered the classic, the culinary world is your oyster! This recipe is a wonderful canvas for your own creativity. Here are a few inspired twists to tickle your fancy.
For a truly adult-friendly dessert with a deep, warm note, consider a Bourbon Pecan variation. Simply add a tablespoon or two of good bourbon to the pecan mixture along with the syrup. The alcohol cooks off, leaving behind a wonderfully complex flavor that pairs magically with the nuts.
Chocolate lovers, rejoice! A Chocolate Swirl variation is incredibly easy and decadent. Melt about half a cup of dark chocolate and let it cool slightly. After pouring the cheesecake batter into the crust, dollop the melted chocolate on top and use a knife or skewer to swirl it dramatically through the filling before adding the pecan layer.
If you’re after a more autumnal, robust flavor, try the Maple Bliss version. Replace the corn syrup in the pecan layer with an equal amount of pure, dark maple syrup. Its rich, caramel-like earthiness elevates the entire dessert to a whole new level of coziness.
For your crust, why not experiment? A Gingersnap Crust is a phenomenal alternative. Simply replace the graham crackers with an equal amount of finely crushed gingersnap cookies. The spicy, zingy flavor of the ginger provides a fantastic counterpoint to the sweet and creamy elements of the cheesecake.
Serving and Presentation Suggestions
The big moment has arrived. You’ve waited patiently, and now it’s time for the grand unveiling and, most importantly, the tasting!
First, ensure you serve this dessert properly chilled. The cool, firm texture is essential to the experience. To release it from the pan, run a thin knife around the inner edge of the springform ring before unclasping it and lifting it away.
Now, for the garnishes! While the cheesecake is spectacular on its own, a few final flourishes make it restaurant-worthy. A dollop of freshly whipped cream adds a lovely light contrast. A generous drizzle of extra caramel sauce over each slice leans into the indulgent theme. For a touch of elegance, a few extra perfectly placed toasted pecans on top look beautiful. And for the ultimate pro move, a tiny pinch of flaky sea salt sprinkled on top just before serving heightens every single flavor.
This rich dessert pairs wonderfully with a cup of hot coffee or a glass of cold milk to balance its sweetness. Present it on a beautiful cake stand, slice it with your hot knife, and get ready to accept your compliments. You’ve earned them
Storing Your Masterpiece, FAQs, and Conclusion
Your magnificent Decadent Pecan Pie Cheesecake has been devoured, and the accolades have (rightfully) rolled in. Now, let’s address the practicalities of leftovers and those nagging questions that might pop up before or after your bake. Finally, we’ll send you off, ready to conquer any dessert table with your newfound expertise.
Storing Your Masterpiece: Make-Ahead and Leftovers
Fortunately, this dessert is as practical as it is impressive. Proper storage is key to maintaining that perfect texture and flavor.
For short-term keeping, simply place any leftover cheesecake in an airtight container, or cover the entire springform pan tightly with plastic wrap. It will happily reside in your refrigerator for up to 5 days. The flavors, believe it or not, continue to meld and often taste even better on the second day!
This cheesecake also freezes like a dream, making it the ultimate make-ahead dessert. To freeze the whole thing or individual slices, first ensure it is completely chilled. Then, wrap it tightly in a layer of plastic wrap, followed by a snug layer of heavy-duty aluminum foil. This double layer prevents freezer burn and protects the delicate filling. You can freeze it for up to 3 months. When a craving strikes, simply transfer it to the refrigerator to thaw overnight. This is the perfect trick for stress-free holiday planning.
Frequently Asked Questions (FAQs)
Let’s tackle those common curiosities head-on.
Can I make this pecan pie cheesecake without a water bath?
While technically possible, it is highly not recommended. The water bath is your number one insurance policy against cracks, uneven cooking, and a dry, rubbery texture. It creates a steamy environment for gentle, even heat, which is absolutely essential for that creamy, luxurious outcome. I strongly advise against skipping this crucial step.
Why is my cheesecake filling lumpy?
This almost always traces back to one culprit: temperature. Using cold cream cheese is a surefire way to end up with a lumpy batter. The fat in cold cream cheese seizes up and refuses to blend smoothly with the other ingredients. Always, without exception, ensure your cream cheese, eggs, and sour cream are truly at room temperature before you begin.
Can I use a store-bought crust to save time?
You can, in a pinch. A pre-made graham cracker crust will work, but expect a few differences. The crust will be thinner and often much sweeter than a homemade version. For the best texture and control over flavor, a homemade crust is vastly superior. If you do use a store-bought one, opt for a “press-in” style rather than a crumbly, pre-baked one for better results.
How do I know when the pecan pie cheesecake is done baking?
Forget the toothpick! Rely on the “jiggle test.” The edges of the cheesecake should look set and may be slightly puffed, but the center—about a 3- to 4-inch circle—should still have a slight, gentle wobble when you gently shake the pan. It will firm up dramatically as it cools during the gradual process in the turned-off oven.
Can I make this recipe gluten-free?
Absolutely! This recipe is wonderfully adaptable. Simply use certified gluten-free graham crackers or another gluten-free cookie (like ginger snaps) for the crust. Double-check that all your other ingredients, like the corn syrup, are certified gluten-free, and you’re all set for a delicious gluten-free treat.
Conclusion: Your Dessert Triumph Awaits
And there you have it—your comprehensive guide to creating a true show-stopping masterpiece. You’ve journeyed from selecting the finest ingredients to mastering the art of the water bath, and from patiently waiting through the chill to slicing the perfect piece.
This Decadent Pecan Pie Cheesecake is more than just a recipe; it’s a testament to your baking prowess, a guaranteed joy-bringer, and the ultimate fusion of two beloved classics. You are now armed with all the knowledge, tips, and tricks needed to achieve dessert perfection. So, preheat that oven with confidence, and get ready to create something truly spectacular. Your triumph in the kitchen is not just awaited—it’s guaranteed.
Decadent Pecan Pie Cheesecake
Description
✨ Decadent Pecan Pie Cheesecake
Ingredients
For the Crust:
-
2 cups graham cracker crumbs (or vanilla wafers)
-
½ cup unsalted butter, melted
-
¼ cup brown sugar
For the Pecan Pie Layer:
-
1 cup light corn syrup
-
½ cup brown sugar
-
⅓ cup unsalted butter
-
3 large eggs, lightly beaten
-
1 tsp vanilla extract
-
2 cups pecans, chopped
For the Cheesecake Layer:
-
24 oz cream cheese (softened)
-
1 cup granulated sugar
-
1 cup sour cream (room temp)
-
3 large eggs (room temp)
-
2 tsp vanilla extract
For the Topping:
-
1 cup pecans, halves or chopped
-
½ cup caramel sauce (homemade or store-bought)
Instructions
-
Prepare the Crust:
-
Preheat oven to 325°F (160°C).
-
Mix graham cracker crumbs, melted butter, and brown sugar.
-
Press into the bottom of a 9-inch springform pan. Bake 10 minutes, then set aside.
-
-
Make the Pecan Pie Filling:
-
In a saucepan over medium heat, combine corn syrup, brown sugar, and butter. Stir until melted and smooth.
-
Remove from heat and whisk in eggs, vanilla, and pecans. Let cool slightly.
-
Pour over the baked crust and spread evenly.
-
-
Make the Cheesecake Layer:
-
Beat cream cheese and sugar until smooth.
-
Mix in sour cream and vanilla. Add eggs one at a time, mixing just until combined.
-
Pour cheesecake batter gently over the pecan pie layer.
-
-
Bake the Cheesecake:
-
Place springform pan in a water bath (wrap pan in foil and set inside a larger pan with 1 inch hot water).
-
Bake 60–70 minutes, until center is almost set.
-
Turn off oven, crack the door, and let cool 1 hour before removing.
-
-
Chill & Top:
-
Refrigerate at least 4 hours or overnight.
-
Before serving, drizzle with caramel sauce and sprinkle pecans on top.
-