
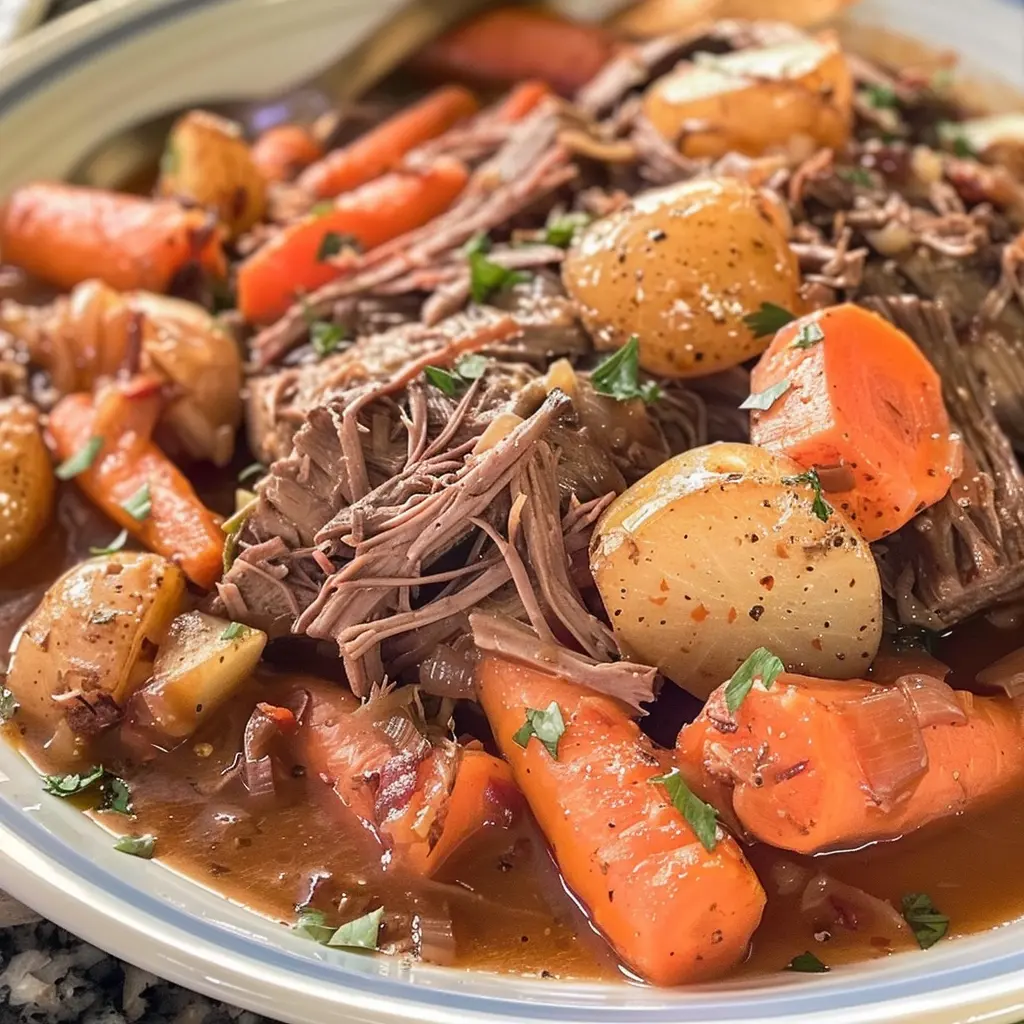
The Ultimate Guide to Perfect Pot Roast: Recipes, Tips, and History
Ah, pot roast. Is there any other dish that so perfectly whispers of home, comfort, and the simple joy of a family gathered around the dinner table? Frankly, it’s the undisputed champion of Sunday dinners, a culinary hug that fills your entire house with an aroma so inviting it could probably convince a stranger to pull up a chair. This isn’t just a meal; it’s a feeling. It’s the promise of fall-apart tender beef, savory vegetables, and a rich, soul-warming gravy that makes you want to savor every single bite.
But here’s the real secret: achieving that perfect, tender pot roast isn’t about some complicated chef’s technique. On the contrary, it’s about understanding a few fundamental principles of cooking. This guide, therefore, is your one-stop resource for mastering this classic. We’ll dive into its humble origins, explore the science behind the braise, and walk you through every single step to ensure your next family dinner is an unforgettable success. So, pull out your trusty Dutch oven, and let’s get started on creating a new comfort food classic in your kitchen.
Introduction & The Foundation of a Great Pot Roast
What Exactly is Pot Roast?
Alright, let’s clear something up right from the beginning. “Pot roast” is actually a bit of a misnomer; it’s not a specific cut of meat from the cow. Instead, it refers to a magical cooking method known as braising. Essentially, you start with a large, notoriously tough cut of beef—think a shoulder or rump cut—that would be chewy and unpleasant if you tried to grill it quickly.
The magic, however, happens through low and slow transformation. First, you sear the meat fiercely in a hot pot to create a gorgeous, brown crust packed with flavor (a process called the Maillard reaction). Then, you add a bit of liquid, cover the pot, and let it simmer gently for hours. During this long, lazy cook time, the stubborn connective tissues and collagen within the meat melt away. They don’t just disappear, mind you; they miraculously break down into luxuriously rich, unctuous gelatin. This process, consequently, bastes the meat from the inside out, transforming an otherwise inexpensive and tough piece of beef into a succulent, mouthwatering masterpiece that practically shreds itself with a fork.
In short, pot roast is the ultimate lesson in patience and technique, turning the underdog of the butcher’s case into the star of your dinner table. It’s a beautiful, simple process that rewards you with incredible flavor and texture, making it the ultimate hearty and economical meal for any home cook.
Choosing Your Ingredients & Equipment
Selecting the Best Cut of Meat for Your Pot Roast
Now, for the star of the show: the beef! Choosing the right cut isn’t just a suggestion; it’s the single most important decision you’ll make. You need a cut that’s practically begging for a long, slow braise.
Chuck Roast: The Undisputed Champion
Without a doubt, the chuck roast is the gold standard for this classic dish. Coming from the shoulder area of the animal, this cut works hard, and that effort translates into incredible flavor. It’s marvelously marbled with fat and packed with all that glorious collagen we talked about. As it cooks, that fat renders and the collagen converts to gelatin, resulting in meat that is unbelievably juicy and flavorful. For a guaranteed winner, a chuck roast is your best bet.
Brisket: The Flavorful Alternative
Another fantastic contender is the beef brisket. This cut, from the breast or lower chest, is famous for its bold, beefy flavor. It has a dense, meaty texture that stands up beautifully to long cooking times. A word of caution, though: brisket can be a bit leaner in parts, so it requires extra care to avoid drying out. It’s a fantastic choice for those who love a more robust flavor and don’t mind keeping a closer eye on the pot.
Round Roast (Bottom & Eye): A Leaner Option
You might also see bottom round or eye of round roasts at the market. These come from the rear leg and rump of the animal, which are leaner muscles. While they can be used, they are far less forgiving. Because they lack sufficient marbling, they can easily become tough and dry if even slightly overcooked. If you choose this route, plan on slicing it very thinly against the grain instead of shredding it.
How to Choose a Good Roast at the Store
So, how do you pick a champion? First, look for generous marbling—those thin white streaks of fat running through the meat. That’s your flavor insurance! The color should be a bright, cherry red, not a dull brown. Finally, don’t be shy! If you’re unsure, ask your butcher for a recommendation. They are fantastic resources and can point you to the perfect piece of meat for your hearty meal.
Essential Equipment for Braising Success
You’ve got the meat; now, what do you cook it in? The vessel you choose makes a world of difference.
Dutch Oven: The Gold Standard
For the absolute best results, a heavy-duty Dutch oven is unbeatable. Typically made of enameled cast iron, these pots are absolute workhorses. They distribute heat incredibly evenly, preventing hot spots that could burn your masterpiece. Furthermore, they retain heat like a dream, maintaining that perfect gentle simmer in the oven. Best of all, they go seamlessly from stovetop (for searing) to oven (for braising), making them the ultimate one-pot meal solution.
Slow Cooker: For Hands-Off Cooking
If your goal is ultimate convenience, the slow cooker is a fantastic tool. Just sear your meat and sauté your veggies on the stove first (trust me, this step is worth it for flavor), then transfer everything to the crock. You can let it cook all day on low while you’re at work or running errands, and come home to a perfectly cooked dinner. It’s the ultimate set-it-and-forget-it appliance for easy recipes.
Instant Pot / Pressure Cooker: The Speed Demon
Short on time? The Instant Pot or any electric pressure cooker is your new best friend. It uses steam and pressure to dramatically accelerate the braising process. You can achieve that coveted fall-apart tenderness in well under two hours. It’s a modern miracle for busy weeknights when you need a comfort food fix fast.
The Classic Recipe & Cooking Techniques
The Classic Traditional Pot Roast Recipe
Ready to cook? This classic recipe is your foolproof roadmap to pot roast perfection.
Ingredients:
-
1 (3-4 pound) chuck roast
-
2 tablespoons high-heat oil (avocado or vegetable)
-
1 large onion, chopped
-
3 carrots, peeled and chopped (plus 4-5 whole carrots for later)
-
2 celery stalks, chopped
-
4 cloves garlic, minced
-
2 tablespoons tomato paste
-
1 cup beef broth (plus more as needed)
-
1 tablespoon Worcestershire sauce
-
3 sprigs fresh thyme
-
2 sprigs fresh rosemary
-
2 bay leaves
-
1.5 pounds Yukon Gold potatoes, halved
-
Salt and black pepper, to taste
Step-by-Step Instructions
Step 1: Bringing the Meat to Temperature
First things first, about 30 to 45 minutes before you plan to cook, take the chuck roast out of the refrigerator. Letting it come closer to room temperature is a small step that makes a huge difference; it ensures the meat cooks much more evenly from edge to center.
Step 2: The Perfect Sear
Now, for the most critical step: the sear. Pat the roast completely dry with a wad of paper towels. Seriously, get it as dry as you can! This is the secret to a deep, brown crust, not a steamy, gray exterior. Generously season all sides with salt and pepper. Meanwhile, heat your oil in your heavy Dutch ovenover medium-high heat until it’s shimmering. Carefully place the roast in the pot and let it sear, without moving it, for a solid 5-6 minutes per side. Don’t rush this! You’re building a foundation of flavor with the Maillard reaction.
Step 3: Building the Foundation: Sautéing Aromatics
Once the roast is beautifully browned on all sides, transfer it to a plate. See all those delicious browned bits stuck to the bottom of the pot? That’s liquid gold! Reduce the heat to medium and add the chopped onion, carrots, and celery (this trio is called a mirepoix). Sauté them until they begin to soften, about 5-7 minutes. Then, add the garlic and tomato paste, cooking for another minute until incredibly fragrant.
Step 4: Deglazing the Pot
This is where you unlock all that flavor. Pour in your cup of beef broth and the Worcestershire sauce. As the liquid hits the hot pot, use a wooden spoon to vigorously scrape all those browned bits off the bottom. This process, called deglazing, is absolutely non-negotiable for a deeply flavorful braising liquid.
Step 5: The Braise
Now, return the seared roast to the pot, nestling it right into the vegetables and liquid. The liquid should come about halfway up the sides of the meat; if it doesn’t, add a bit more broth. Then, toss in the herb sprigs and bay leaves. Bring the liquid to a very gentle simmer, then cover the pot with a tight-fitting lid. Finally, transfer the whole thing to a preheated 300°F (150°C) oven. Now, you wait. Let it cook for about 2 hours before you even think about checking it.
Step 6: Adding Vegetables and Finishing
After 2 hours, carefully remove the pot from the oven. The smell will be incredible! Add your halved potatoes and the remaining whole carrots to the pot, submerging them in the liquid around the roast. Cover it again and return it to the oven for another 1 to 1.5 hours. You’ll know it’s done when the meat is completely tender and easily pulls apart with a fork.
Mastering the Method & Troubleshooting
Pro Tips for the Most Tender Pot Roast Ever
Want to elevate your roast from great to legendary? These pro tips are game-changers.
-
Don’t Rush the Sear: That sizzle is the sound of flavor developing. Let the meat develop a deep, dark crust on each side without fussing with it.
-
Low and Slow is the Law: A gentle simmer in the oven is key. A rolling boil will just make the meat tough and chewy. Patience is your greatest ingredient.
-
Don’t Overcook the Vegetables: Adding your hardy vegetables partway through the cooking process prevents them from turning into a mushy, flavorless mess. They should be tender but still hold their shape.
-
Rest the Meat: I know it’s tempting to dig right in, but resist! Transfer the finished roast to a cutting board and tent it with foil. Let it rest for a solid 15-20 minutes. This allows the frantic muscle fibers to relax and reabsorb all their juicy goodness, ensuring a moist result.
-
Thicken the Juices: While the meat rests, turn that amazing pot liquid into gravy. You can skim off excess fat, then bring the liquid to a simmer on the stove. For a quick thickener, whisk a few tablespoons of cornstarch with an equal amount of cold water to make a slurry, then whisk it into the simmering liquid.
Common Pot Roast Problems and How to Fix Them
Even the best cooks run into hiccups. Here’s how to solve common pot roast dilemmas.
My Roast is Tough. What happened?
Good news: this is almost always fixable! A tough roast means it’s undercooked. The collagen hasn’t had enough time to break down into soft, luxurious gelatin. The solution is simple: just cook it longer! Return it to the pot and continue braising, checking for tenderness every 30 minutes.
My Roast is Dry. Why?
This is usually a sign of overcooking or using the wrong cut. Even well-marbled cuts will eventually dry out if left in the heat for too long after their collagen has dissolved. Alternatively, a lean cut like round roast has very little fat to render and will dry out much faster. Unfortunately, you can’t undo dryness, but serving it with plenty of gravy will help immensely.
My Gravy is Too Thin / Too Fatty
For thin gravy, your best bet is a cornstarch slurry (as mentioned above) or a flour-based roux. For a fatty gravy, the easiest tool is a fat separator. If you don’t have one, you can carefully skim the fat off the top of the liquid with a large spoon or ladle. Alternatively, you can drag a piece of paper towel across the surface; it will miraculously absorb the fat layer.
Variations, Serving, and Storage
Delicious Variations on a Classic
Once you’ve mastered the classic, the world is your oyster! Here are a few famous twists.
-
Mississippi Pot Roast: This internet sensation is famously easy. Just place your seared roast in the pot and top it with a packet of ranch seasoning, a packet of au jus gravy mix, a stick of butter, and 5-6 pepperoncini peppers. Braise as usual—it’s tangy, savory, and ridiculously simple.
-
Asian-Inspired Pot Roast: Swap the broth for beef stock with a big splash of soy sauce. Add a few star anise pods, a piece of fresh ginger, and a tablespoon of brown sugar to the braising liquid for a deeply aromatic, umami-rich twist.
-
Herb-Crusted Pot Roast: After searing, slather the entire roast in a layer of Dijon mustard. Then, press a mixture of chopped fresh rosemary, thyme, parsley, and a bit of garlic onto the mustard layer. This creates a flavorful herb crust during braising.
How to Serve and Store Pot Roast
Best Side Dishes for Pot Roast
This hearty main dish deserves equally comforting sides. The classic pairing is, of course, a big pile of creamy mashed potatoes to soak up all that gravy. Buttered egg noodles are another fantastic option. For vegetables, try simple green beans, roasted Brussels sprouts, or a crisp green salad to cut through the richness.
Storing and Reheating Leftovers
Honestly, leftovers might be the best part! The flavors meld and deepen overnight. Store cooled leftovers in an airtight container in the refrigerator for up to 4 days. To reheat, do so gently on the stovetop over low heat or in the microwave with a splash of extra broth to keep it moist. This dish also freezes beautifully for up to 3 months. Just thaw overnight in the fridge before reheating.
FAQs and Conclusion
Frequently Asked Questions (FAQs)
What is the best cut of meat for pot roast?
The best cut is undoubtedly a chuck roast. Sourced from the animal’s shoulder, it boasts an ideal amount of fat marbling and connective tissue. This composition ensures that during the long, slow braising process, it becomes exceptionally tender and flavorful, making it the perfect choice for this classic dish.
Should you cover a pot roast in the oven?
Yes, you absolutely should for the majority of the cooking time. Braising requires a moist, humid environment to properly break down tough collagen fibers. Keeping the pot covered with a tight-fitting lid traps steam and liquid, effectively tenderizing the meat. You can remove the lid at the very end if you need to thicken your gravy.
How long does it take to cook a pot roast?
As a general rule of thumb, plan for approximately 3 to 4 hours for a standard 3-4 pound roast in a 300°F (150°C) oven. However, the exact time can vary based on the size, shape, and specific cut of the roast. The best indicator of doneness is always tenderness, not the clock. The roast is done when it easily shreds with a fork.
Can I make pot roast in a slow cooker?
Absolutely! The slow cooker is an excellent tool for this dish. For the best flavor, sear the meat and sauté the vegetables on the stovetop first. Then, transfer everything to the slow cooker and add your liquid. Cook on the LOW setting for 8-10 hours, or on HIGH for 5-6 hours, until the meat is fall-apart tender.
Conclusion: Your New Family Favorite
And there you have it—everything you could possibly need to know to create a truly spectacular pot roast. From selecting the perfect chuck roast to mastering the sear and patiently braising it to perfection, you’re now equipped with the knowledge and tips to make a legendary meal. This isn’t just cooking; it’s creating a warm, delicious memory for your table. So go ahead, embrace the process, and get ready to earn some serious compliments. Your new favorite family dinner awaits
Print
Pot Roast
Description
🍽️ Pot Roast
Ingredients (Serves 6)
-
3–4 lbs chuck roast (or brisket/round roast)
-
2 tbsp olive oil
-
1 large onion, sliced
-
4 garlic cloves, smashed
-
4 carrots, cut into chunks
-
2–3 celery stalks, cut into chunks
-
1 ½ lbs baby potatoes (or halved Yukon golds)
-
2 cups beef broth
-
1 cup red wine (or extra broth)
-
2 tbsp tomato paste
-
2 tsp Worcestershire sauce
-
2 sprigs fresh rosemary (or 1 tsp dried)
-
3 sprigs thyme (or 1 tsp dried)
-
2 bay leaves
-
Salt & black pepper, to taste
Instructions
1. Sear the roast
-
Pat beef dry and season generously with salt and pepper.
-
Heat olive oil in a Dutch oven over medium-high heat.
-
Sear roast on all sides until browned (about 4–5 minutes per side). Remove and set aside.
2. Build the flavor base
-
In the same pot, add onion, garlic, carrots, and celery. Sauté 4–5 minutes until softened.
-
Stir in tomato paste and cook 1 minute. Deglaze with red wine, scraping up brown bits.
3. Braise
-
Return beef to the pot. Add potatoes, beef broth, Worcestershire sauce, rosemary, thyme, and bay leaves.
-
Bring to a simmer, cover, and transfer to oven at 300°F (150°C). Cook for 3–4 hours, until beef is fork-tender.
4. Serve
-
Remove herbs and bay leaves.
-
Shred beef into chunks.
-
Serve with vegetables and ladle rich broth over the top.