
The Ultimate Comfort Food Guide
This comprehensive guide dives deep into the world of Ground Beef and Gravy Over Mashed Potatoes, a dish that is so much more than the sum of its simple parts. We will explore its humble origins, break down the science of selecting the perfect ingredients, and master the techniques for creating flawless, silky gravy and pillowy mashed potatoes. Furthermore, we will provide a detailed, step-by-step recipe, explore delicious variations for different diets and kitchens, and answer all your burning questions. By the end, you’ll be equipped to turn this classic comfort food into a personalized masterpiece for your family’s table.
Introduction & The Allure of Comfort Food
Ground Beef and Gravy Over Mashed Potatoes: The Ultimate Comfort Food Guide
Why This Dish is a Timeless Classic
Ah, the unmistakable sound of a rich, savory gravy bubbling away on the stovetop—it’s a siren’s call to the hungry and weary soul. Meanwhile, the heavenly aroma of sautéing onions and browning ground beef begins to weave its way through the entire house, promising something truly special is on the way. Honestly, is there any smell more inviting, more downright comforting? This isn’t just dinner; it’s a warm hug on a plate, a direct line to nostalgia, and the very definition of hearty family meals.
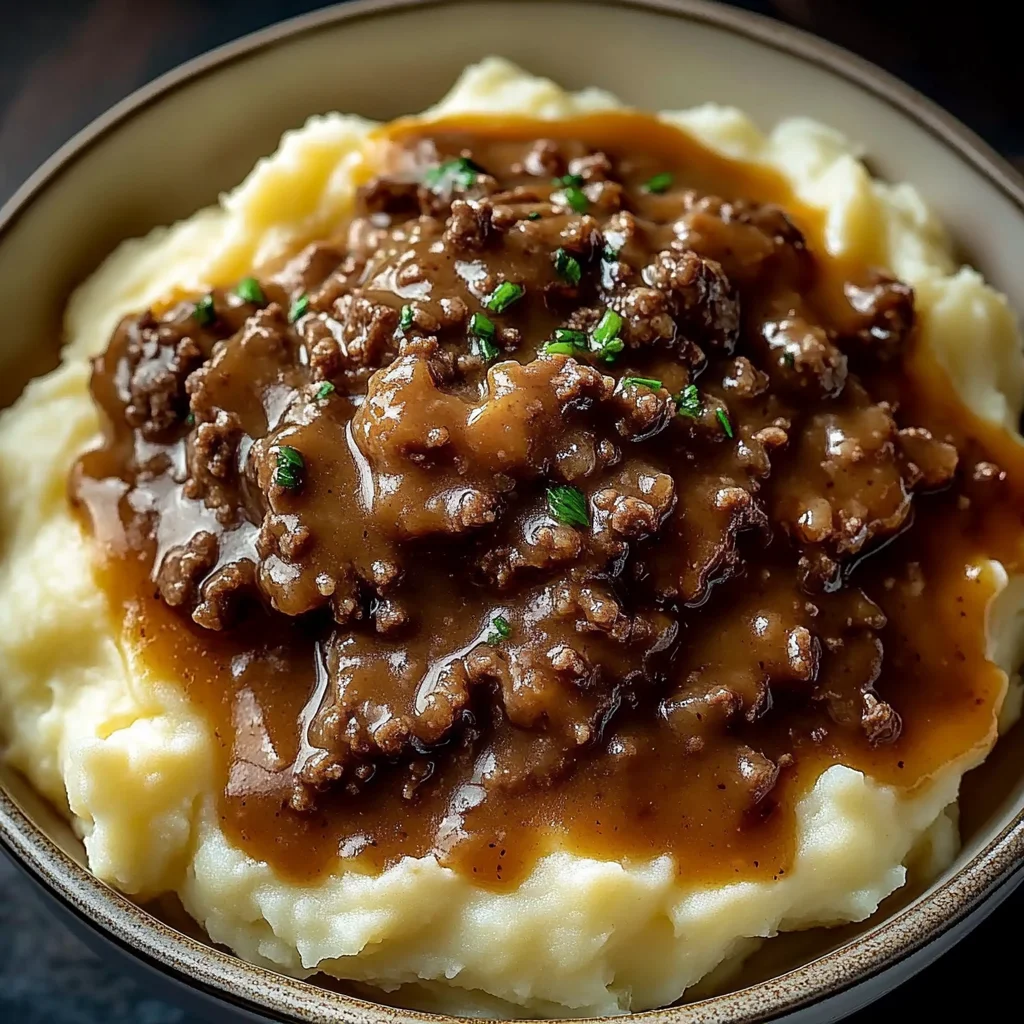
Ultimately, the magic of this dish lies in its beautiful, deconstructed simplicity. Think of it as the easier, weeknight-friendly cousin of Salisbury steak, forgoing the fuss of forming patties for the straightforward joy of a saucy, meaty masterpiece. Visually, it’s a masterpiece of contrasts: a fluffy, white mountain of creamy mashed potatoes, perfectly imperfect with a few specks of skin, just waiting for a lake of deep brown, glossy gravy studded with morsels of beef to cascade down its slopes. Consequently, every single bite delivers a perfect harmony of texture and flavor—the smooth, buttery potatoes against the robust, umami-rich meat and gravy. It’s no wonder this easy weeknight dinner has secured its place as a beloved comfort food recipes champion for generations, stubbornly resisting food trends and fads with its timeless appeal.
A Dish Steeped in History
The Humble Origins of a Hearty Meal
From Cottage Pie to American Dinner Tables
Believe it or not, your humble weeknight supper has a passport stamped with centuries of history! Essentially, the concept of pairing meat with gravy and potatoes is a cornerstone of European peasant cuisine. For instance, the British have their beloved Cottage Pie (with beef) and Shepherd’s Pie (with lamb), a casserole designed to stretch precious Sunday roast leftovers into a new, satisfying meal for the week. Similarly, other cultures have their own versions, all celebrating the hearty, economical union of meat, starch, and sauce.
However, our specific old-fashioned comfort food dish found its true home in mid-20th century America. Why? Because of the widespread availability and affordability of ground beef. After World War II, this versatile ingredient became a supermarket staple, landing in every home cook’s repertoire. Consequently, busy families needed fast, filling, and budget-friendly dinners; thus, this recipe was born. It captured the soul-warming essence of its elaborate ancestors but ditched the complexity, becoming a budget-friendly dinner icon in its own right. You’d often find it on the menus of classic diners, proudly listed as a “blue-plate special,” fueling generations of hard-working Americans.
Building the Foundation: Ingredients Deep Dive
Selecting the Best Ingredients for Maximum Flavor
Alright, let’s get down to the nitty-gritty! While this dish is forgiving, choosing the right components absolutely elevates it from “good” to “knock-your-socks-off incredible.” It’s all about building layers of flavor from the ground up.
The Beef: Choosing Your Ground Chuck, Round, or Sirloin
First things first: the star of the show. Not all ground beef is created equal! For this application, you want a bit of fat for flavor and juiciness. Therefore, I highly recommend an 80/20 blend (80% lean, 20% fat). The fat renders out as you cook, creating those delicious crispy bits and, more importantly, providing the base fat you’ll use for your roux for gravy. While leaner blends like 90/10 are healthier, they often result in a drier texture and less flavorful gravy. Trust me, the 80/20 is the way to go for the most succulent results.
Aromatics: The Flavor Base of Onions and Garlic
Next up, the aromatic foundation. Don’t you dare skip these! Yellow onions are your best bet here—they offer a perfect balance of sweetness and pungency that mellows beautifully when cooked. Fresh garlic, minced or pressed, is non-negotiable for that punch of depth. Using powder in a pinch works, but fresh truly makes a world of difference in your homemade brown gravy.
Broth Matters: Beef Broth vs. Beef Stock vs. Bouillon
This choice is critical for your gravy’s flavor profile. Here’s a quick breakdown:
-
Beef Stock: Made from roasted bones and mirepoix, it’s typically richer, thicker, and has a deeper, more robust flavor. Fantastic if you can find a good quality one.
-
Beef Broth: Made from simmering meat and vegetables, it’s generally lighter in body and flavor than stock.
-
Bouillon: A convenient, shelf-stable option. However, it can be very salty.
My advice? Opt for a low-sodium beef broth or stock. This simple choice gives you complete control over the seasoning, preventing your gravy from becoming a salt lick. The quality of your liquid directly translates to the quality of your final dish.
The Spice Rack: Essential Herbs and Seasonings
Finally, the flavor enhancers. Worcestershire sauce is your secret weapon—its fermented tang adds incredible umami depth. Similarly, a dash of soy sauce (yes, really!) does the same thing without tasting Asian; it just makes the beef taste more, well, beefy. Dried thyme and a pinch of paprika add earthy, sweet notes that complement the beef perfectly. Of course, never underestimate the power of kosher salt and freshly cracked black pepper.
The Art of Perfect Mashed Potatoes
Creating the Perfect Pillowy Bed: Mashed Potatoes 101
Let’s be real: the beef and gravy may be the showstopper, but the mashed potatoes are the stage. And a wobbly, gluey, or lumpy stage just won’t do. Achieving fluffy, cloud-like perfection is easier than you think, but it requires a bit of know-how.
Choosing the Right Potato: Russet vs. Yukon Gold
This is your most important decision! The type of spud you use dictates the final texture.
-
Russet Potatoes: These are the high-starch, classic choice. They yield a light, fluffy, and dry mash that’s absolutely ideal for soaking up every last drop of that glorious gravy. They’re the traditionalist’s pick.
-
Yukon Gold Potatoes: These are a mid-starch, all-purpose wonder. They naturally have a buttery flavor and a creamier, slightly denser, and more velvety texture when mashed. They are also more forgiving and less likely to become gluey if overworked.
So, which to choose? For a classic, fluffy mound, go with Russets. For a reliably creamy and rich mash, Yukon Golds are your best friend. You can’t go wrong with either!
Step-by-Step to Fluffy, Lump-Free Perfection
To Peel or Not to Peel? Well, that’s entirely up to you! Leaving the skins on adds a rustic texture and extra nutrients. For a super smooth and elegant finish, peeling is the way to go.
The Boiling Process: Always start your potatoes in cold, salted water. This ensures they cook evenly from the outside in. Bringing them up to a boil with the water prevents the outsides from becoming mushy before the insides are tender. Cook until they are fork-tender, but not so long that they are waterlogged and falling apart.
The Mashing Technique: This is crucial! Do not, under any circumstances, use a food processor or blender. Those appliances will turn your potatoes into a sticky, glue-like paste. Instead, use a classic potato ricer for the smoothest results imaginable, or a standard potato masher for a more rustic, homemade texture. A hand mixer on low speed can work, but be very careful not to overmix.
Enriching Your Potatoes: Butter, Cream, and Beyond
Now for the fun part: making them irresistible. Always use warm milk or cream—adding cold liquid will make the potatoes gummy. Fold in melted butter first to coat the starch granules, then gradually add your warm dairy, mashing until just combined. For next-level decadence, consider stirring in a dollop of sour cream, cream cheese, or even roasted garlic for an incredible flavor boost. Season generously with salt and white pepper.
Mastering the Beef and Gravy
The Main Event: Crafting the Savory Ground Beef and Gravy
This is where the magic happens. Transforming simple ground beef and broth into a luxurious, deeply flavored sauce might seem like alchemy, but it’s really just a series of simple, intentional steps.
Building a Flavor Foundation: Browning the Beef
Please, I beg of you, don’t just gray your meat! Proper browning, known as the Maillard reaction, is what creates complex, savory flavors. To achieve this, ensure your pan is hot before adding the beef. Moreover, avoid overcrowding the pan. Cooking in batches if necessary prevents the meat from steaming and instead gives each piece a chance to develop a proper, flavorful sear. Those crispy, browned bits (called “fond”) stuck to the bottom of the pan are pure gold—don’t waste them!
The Secret to Silky Gravy: Mastering the Roux
After browning your beef and sautéing your aromatics, you’ll likely have enough rendered fat left in the pan. If not, add a little butter. Sprinkle an equal amount of all-purpose flour over the fat. This mixture of fat and flour is called a roux, and it’s the key to how to thicken gravy. Cook this paste for a minute or two, stirring constantly, to get rid of the raw flour taste. You’re aiming for a blonde color for a classic gravy.
Deglazing and Simmering: Developing Deep Flavor
Here’s the best part. Once your roux is ready, it’s time to deglaze the pan. Slowly pour in your beef broth while whisking constantly. As you whisk, you’ll loosen all those wonderful browned bits from the bottom of the pan, incorporating them directly into your gravy. This is a massive flavor win! Bring the mixture to a gentle simmer. As it simmers, the gravy will begin to thicken beautifully. Let it bubble away for a few minutes; this cooking time allows the flour to fully hydrate and the flavors to meld and deepen, creating that homemade brown gravy taste you’re after.
Troubleshooting Your Gravy: Too Thin? Too Thick?
Don’t panic if your gravy isn’t perfect on the first try! Gravy is very forgiving.
-
Too Thin? Create a slurry by mixing a tablespoon of cornstarch with two tablespoons of cold water. Whisk this into your simmering gravy—it will thicken up almost immediately.
-
Too Thick? This is an easier fix. Simply whisk in more broth or a bit of water, a splash at a time, until it reaches your desired consistency.
The Complete Recipe
Classic Ground Beef and Gravy Over Mashed Potatoes Recipe
Prep Time: 15 mins | Cook Time: 30 mins | Total Time: 45 mins
Ingredients List
For the Mashed Potatoes:
-
2 lbs Russet or Yukon Gold potatoes, peeled and quartered
-
1/2 cup warm whole milk or half-and-half
-
1/4 cup unsalted butter, melted
-
1 tsp salt, or to taste
-
1/4 tsp white pepper
For the Ground Beef and Gravy:
-
1.5 lbs ground beef (80/20 blend)
-
1 medium yellow onion, finely diced
-
2 cloves garlic, minced
-
3 tbsp all-purpose flour
-
3 cups low-sodium beef broth
-
1 tbsp Worcestershire sauce
-
1 tsp soy sauce (optional, for umami)
-
1/2 tsp dried thyme
-
1/2 tsp paprika
-
Salt and black pepper to taste
-
2 tbsp fresh parsley, chopped (for garnish)
Step-by-Step Instructions
-
Cook the Potatoes: Place the peeled and quartered potatoes in a large pot. Cover them with cold, salted water by an inch. Bring to a boil over high heat, then reduce heat to medium and simmer for 15-20 minutes, or until the potatoes are fork-tender.
-
Drain and Mash: Drain the potatoes thoroughly in a colander. Return them to the warm pot and let them sit for a minute to allow any residual steam to evaporate. Mash the potatoes using your preferred tool. Gradually stir in the melted butter and warm milk until smooth and creamy. Season with salt and white pepper. Cover and set aside.
-
Brown the Beef: While the potatoes cook, heat a large skillet or Dutch oven over medium-high heat. Add the ground beef and cook, breaking it up with a spoon, until well-browned. Avoid overcrowding for the best sear.
-
Sauté Aromatics: Add the diced onion to the skillet with the beef and cook for 4-5 minutes until softened. Add the minced garlic and cook for another 30 seconds until fragrant.
-
Make the Roux: If there is excess fat (more than 3-4 tablespoons), drain a little off. Sprinkle the flour over the beef and onion mixture. Stir constantly and cook for 1-2 minutes to cook out the raw flour taste.
-
Create the Gravy: Slowly pour in the beef broth while whisking constantly to avoid lumps. Add the Worcestershire sauce, soy sauce (if using), thyme, and paprika. Scrape the bottom of the pan to incorporate all the browned bits.
-
Simmer: Bring the gravy to a simmer. Reduce the heat to low and let it cook for 5-7 minutes, stirring occasionally, until the gravy has thickened to your liking. Season generously with salt and black pepper.
-
Serve: Spoon a generous portion of creamy mashed potatoes onto a plate or bowl. Create a well in the center and ladle the hot ground beef and gravy over the top. Garnish with fresh parsley and serve immediately.
Variations & Dietary Adaptations
Beyond the Classic: Delicious Variations to Try
The beauty of this dish is its incredible adaptability. Whether you need a hands-off approach or have specific dietary needs, there’s a version for you.
Slow Cooker/Crockpot Method
Perfect for busy days! Simply brown the beef and onions in a skillet on the stove first (this step is crucial for flavor). Then, transfer everything to your slow cooker: the browned beef, onions, raw garlic, flour, broth, and seasonings. Give it a good stir. Cover and cook on LOW for 6-7 hours or on HIGH for 3-4 hours. The gravy will thicken as it cooks. Serve over freshly made mashed potatoes.
Instant Pot Pressure Cooker Method
For a lightning-fast, one-pot wonder, use the Sauté function on your Instant Pot to brown the beef and cook the onions. Turn off the pot and sprinkle the flour over the meat, stirring for a minute. Pour in the broth and scrape the bottom to deglaze. Add your seasonings. Secure the lid, set the valve to sealing, and cook on HIGH PRESSURE for 10 minutes. Allow for a natural pressure release for 5 minutes, then quick release any remaining pressure. The gravy will thicken upon standing.
Dietary Tweaks: Gluten-Free, Dairy-Free, and Lower-Fat
-
Gluten-Free: Substitute the all-purpose flour with a 1:1 gluten-free flour blend or use cornstarch. For cornstarch, mix it with cold water to create a slurry and whisk it in at the end of cooking instead of making a roux.
-
Dairy-Free: Your mashed potatoes can still be creamy! Use olive oil or vegan butter instead of dairy butter, and unsweetened almond, oat, or soy milk instead of cow’s milk.
-
Lower-Fat: Use a leaner blend of ground beef, like 93/7, or even ground turkey. For the gravy, you can use a cornstarch slurry instead of a roux to avoid the added fat. For the potatoes, use low-fat milk and reduce the amount of butter.
Serving, Pairing, and Storing
Serving Suggestions and Leftover Magic
What to Serve on the Side
This dish is a complete meal in itself, but a few simple sides can round it out beautifully. Buttery steamed peas or green beans are a classic pairing—their bright color and slight sweetness cut through the richness perfectly. A simple side salad with a tangy vinaigrette provides a refreshing contrast. And let’s not forget a warm, crusty dinner roll for sopping up any leftover gravy on the plate!
How to Store and Reheat for Best Results
Storage: Allow the beef and gravy to cool completely before transferring it to an airtight container. It will keep in the refrigerator for 3-4 days. Store mashed potatoes separately in another container.
Reheating: The best method is on the stovetop. Reheat the gravy gently in a saucepan over medium-low heat, adding a splash of broth or water to loosen it up as it will thicken when cold. Reheat mashed potatoes in a pot with a little added milk to restore their creaminess. You can also use the microwave, stirring at 30-second intervals to ensure even heating.
Frequently Asked Questions (FAQs)
Frequently Asked Questions (FAQs)
What is the difference between this and Salisbury steak?
The flavor profile is very similar, as both feature a savory beef and onion gravy. The main difference is the form of the beef. Salisbury steak involves forming the ground beef into patties, which are then pan-fried before being smothered in gravy. Our dish uses loose, crumbled ground beef for a quicker, more casual, and deconstructed approach.
Can I make this gravy without pan drippings?
Absolutely! While the drippings add incredible flavor, you can still make a delicious gravy without them. Simply melt 3 tablespoons of butter in your pan, add the flour to make your roux, and proceed with the recipe using broth. You can boost the meaty flavor by using a high-quality beef broth and not skipping the Worcestershire and soy sauce.
How can I make my gravy more flavorful?
This is a common goal! Here are the pro tips:
-
Brown, don’t gray: Get a good, dark sear on your meat.
-
Use quality broth: This is the base of your gravy’s flavor.
-
Don’t rush the roux: Cook it for a full minute to eliminate the raw flour taste.
-
Deglaze thoroughly: Get every last bit of “fond” off the pan.
-
Simmer: Let the gravy bubble gently for at least 5 minutes to allow the flavors to meld and concentrate.
-
Season at the end: Salt and pepper to taste only after the gravy has thickened.
What can I use instead of mashed potatoes?
This savory beef and gravy is incredibly versatile! It’s also fantastic served over:
-
Egg Noodles: For a stroganoff-like experience.
-
Rice: A simple bed of white or brown rice works wonderfully.
-
Bread: A thick slice of toasted sourdough or a fluffy biscuit makes a great base.
-
Cauliflower Mash: A fantastic low-carb and gluten-free alternative.
Can I freeze ground beef and gravy?
Yes, it freezes exceptionally well! Allow the mixture to cool completely, then transfer it to a freezer-safe container or heavy-duty zip-top bag. It can be frozen for up to 3 months. Thaw overnight in the refrigerator before reheating gently on the stovetop with a little added liquid. For the best texture, I recommend making fresh mashed potatoes when you’re ready to serve.
Conclusion
The Joy of a Perfect Comfort Meal
In the end, this dish is so much more than just ground beef and gravy over mashed potatoes. It’s a testament to the power of simple, honest ingredients treated with care and respect. It’s about the joy of creating something deeply satisfying and nourishing for yourself and your loved ones. It’s a reminder that the best meals aren’t always the most complicated ones. So, go ahead—embrace the process, ladle that gravy with abandon, and savor every single bite of your homemade comfort food masterpiece. You’ve earned it.
Print
Ground Beef and Gravy Over Mashed Potatoes
Description
Ground Beef and Gravy Over Mashed Potatoes
Ingredients
For the Beef & Gravy:
-
1 lb ground beef (80/20 for best flavor)
-
1 small onion, finely chopped
-
2 garlic cloves, minced
-
2 tbsp all-purpose flour
-
2 cups beef broth (or 1 cup broth + 1 cup water with bouillon)
-
1 tbsp Worcestershire sauce
-
½ tsp dried thyme (optional)
-
½ tsp smoked paprika (optional)
-
Salt & black pepper, to taste
-
2 tbsp butter (for richness)
-
Fresh parsley, chopped (for garnish)
For the Mashed Potatoes:
-
2 lbs russet or Yukon gold potatoes, peeled & cubed
-
4 tbsp butter
-
½ cup whole milk (or heavy cream for extra richness)
-
Salt & pepper, to taste
Instructions
1. Make the Mashed Potatoes
-
Place potatoes in a large pot, cover with salted water, and bring to a boil.
-
Cook until fork-tender, about 15 minutes.
-
Drain and mash with butter, milk, salt, and pepper until creamy. Cover to keep warm.
2. Cook the Beef & Gravy
-
In a large skillet, brown ground beef over medium-high heat, breaking it up as it cooks. Drain excess fat if needed.
-
Add chopped onion and cook until softened, about 3 minutes. Stir in garlic and cook 30 seconds.
-
Sprinkle flour over the beef mixture and stir well to coat (this makes the gravy base). Cook 1–2 minutes.
-
Slowly pour in beef broth while stirring to avoid lumps. Add Worcestershire, thyme, paprika, salt, and pepper.
-
Simmer for 5–7 minutes, stirring occasionally, until thickened into a rich gravy. Stir in butter for a glossy finish.
3. Serve
-
Spoon creamy mashed potatoes onto plates.
-
Generously ladle beef and gravy over the top.
-
Garnish with fresh parsley.