
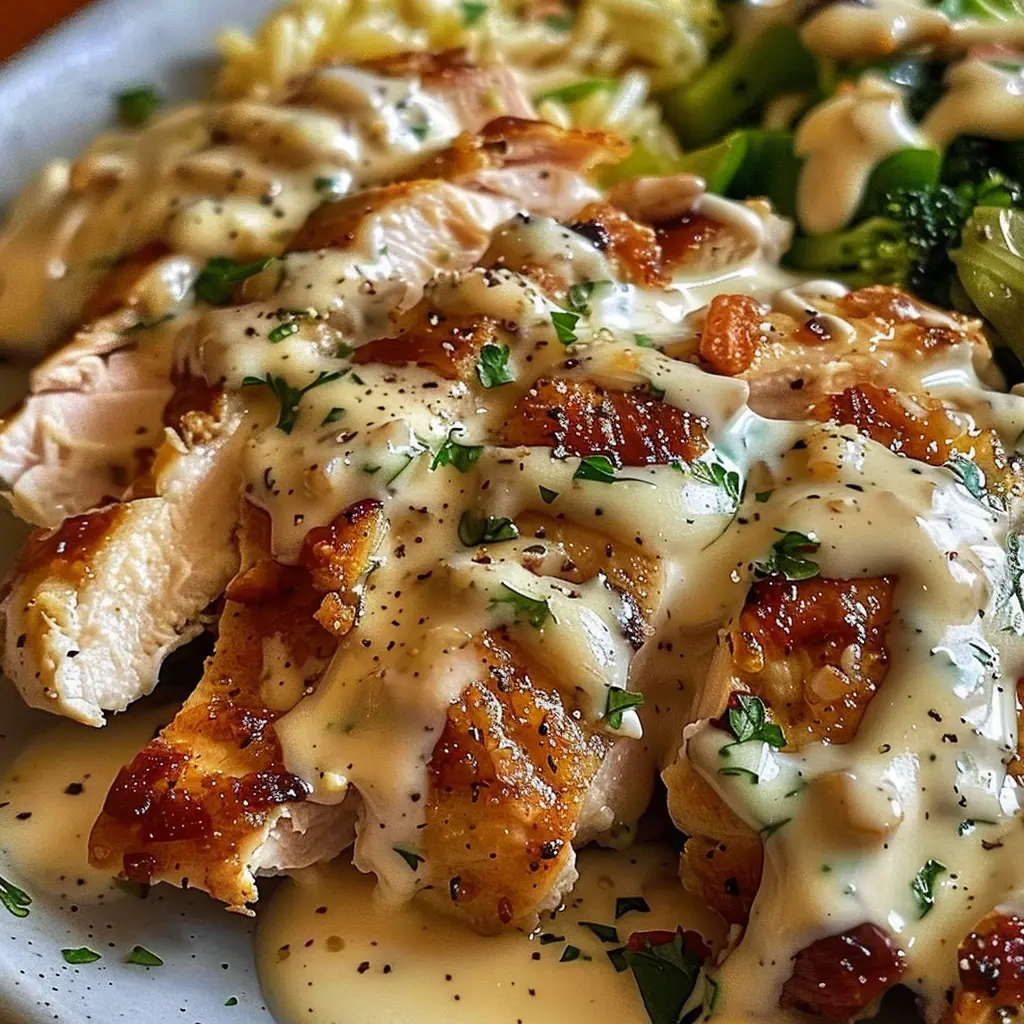
The Ultimate Guide to Caesar Chicken: Recipes, History, and Variations
Ah, Caesar Chicken! Now, here’s a dish that needs no formal introduction, yet somehow deserves a grand one. It’s the glorious, main-course evolution of a salad bar classic, transforming the humble chicken breast into a symphony of garlicky, creamy, and savory flavors. Honestly, who can resist the combination of perfectly cooked chicken, tangy Parmesan, and that unmistakably rich Caesar dressing?
Throughout this ultimate guide, we’re not just tossing together a recipe; we’re diving fork-first into everything that makes this dish a superstar. We’ll unravel its surprisingly debated past, master the art of the flawless marinade, and explore cooking methods from the smoky grill to the convenient air fryer. Furthermore, we’ll tackle healthier twists and answer all your burning questions. So, get ready to move beyond the basic salad and discover why Caesar Chicken has rightfully earned its place as a beloved dinnertime champion.
Introduction and Foundation
What is Caesar Chicken? The Culinary Staple Explained
Let’s start with the basics, shall we? Essentially, Caesar Chicken is a brilliantly simple concept. Imagine taking all the iconic, crave-worthy flavors of a classic Caesar salad—the umami punch of anchovies, the sharpness of Parmesan, the garlicky creaminess of the dressing—and applying them to a juicy, succulent piece of chicken. Instead of being a mere topping, the chicken becomes the canvas for these bold flavors, often through marinating, grilling, or baking.
But why has this particular dish become such a ubiquitous favorite? Well, its popularity isn’t just a happy accident; it’s a testament to perfect flavor pairing. The dish delivers a powerful one-two punch of comfort and sophistication. It’s familiar enough for a casual weeknight dinner yet feels elegant enough for company. Ultimately, it satisfies that deep craving for something both hearty and brilliantly flavorful without requiring a chef’s skills.
A Brief Dive into the Unexpected History
Now, hold onto your forks, because the history here is a tad twisty! Firstly, everyone knows the Caesar salad, right? Its origin story, famously set in Tijuana, Mexico, by restaurateur Caesar Cardini, is the stuff of culinary legend. Interestingly, that iconic salad was an improvisation made from what was left in the kitchen.
However—and this is a crucial however—the specific dish we call “Caesar Chicken” is a distinctly modern, American invention. Think of it as a delicious case of culinary evolution. Someone, somewhere, brilliantly thought, “Why should the salad get all the glory?” Consequently, they took that beloved Caesar dressing and slathered it on chicken, transforming it from a condiment into a marinade and sauce. This clever innovation created a protein-packed main course that proudly carries the name but boasts its own unique identity on the plate. It’s a beautiful remix of a classic tune.
Deconstructing the Classic Caesar Chicken
The Anatomy of a Perfect Caesar Chicken
Before we fire up the stove, let’s break down this masterpiece into its core components. Understanding these four elements is your secret recipe for success every single time. Fundamentally, you need the right chicken, a well-balanced dressing that doubles as a marinade, a reliable cooking method, and a thoughtful way to serve it all up.
The Star: Choosing and Prepping Your Chicken
Alright, let’s talk chicken. Your choice of cut dramatically changes the game, so choose wisely!
-
Cut is Key: Breasts, Thighs, Tenders, or Whole?
-
Chicken Breasts: The lean, classic choice. They’re fantastic for grilling and baking, cooking relatively quickly. Just be careful; their low fat content means they can dry out if overcooked.
-
Chicken Thighs: The juicier, more forgiving option. With more fat, thighs stay succulent through slightly longer cooking times, making them ideal for baking or pan-searing.
-
Chicken Tenders: The speed demon of the group. Perfect for a super-fast sauté or air frying, and a guaranteed hit with the kids.
-
Whole Chicken: The grand feast option. Roasting a whole bird with Caesar flavors is a show-stopping move for a family dinner.
-
-
Essential Prep Tips: No matter your cut, two steps are non-negotiable. First, always pat the chicken completely dry with paper towels; this is the ultimate secret for getting a gorgeous, golden-brown sear instead of a pale steam. Secondly, for even cooking—especially with plump breasts—lightly score the top in a crosshatch pattern.
The Soul: The Caesar Dressing and Marinade
This is where the magic happens. The dressing is the heart, soul, and voice of the entire dish.
-
Homemade vs. Store-Bought: A Taste Comparison
Honestly, making your homemade Caesar dressing is a game-changer. You control the quality of every ingredient, dialing the garlic up or down, ensuring a bold anchovy flavor, and creating something phenomenally fresh. Conversely, a high-quality store-bought dressing is a fantastic time-saver. If you go this route, doctor it up! A squeeze of fresh lemon juice, a minced garlic clove, or a tablespoon of grated Parmesan can transform it from good to great. -
Building Your Flavor Base: The Essential Ingredients
To build a legendary dressing from scratch, you need a choir of flavors singing in harmony:-
The Umami Foundation: This is where the deep, savory notes come from. Anchovy paste (or finely minced fillets) and freshly grated Parmesan cheese are absolutely indispensable.
-
The Creamy Body: Traditionally, mayonnaise provides the lush, creamy texture that clings to the chicken. For a lighter version, Greek yogurt is a stellar substitute.
-
The Tangy Spark: Fresh lemon juice is non-negotiable. It cuts through the richness and brightens every other flavor.
-
The Aromatic Punch: Freshly minced garlic and a crack of black pepper provide that essential sharp, pungent kick.
-
The Salty Depth: Worcestershire sauce adds a complex saltiness that ties everything together beautifully.
-
Mastering the Methods: How to Cook Caesar Chicken
The Quintessential Grill: Achieving Smoky Char
For many, grilling is the ultimate way to cook Caesar Chicken. The smoky char from the flames complements the garlicky marinade perfectly.
-
Step-by-Step Grilling Guide: First, preheat your grill to medium-high heat. Make sure those grates are clean and well-oiled to prevent sticking! Then, place your marinated chicken on the grill. For breasts, sear over direct heat for 5-7 minutes per side. If they’re thick, move them to indirect heat to finish cooking through without burning. Always, and we mean always, use a meat thermometer to ensure they hit 165°F (74°C) internally.
-
Pro Tips for Grilling: Here’s a crucial tip: if you marinated your chicken in a dressing with mayo, wipe off most of the excess before grilling. Why? Because the oil in the mayo can cause major flare-ups. Instead, baste the chicken with fresh dressing in the last minute of cooking for an incredible flavor boost.
The Reliable Oven: Baking for Consistent Results
When you need a hands-off, no-fuss approach, baking is your best friend. It delivers incredibly juicy chicken with minimal effort.
-
Step-by-Step Baking Guide: Preheat your oven to 375°F (190°C). Arrange your chicken on a parchment-lined baking sheet—using a wire rack on the sheet promotes even air circulation for a better texture. Bake for 20-25 minutes, again checking for that perfect 165°F internal temperature.
-
One-Pan Caesar Chicken Dinner: Love easy cleanup? Turn your baked Caesar Chicken into a complete one-pan dinner. With about 10 minutes left, scatter chopped romaine lettuce, halved cherry tomatoes, and chunks of crusty bread around the chicken. Everything roasts together, and the chicken drippings flavor the veggies and croutons!
The Quick Stovetop: Pan-Searing and Sautéing
Need dinner on the table in under 20 minutes? The stovetop is your answer. This method is all about creating a magnificent golden crust.
-
Perfect Pan-Seared Chicken: Heat a tablespoon of olive oil in a heavy-bottomed skillet (like cast-iron) over medium-high heat. Once the oil is shimmering, add your chicken. Don’t move it! Let it sear for 5-6 minutes until a beautiful brown crust forms. Flip and cook for another 5-7 minutes until done.
-
Creating a Pan Sauce: This is a next-level pro move. After removing the chicken, add a splash of chicken broth or lemon juice to the hot skillet. Scrape all those browned, flavorful bits off the bottom (this is called deglazing). Then, swirl in a spoonful of Caesar dressing or a pat of butter to create a simple, incredible sauce to pour over your chicken.
The Modern Marvel: Using an Air Fryer
For those seeking maximum crispiness with minimal oil, the air fryer is a modern miracle worker for Caesar Chicken, especially with tenders or thighs.
-
Why It Works: The air fryer’s powerful, circulating heat cooks the chicken quickly while rendering fat and creating a delightfully crispy exterior. It’s a healthier alternative to deep-frying but delivers a similar satisfying crunch.
-
Air Fryer Instructions: Preheat your air fryer to 380°F (193°C). Place the chicken in the basket in a single layer—do not overcrowd! Cook for 10-12 minutes for tenders, flipping halfway through, or 15-18 minutes for breasts or thighs. Always check for doneness with a thermometer.
Beyond the Basic: Creative Variations and Dietary Tweaks
Lighter and Healthier Caesar Chicken Options
Craving the flavor but watching your calories? No problem! You can easily lighten up this classic dish without sacrificing taste.
-
Greek Yogurt Caesar Dressing: This is the number one swap. Simply replace the mayonnaise with an equal amount of plain, non-fat Greek yogurt. You’ll get a huge protein boost, less fat, and that same creamy tang.
-
“Deconstructed” Salad Bowl: Think outside the plate! Instead of coating the chicken in a heavy dressing, serve a perfectly grilled chicken breast on a massive bed of fresh romaine lettuce. Then, drizzle a lighter dressing over the top. You get all the flavors in a much brighter, healthier package.
-
Dairy-Free and Gluten-Free Adaptations: Dietary restrictions shouldn’t stop anyone. For a dairy-free version, use nutritional yeast or a vegan Parmesan alternative to mimic the cheesy flavor. To make it gluten-free, simply ensure your Worcestershire sauce is gluten-free (many brands are, but always check!) or use tamari instead.
Global and Gourmet Twists on a Classic
Once you’ve mastered the classic, it’s time to play with your food! These creative twists can make Caesar Chicken feel brand new.
-
Caesar Chicken Pasta: Turn it into a luxurious pasta dish. Simply slice your cooked Caesar Chickenand toss it with warm pasta, a few tablespoons of the dressing, a splash of pasta water to create a light sauce, and some steamed peas. It’s incredibly satisfying.
-
Caesar Chicken Wraps and Sandwiches: This is a fantastic lunch solution. Chop or slice the cold leftover chicken, mix it with a little extra dressing, and pile it into a whole-wheat wrap or between two slices of crusty bread with lettuce and tomato.
-
Lemon-Herb Infusion: Add a fresh, garden-inspired twist by mixing finely chopped fresh herbs like dill, parsley, or chives right into your marinade. The herbs add a wonderful layer of freshness that cuts through the richness.
Serving, Pairing, and Storing
How to Serve and Present Caesar Chicken
Presentation matters! A few simple touches make your dish look as good as it tastes.
Always let your chicken rest for 5 minutes after cooking; this allows the juices to redistribute, ensuring every bite is moist. Then, slice it against the grain for the most tender texture. Finally, garnish generously with fresh chopped parsley, extra shavings of Parmesan cheese, a couple of homemade croutons, and a lemon wedge on the side for squeezing.
Perfect Side Dishes to Complement Your Meal
While it’s often served with a salad, the pairing possibilities are nearly endless.
-
Classic Companions: You can never go wrong with a simple Caesar salad, garlic bread, roasted asparagus, or a creamy Parmesan risotto.
-
Lighter Options: For a healthier spread, consider a quinoa salad with lemon vinaigrette, simple steamed green beans, or a light arugula salad with a lemon squeeze.
Storage and Reheating Instructions for Best Quality
Got leftovers? Lucky you! Proper storage is key.
Store cooled Caesar Chicken in an airtight container in the refrigerator for up to 3-4 days. When reheating, avoid the microwave if you can, as it will make the chicken rubbery. Instead, reheat it gently in a 350°F (175°C) oven or back in the air fryer for a few minutes until warmed through. This helps preserve the texture.
Frequently Asked Questions (FAQs)
Frequently Asked Questions About Caesar Chicken
What is Caesar chicken made of?
At its core, it’s chicken (breasts, thighs, or tenders) coated in a sauce or marinade made from classic Caesar salad ingredients. This typically includes Parmesan cheese, garlic, lemon juice, black pepper, anchovies (or paste), and a creamy base like mayonnaise or yogurt. The chicken is then grilled, baked, or pan-cooked.
What to serve with Caesar chicken?
The most traditional and perfect pairing is a classic Caesar salad. Other excellent sides include roasted vegetables like broccoli or asparagus, pasta, garlic mashed potatoes, or a simple rice pilaf. It’s a very versatile protein!
Can I use bottled Caesar dressing as a marinade?
Absolutely, you can! It’s a great shortcut for a busy night. For the best results, consider adding a little extra fresh minced garlic, lemon zest, or black pepper to elevate the flavor from the bottle. Remember, if grilling, wipe off excess marinade containing mayo to prevent flare-ups.
How long should I marinate Caesar chicken?
For the best flavor and texture, marinate for at least 30 minutes. You can marinate it for up to 4 hours in the refrigerator. Avoid marinating for much longer than that, especially if your dressing is very acidic (from lemon juice), as it can start to break down the proteins in the chicken and give it a mushy texture.
For anyone looking to master the foundation of great chicken, reading up on the scientific tips for perfectly grilled chicken breast can make all the difference. And if you’re curious about how it all began, the fascinating history of the Caesar salad is a fun culinary rabbit hole to dive into. Always remember to follow official USDA guidelines for safe chicken handling to ensure your delicious meals are also safe to eat.
Print
Caesar Chicken
Description
Caesar Chicken
Ingredients
-
4 boneless, skinless chicken breasts
-
2 tbsp olive oil
-
Salt and black pepper, to taste
-
1 tsp garlic powder
-
1 tsp dried Italian herbs (optional)
-
½ cup Caesar dressing (store-bought or homemade)
-
½ cup grated Parmesan cheese
-
2 cups Romaine lettuce, chopped (optional, for serving)
-
Croutons (optional, for garnish)
-
Lemon wedges, for serving
Instructions
-
Prep the chicken: Pat chicken dry. Season both sides with salt, pepper, garlic powder, and Italian herbs.
-
Cook the chicken: Heat olive oil in a large skillet over medium heat. Cook chicken 6–7 minutes per side until golden brown and cooked through (internal temperature 165°F / 74°C). Remove from skillet and let rest for 3–5 minutes.
-
Top with Caesar flavor: Spread a generous layer of Caesar dressing over each chicken breast. Sprinkle with Parmesan cheese.
-
Optional broil: For a bubbly, golden top, place the chicken under the broiler 1–2 minutes until cheese is lightly browned.
-
Serve: Serve on a bed of chopped Romaine lettuce, topped with croutons and an extra drizzle of Caesar dressing. Garnish with lemon wedges.