
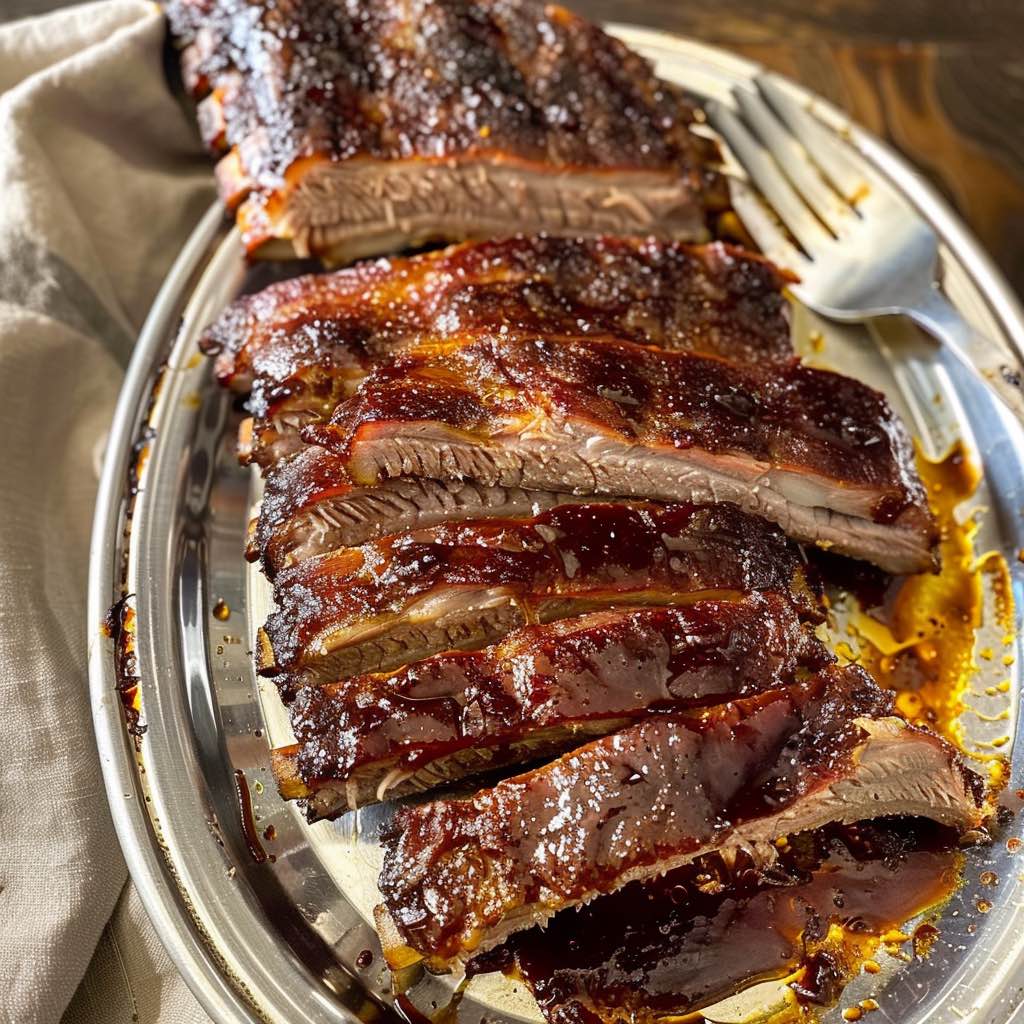
Easy Oven-Baked Ribs
Introduction
Making easy oven-baked ribs at home is simpler than most people think. Moreover, there’s no need for a grill or smoker to achieve tender, flavorful results. These ribs come out juicy and delicious every single time. Furthermore, the low and slow cooking method guarantees fall-off-the-bone perfection.
Anyone can master this technique with basic kitchen equipment. Additionally, the process requires minimal active cooking time. Therefore, it’s perfect for busy weeknights or weekend gatherings. In fact, many home cooks prefer oven-baked ribs over grilled versions for their consistency.
This comprehensive guide covers everything needed for success. Consequently, both beginners and experienced cooks will find valuable tips here. The result is restaurant-quality ribs made in your own kitchen.
What Are Oven-Baked Ribs?
Oven-baked ribs are pork ribs cooked slowly in the oven using indirect heat. This method mimics traditional smoking techniques without outdoor equipment. Essentially, the ribs braise in their own juices while wrapped in foil.
The low temperature breaks down tough connective tissue gradually. As a result, the meat becomes incredibly tender. Meanwhile, the dry rub creates a flavorful crust on the surface. The technique works beautifully for any type of pork ribs.
Types of Ribs for Baking
Baby Back Ribs
Baby back ribs come from the upper part of the pig’s rib cage. They’re shorter, more curved, and leaner than spare ribs. Additionally, they cook faster due to their smaller size. These ribs typically weigh 1.5 to 2 pounds per rack.
Baby backs are the most tender option available. Therefore, many people prefer them for oven baking. However, they also cost more than other varieties.
St. Louis Style Ribs
St. Louis style ribs are spare ribs trimmed into a neat rectangle. Specifically, the cartilage and rib tips are removed. This makes them easier to handle and cook evenly.
These ribs contain more fat than baby backs. Consequently, they have richer flavor and stay moist during cooking. They typically require slightly longer cooking times.
Spare Ribs
Spare ribs come from the belly area and are larger than baby backs. They contain more bone, fat, and connective tissue. Nevertheless, they offer excellent flavor when cooked properly.
These ribs need additional cooking time to become tender. Furthermore, they benefit from the low and slow method. The extra fat keeps them juicy throughout the process.
Essential Tools and Equipment
Creating easy oven-baked ribs requires minimal equipment. First, you’ll need a large baking sheet with raised edges. Additionally, heavy-duty aluminum foil is essential for wrapping.
A wire rack helps promote even cooking and browning. However, it’s optional for this recipe. You’ll also need a small mixing bowl for the dry rub.
Paper towels are necessary for drying the ribs before seasoning. Moreover, a sharp knife helps with membrane removal. Finally, a basting brush applies sauce during finishing.
Removing the Membrane
The membrane is a thin, silvery layer on the back of the ribs. Removing it allows seasonings to penetrate the meat better. Additionally, it prevents the ribs from becoming chewy.
Start by sliding a butter knife under the membrane at one end. Then, use a paper towel to grip the slippery surface firmly. Pull the entire membrane away in one piece.
This step takes practice but significantly improves the final texture. Nevertheless, some cooks leave the membrane on for structural support. Ultimately, removal is recommended for the best results.
Creating the Perfect Dry Rub
Basic Dry Rub Recipe
A flavorful dry rub transforms ordinary ribs into something extraordinary. Combine these ingredients in a small bowl:
-
1/4 cup brown sugar
-
2 tablespoons paprika
-
2 teaspoons kosher salt
-
2 teaspoons black pepper
-
2 teaspoons smoked paprika
-
1 teaspoon garlic powder
-
1 teaspoon onion powder
-
1 teaspoon ground mustard
-
1/2 teaspoon cayenne pepper
Mix all ingredients thoroughly, breaking up any clumps. This rub balances sweet, smoky, and spicy flavors perfectly. Furthermore, it creates a beautiful crust during cooking.
Alternative Seasoning Blends
For a simpler approach, use just salt and pepper generously. Alternatively, try a Cajun-style rub with cumin and coriander. Some cooks prefer adding cinnamon for subtle sweetness.
Chili powder and chipotle powder add smoky heat effectively. Meanwhile, dried herbs like oregano provide Mediterranean flair. Experiment with different combinations to find your favorite.
Step-by-Step Cooking Instructions
Preparation Phase
First, preheat your oven to 275°F (135°C) for consistent results. Line a large baking sheet with aluminum foil for easy cleanup. Pat the ribs completely dry with paper towels.
Remove the membrane from the back of the ribs carefully. Then, check for any small bone fragments and remove them. Cut the racks in half if necessary to fit your pan.
Applying the Rub
Sprinkle the dry rub evenly over both sides of the ribs. Use about 1/4 cup of rub per side for full coverage. Massage the spices into the meat thoroughly.
Let the seasoned ribs rest for at least one hour. This allows the spices to penetrate the meat deeply. For best results, refrigerate them during this time.
The Cooking Process
Place the ribs meat-side down on the prepared baking sheet. Add sliced onions and garlic underneath for extra flavor. Cover the entire pan tightly with aluminum foil.
Bake for 2.5 to 3 hours depending on thickness. Meanwhile, the low temperature breaks down collagen gradually. Check for tenderness by inserting a knife between the bones.
The meat should pull away from the bones easily when done. However, it shouldn’t fall off completely before saucing. If needed, continue cooking in 30-minute increments.
Temperature and Timing Guide
Temperature Options
Most recipes call for baking between 250°F and 300°F. Lower temperatures around 250°F require longer cooking times. Conversely, 300°F cooks ribs slightly faster.
The key is maintaining consistent temperature throughout cooking. Therefore, avoid opening the oven door frequently. Additionally, ensure your oven is properly calibrated.
Timing for Different Rib Types
Baby back ribs typically need 1.5 to 2 hours at 300°F. Meanwhile, St. Louis style ribs require 2.5 to 3 hours. Spare ribs often take 3 to 3.5 hours for optimal tenderness.
Always test for doneness rather than relying solely on time. Furthermore, larger racks need additional cooking time. The meat should be tender but not mushy.
Finishing Touches and BBQ Sauce
Broiling for Caramelization
After the initial baking, remove the ribs from the oven carefully. Unwrap them and discard the foil along with accumulated juices. Pat the surface dry with paper towels.
Brush both sides generously with your favorite BBQ sauce. Then, place the ribs under the broiler on high heat. Watch them closely to prevent burning.
Broil for 3 to 5 minutes until the sauce caramelizes beautifully. For extra glaze, apply a second coat and broil again. This creates sticky, flavorful ribs with gorgeous color.
Homemade BBQ Sauce Option
Make a simple sauce by combining ketchup, vinegar, and brown sugar. Add honey, Worcestershire sauce, and spices to taste. Simmer the mixture until slightly thickened.
This homemade version contains no alcohol and tastes fresh. Moreover, it’s less sweet than many store-bought varieties. Adjust seasonings according to personal preference.
Common Mistakes to Avoid
Cooking at Too High Temperature
Rushing the process with high heat causes dry, tough ribs. Specifically, temperatures above 350°F cook the outside too quickly. Meanwhile, the inside remains chewy and unpalatable.
Patience is essential for tender results with easy oven-baked ribs. Therefore, stick to low temperatures between 250°F and 300°F. The slow cooking method cannot be shortcut successfully.
Leaving the Ribs Uncovered
Skipping the foil wrap leads to significant moisture loss. Consequently, the ribs become dry and leathery. The foil creates a steamy environment that keeps meat juicy.
Always seal the foil tightly around the ribs completely. Additionally, check that no steam can escape during cooking. This simple step makes a dramatic difference in final texture.
Adding Sauce Too Early
Applying BBQ sauce at the beginning causes burning and bitter flavors. Sugar in the sauce caramelizes quickly at low temperatures. Furthermore, it prevents the dry rub from forming a proper crust.
Wait until the final 10 minutes to add sauce. Then, use the broiler for quick caramelization only. This technique keeps the sauce bright and flavorful.
Not Testing for Doneness
Relying solely on cooking time without checking doneness causes problems. Rib sizes vary significantly between packages. Additionally, oven temperatures aren’t always accurate.
Insert a knife between bones to test tenderness properly. The meat should slide away easily with minimal resistance. Furthermore, the bones should twist slightly when pulled.
Storage and Reheating Tips
Proper Storage Methods
Leftover easy oven-baked ribs stay fresh for 3 to 4 days refrigerated. First, let them cool completely to room temperature. Then, wrap them tightly in aluminum foil or plastic wrap.
Alternatively, place ribs in an airtight container for storage. For longer storage, freeze them for up to 3 months. Cut ribs into individual portions before freezing for convenience.
Vacuum sealing provides the best protection against freezer burn. However, freezer bags work well too. Press out excess air before sealing completely.
Reheating Instructions
The oven provides the best method for reheating ribs. Preheat to 300°F and place ribs in a baking dish. Add a small amount of broth or water to the bottom.
Cover tightly with foil and heat for 20 to 30 minutes. This gentle method prevents drying out the meat. Meanwhile, the liquid creates steam that keeps ribs moist.
Avoid using the microwave as it makes ribs tough and chewy. For quick reheating, wrap in damp paper towels if necessary. Nevertheless, the oven produces superior results every time.
Nutritional Information
Easy oven-baked ribs provide substantial protein and essential nutrients. A typical 4-ounce serving contains approximately 250 to 300 calories. However, this varies based on the cut and preparation method.
Baby back ribs offer about 248 calories per serving with 32% protein. Meanwhile, they contain 68% fat and zero carbohydrates. The macronutrient breakdown makes them suitable for low-carb diets.
These ribs are excellent sources of vitamin B6, B12, and selenium. Additionally, they provide significant amounts of zinc, phosphorus, and potassium. One serving delivers 78% of the daily value for protein.
The fat content includes both saturated and unsaturated fats naturally. Furthermore, ribs contain essential amino acids necessary for muscle maintenance. Trimming visible fat before eating reduces overall calorie content.
Frequently Asked Questions
How do I know when easy oven-baked ribs are done?
The meat should easily pull away from the bones when tested. Insert a knife between two bones to check tenderness. Additionally, the bones should twist slightly with gentle pressure. The internal temperature should reach at least 190°F for optimal tenderness.
Can I make oven-baked ribs without BBQ sauce?
Absolutely! Many people prefer dry-rubbed ribs without any sauce. The spice rub alone creates incredible flavor. Simply skip the saucing step and enjoy them as-is. Alternatively, serve sauce on the side for dipping.
Do I need to boil ribs before baking them?
No, boiling is unnecessary and actually removes flavor. The low and slow oven method achieves tenderness without pre-cooking. Furthermore, boiling can make the texture mushy rather than tender. Baking alone produces superior results consistently.
What’s the best temperature for baking ribs in the oven?
The ideal temperature range is between 250°F and 300°F. Most recipes recommend 275°F for consistent results. Lower temperatures take longer but produce extremely tender meat. Higher temperatures speed up cooking but risk drying out the ribs.
Can I cook frozen ribs in the oven?
Yes, but thaw them first for best results and even cooking. Frozen ribs take significantly longer and cook unevenly. Therefore, plan ahead and thaw them in the refrigerator overnight. This ensures proper seasoning penetration and texture.
How can I make ribs more tender?
Use the low and slow cooking method at 275°F. Additionally, wrap ribs tightly in foil to trap moisture. Let them cook until a knife slides between bones easily. Furthermore, removing the membrane before cooking helps significantly.
Conclusion
Making easy oven-baked ribs at home delivers restaurant-quality results with minimal effort. This foolproof method guarantees tender, flavorful ribs every single time. Moreover, no special equipment or outdoor space is required.
The key steps include proper preparation, generous seasoning, and patient cooking. Additionally, maintaining low temperatures ensures the meat stays juicy and tender. The finishing broil creates a beautiful caramelized crust.
These techniques work perfectly for any occasion or skill level. Furthermore, the recipe easily scales up for larger gatherings. Your family and guests will rave about these delicious ribs.
Print
Easy Oven-Baked Ribs
Description
Easy Oven-Baked Ribs
Ingredients
-
2 racks baby back or St. Louis-style pork ribs
-
2 tbsp olive oil
-
2 tbsp brown sugar
-
2 tsp smoked paprika
-
1 tsp garlic powder
-
1 tsp onion powder
-
1 tsp salt
-
1 tsp black pepper
-
½ tsp chili powder or cayenne (optional for heat)
-
1 ½ cups barbecue sauce (your favorite)
Instructions
-
Preheat Oven
Preheat oven to 300°F (150°C). Line a large baking sheet with foil and place a wire rack on top. -
Prepare the Ribs
Remove the thin silver skin from the back of the ribs for maximum tenderness.
Pat dry with paper towels and drizzle with olive oil. -
Season the Ribs
In a small bowl, mix brown sugar, paprika, garlic powder, onion powder, salt, pepper, and chili powder.
Rub generously over both sides of the ribs. -
Wrap and Bake
Place ribs on the prepared sheet, bone side down.
Cover tightly with foil and bake for 2 ½ to 3 hours, until the meat is tender and easily pulls from the bone. -
Glaze and Broil
Remove foil, brush ribs generously with barbecue sauce, and broil for 3–5 minutes, until caramelized and sticky.
(Keep an eye on them — they brown fast!) -
Rest and Serve
Let the ribs rest for 5 minutes before cutting into portions. Serve with extra BBQ sauce on the side.