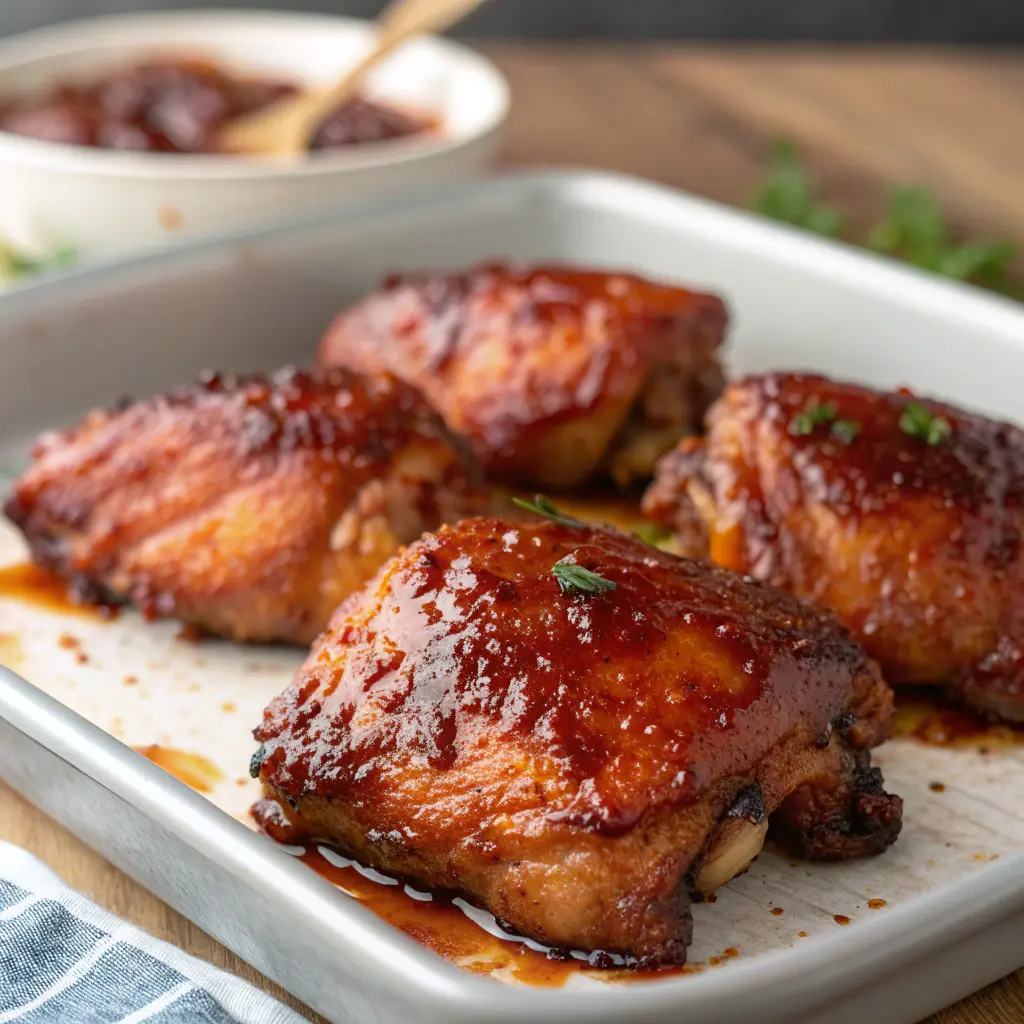
Oven-Baked BBQ Chicken Thighs: The Ultimate Guide to Juicy, Fall-Off-The-Bone Perfection
Craving tender, smoky, and perfectly caramelized chicken without firing up the grill? Oven-baked BBQ chicken thighs deliver restaurant-quality results right in your kitchen. These juicy, budget-friendly cuts transform into a flavor-packed meal with minimal effort, making them perfect for busy weeknights or weekend gatherings. Whether you’re a seasoned home cook or just starting your culinary journey, mastering this technique will become your go-to dinner solution.
Why Choose Chicken Thighs for BBQ
Chicken thighs reign supreme when it comes to oven-baked BBQ preparations. Unlike their leaner counterparts, these cuts contain more fat and connective tissue, resulting in incredibly moist and flavorful meat.
Superior Moisture Retention
Dark meat naturally contains more intramuscular fat. This characteristic prevents the meat from drying out during cooking. Additionally, thighs remain tender even if slightly overcooked, offering more forgiveness than chicken breasts.
The higher fat content also enhances flavor absorption. BBQ sauce adheres better to thighs, creating that signature sticky-sweet coating everyone loves.
Budget-Friendly Option
Chicken thighs typically cost less per pound than breast meat. This makes them an economical choice for feeding families or meal prepping. Furthermore, bone-in, skin-on varieties often provide the best value while delivering maximum flavor.
Versatility in Preparation
These cuts adapt well to various cooking methods. Consequently, they work perfectly for:
-
Quick weeknight dinners
-
Meal prep batches
-
Party platters
-
Casual gatherings
Essential Ingredients and Equipment
Success starts with quality ingredients and the right tools. Gathering everything beforehand streamlines the cooking process significantly.
Main Ingredients
For the Chicken:
-
8-10 bone-in, skin-on chicken thighs (about 3-4 pounds)
-
2 tablespoons olive oil
-
2 teaspoons smoked paprika
-
1 teaspoon garlic powder
-
1 teaspoon onion powder
-
1 teaspoon black pepper
-
1 teaspoon salt
-
½ teaspoon cayenne pepper (optional)
For the BBQ Component:
-
2 cups BBQ sauce (store-bought or homemade)
-
2 tablespoons honey
-
1 tablespoon apple cider vinegar
-
1 teaspoon liquid smoke (optional)
Required Equipment
-
Large rimmed baking sheet
-
Aluminum foil or parchment paper
-
Wire cooling rack (optional but recommended)
-
Meat thermometer
-
Basting brush
-
Mixing bowls
Preparing Your Chicken Thighs
Proper preparation ensures even cooking and maximum flavor penetration. Taking time with this step pays dividends in the final result.
Inspecting and Trimming
Start by examining each thigh carefully. Remove any excess fat, but leave some for moisture. Additionally, trim away any loose skin or cartilage pieces.
Pat the thighs completely dry using paper towels. Moisture on the surface prevents proper seasoning adhesion and crispy skin development.
Seasoning Technique
Create a dry rub by combining all spices in a small bowl. Mix thoroughly to distribute seasonings evenly.
Drizzle olive oil over the chicken thighs. Rub the oil into every surface, ensuring complete coverage. This step helps seasonings stick and promotes browning.
Generously apply the spice mixture to both sides. Press the rub into the meat gently. Let the seasoned thighs rest at room temperature for 20-30 minutes before baking. This practice allows for more even cooking.
Temperature Considerations
Room temperature chicken cooks more evenly than cold meat. Therefore, remove thighs from the refrigerator 30 minutes before cooking. Meanwhile, preheat your oven to ensure consistent heat distribution.
The Perfect BBQ Sauce Selection
Choosing the right BBQ sauce dramatically impacts your final dish. Understanding different styles helps you select based on preference.
Popular BBQ Sauce Styles
Kansas City Style:
This thick, sweet, tomato-based sauce contains molasses and brown sugar. It creates a glossy, caramelized finish on baked chicken thighs.
Carolina Style:
Vinegar-based and tangy, this thinner sauce features mustard or tomato variations. The acidity cuts through rich dark meat beautifully.
Texas Style:
This style emphasizes bold, smoky flavors with minimal sweetness. Consequently, it pairs wonderfully with heavily spiced chicken thighs.
Memphis Style:
Tomato-based with a thinner consistency, this sauce balances sweet and tangy notes. It works exceptionally well for oven baking.
Sauce Enhancement Tips
Boost store-bought sauce by adding:
-
Honey for extra sweetness
-
Hot sauce for heat
-
Liquid smoke for depth
-
Apple cider vinegar for tanginess
-
Minced garlic for aromatic complexity
Mix these additions thoroughly. Taste and adjust seasonings before applying to chicken.
Step-by-Step Baking Instructions
Following a systematic approach guarantees perfectly baked BBQ chicken thighs every time. These detailed steps eliminate guesswork.
Initial Baking Phase
Preheat your oven to 400°F (200°C). Line a large rimmed baking sheet with aluminum foil for easy cleanup. Place a wire rack on top if available.
Arrange seasoned chicken thighs skin-side up on the prepared sheet. Space them evenly, allowing air circulation between pieces. Avoid overcrowding, which leads to steaming instead of baking.
Bake uncovered for 25 minutes. This initial phase renders fat and begins crisping the skin. During this time, the internal temperature should reach approximately 150°F (65°C).
First Sauce Application
Remove the baking sheet from the oven carefully. Using a basting brush, apply a generous layer of BBQ sauce to each thigh. Flip the pieces and coat the underside as well.
Return to the oven immediately. Continue baking for another 10 minutes. The sauce will begin caramelizing and developing complex flavors.
Second Sauce Layer
Remove from the oven again. Apply a second coating of BBQ sauce, focusing on the skin side. This layering technique creates that signature sticky, glossy finish.
Bake for an additional 10-15 minutes. Watch closely during this final phase to prevent burning. The sauce should be bubbling and deeply caramelized.
Final Temperature Check
Insert a meat thermometer into the thickest part of a thigh. Avoid touching bone, which gives false readings. The internal temperature must reach 175-180°F (79-82°C) for optimal texture.
Dark meat benefits from slightly higher temperatures than breast meat. This extra heat breaks down connective tissue, creating that fall-off-the-bone tenderness.
Temperature and Timing Guide
Precision matters when baking chicken thighs. Understanding temperature relationships ensures food safety and quality.
Oven Temperature Options
High Heat (425°F/218°C):
-
Faster cooking time (35-40 minutes total)
-
Crispier skin
-
Risk of burnt sauce
-
Requires closer monitoring
Medium-High Heat (400°F/200°C):
-
Balanced cooking (45-50 minutes total)
-
Even browning
-
Reduced burning risk
-
Recommended for beginners
Moderate Heat (375°F/190°C):
-
Gentler cooking (50-60 minutes total)
-
More forgiving timing
-
Less crispy skin
-
Better for bone-in pieces
Internal Temperature Targets
-
Minimum Safe Temperature: 165°F (74°C)
-
Recommended for Thighs: 175-180°F (79-82°C)
-
Maximum Before Drying: 185°F (85°C)
The higher temperature range allows collagen to break down completely. This process creates incredibly tender, juicy meat.
Timing Variables
Several factors affect cooking duration:
Size of Thighs:
Larger pieces require additional time. Uniformly sized thighs cook more evenly.
Bone-In vs. Boneless:
Bone-in thighs need 10-15 minutes longer than boneless varieties. However, bones conduct heat and enhance flavor.
Starting Temperature:
Cold chicken from the refrigerator extends cooking time. Room temperature meat cooks faster and more evenly.
Oven Accuracy:
Use an oven thermometer to verify actual temperature. Many ovens run hot or cold, affecting results significantly.
Common Mistakes to Avoid
Learning from typical errors saves time and improves outcomes. Awareness prevents disappointing results.
Overcrowding the Pan
Leaving space between thighs allows hot air to circulate properly. Overcrowding causes steaming, resulting in soggy skin and uneven cooking. Use multiple pans if necessary.
Applying Sauce Too Early
BBQ sauce contains sugar, which burns easily at high temperatures. Therefore, apply sauce only during the final 20-25 minutes of baking. This timing prevents charring while allowing proper caramelization.
Not Patting Dry
Moisture on the chicken surface prevents browning and crisping. Always pat thighs thoroughly dry before seasoning. This simple step dramatically improves texture.
Skipping the Meat Thermometer
Visual cues can be misleading. Consequently, always verify doneness with a reliable thermometer. This practice ensures food safety and prevents overcooking.
Using Cold Chicken
Cold meat from the refrigerator cooks unevenly. The outside may overcook while the inside remains undercooked. Let thighs sit at room temperature for 20-30 minutes before baking.
Forgetting to Rest
Resting allows juices to redistribute throughout the meat. Cut into chicken immediately after baking, and those flavorful juices run onto the plate. Wait 5-10 minutes before serving.
Serving Suggestions and Side Dishes
Complementary sides elevate oven-baked BBQ chicken thighs into a complete meal. Balance flavors and textures for optimal dining experience.
Classic BBQ Sides
Coleslaw:
Crisp, tangy slaw provides refreshing contrast to rich, saucy chicken. Vinegar-based versions work particularly well. The acidity cuts through fat beautifully.
Cornbread:
Slightly sweet cornbread soaks up extra BBQ sauce perfectly. Serve warm with butter for maximum enjoyment.
Baked Beans:
Sweet and savory beans complement smoky chicken flavors.
Mac and Cheese:
Creamy, cheesy pasta creates comfort food harmony. Both classic and spicy versions pair wonderfully.
Potato Salad:
Cool, creamy potato salad balances warm, spicy chicken. Use mustard-based or mayo-based versions according to preference.
Vegetable Options
Incorporate vegetables for nutritional balance:
-
Roasted corn on the cob
-
Grilled vegetables (zucchini, bell peppers, onions)
-
Green beans almondine
-
Roasted Brussels sprouts
-
Garden salad with vinaigrette
Starch Alternatives
Beyond traditional sides, consider:
-
Garlic mashed potatoes
-
Rice pilaf
-
Roasted sweet potatoes
-
Buttered egg noodles
-
Cornmeal fritters
Complete Meal Planning
Build balanced plates by including:
-
Protein (chicken thighs)
-
Starch (potatoes, rice, or bread)
-
Vegetable (cooked or raw)
-
Optional sauce or condiment
This approach ensures satisfying, nutritious meals that please diverse palates.
Storage and Reheating Tips
Proper storage maintains quality and extends shelf life. Follow these guidelines for best results.
Refrigeration Guidelines
Cool chicken to room temperature before storing. However, don’t leave at room temperature longer than 2 hours. Transfer to airtight containers or wrap tightly in aluminum foil.
Refrigerated oven-baked BBQ chicken thighs stay fresh for 3-4 days. Store sauce separately if possible to prevent sogginess.
Label containers with preparation dates. This practice helps track freshness and prevents food waste.
Freezing Instructions
Freeze cooked chicken thighs for up to 3 months. Wrap individual portions in plastic wrap, then place in freezer bags. Remove excess air to prevent freezer burn.
Alternatively, freeze thighs in sauce for convenient future meals. Use freezer-safe containers with tight-fitting lids.
Thaw frozen chicken overnight in the refrigerator. Never thaw at room temperature, which promotes bacterial growth.
Reheating Methods
Oven Method (Recommended):
Preheat oven to 350°F (175°C). Place thighs in a baking dish and cover with foil. Add a tablespoon of water or broth to prevent drying. Heat for 20-25 minutes until warmed through.
Microwave Method:
Place thighs in a microwave-safe dish. Cover with a damp paper towel. Heat on medium power in 1-minute intervals, checking frequently. This method works quickly but may soften skin.
Stovetop Method:
Heat a skillet over medium heat. Add a small amount of oil or butter. Place thighs skin-side down and cover. Heat for 3-4 minutes per side until warmed through.
Maintaining Quality
Brush additional BBQ sauce on thighs before reheating. This step refreshes flavors and adds moisture. Furthermore, avoid reheating multiple times, which degrades texture and safety.
Nutritional Benefits
Chicken thighs offer substantial nutritional value beyond delicious taste. Understanding these benefits supports informed dietary choices.
Protein Content
A single chicken thigh provides approximately 26 grams of protein. This macronutrient supports:
-
Muscle growth and repair
-
Immune function
-
Hormone production
-
Satiety and weight management
Protein-rich meals help maintain stable blood sugar levels. Consequently, they reduce cravings and promote sustained energy.
Essential Vitamins and Minerals
B Vitamins:
Thighs contain significant B vitamins, including niacin (B3), B6, and B12. These nutrients support energy metabolism and nervous system function.
Iron:
Dark meat provides more iron than white meat. This mineral prevents anemia and supports oxygen transport throughout the body.
Zinc:
Important for immune function and wound healing, zinc occurs naturally in chicken thighs. This mineral also supports taste and smell perception.
Selenium:
This antioxidant mineral protects cells from damage. It also plays crucial roles in thyroid function and DNA synthesis.
Healthy Fats
While higher in fat than breast meat, thighs contain both saturated and unsaturated fats. Moderate consumption fits within balanced diets. The fat content contributes to:
-
Nutrient absorption
-
Hormone production
-
Cell membrane integrity
-
Flavor and satisfaction
Calorie Considerations
A typical bone-in, skin-on chicken thigh contains approximately 200-250 calories. BBQ sauce adds roughly 50-70 calories per serving. Total calories vary based on:
-
Thigh size
-
Sauce amount
-
Cooking method
-
Skin consumption
Remove skin before eating to reduce fat and calorie content. However, keeping skin during cooking preserves moisture and flavor.
Making Healthier Choices
Reduce sodium by:
-
Using low-sodium BBQ sauce
-
Limiting added salt in dry rub
-
Choosing fresh ingredients
Increase fiber by serving with:
-
Whole grain sides
-
Abundant vegetables
-
Legume-based dishes
Frequently Asked Questions
Should I remove the skin before baking chicken thighs?
Keep the skin on during baking for several reasons. First, skin protects the meat from drying out. Second, it renders fat, adding flavor throughout. Third, crispy skin provides textural contrast. Remove skin before eating if desired for lower fat content.
Can I use boneless chicken thighs instead?
Absolutely. Boneless thighs work perfectly for oven-baked BBQ chicken thighs. Reduce cooking time by 10-15 minutes and monitor internal temperature carefully. They cook faster but may dry out more easily than bone-in varieties.
How do I prevent BBQ sauce from burning?
Apply sauce only during the final 20-25 minutes of baking. Monitor closely during this phase. Lower oven temperature slightly if burning occurs. Using quality sauce with balanced sugar content also helps prevent burning.
What’s the best way to get crispy skin?
Pat thighs completely dry before seasoning. Start at higher temperature (400°F) to render fat. Use a wire rack for air circulation. Apply sauce later in cooking process. Finish under the broiler for 2-3 minutes if desired.
Can I prepare these ahead of time?
Yes. Season thighs and refrigerate up to 24 hours before baking. Bring to room temperature before cooking. Alternatively, fully cook and reheat when needed. This flexibility makes them excellent for meal prep.
Do I need to flip chicken thighs while baking?
Flipping once during cooking promotes even browning. However, it’s not strictly necessary with bone-in thighs. Boneless varieties benefit more from flipping. Always flip when applying BBQ sauce for complete coverage.
How can I tell when chicken thighs are done without a thermometer?
Pierce the thickest part with a knife. Juices should run clear, not pink. Meat should feel firm but not hard. However, using a thermometer remains the most reliable method for ensuring food safety.
Can I make these on a sheet pan with vegetables?
Definitely. Arrange quick-cooking vegetables like bell peppers and onions around thighs. Add heartier vegetables like potatoes during the initial baking phase. Ensure vegetables don’t touch chicken to prevent cross-contamination with raw meat juices.
Conclusion
Mastering oven-baked BBQ chicken thighs transforms everyday cooking into culinary success. These budget-friendly cuts deliver restaurant-quality results through straightforward techniques. By selecting quality ingredients, following proper temperature guidelines, and applying sauce strategically, you’ll create tender, flavorful chicken every time.
The versatility of this method accommodates various preferences and dietary needs. Whether preparing quick weeknight dinners or planning ahead with meal prep, these thighs adapt seamlessly. Moreover, the combination of simple preparation and impressive results makes this recipe invaluable for any home cook.
Start your journey today by selecting fresh chicken thighs and your favorite BBQ sauce. Follow these proven steps, avoid common mistakes, and enjoy perfectly baked results. Your family and friends will request this dish repeatedly.
Print